Introduction
Unicorn cakes have become the ultimate showstopper for birthdays, baby showers, and any celebration that calls for a touch of magic. These whimsical cakes capture the imagination with their pastel colors, glittery accents, and enchanting designs. Whether you’re a seasoned baker or a beginner, creating a unicorn cake at home is easier than you might think with the right guidance.
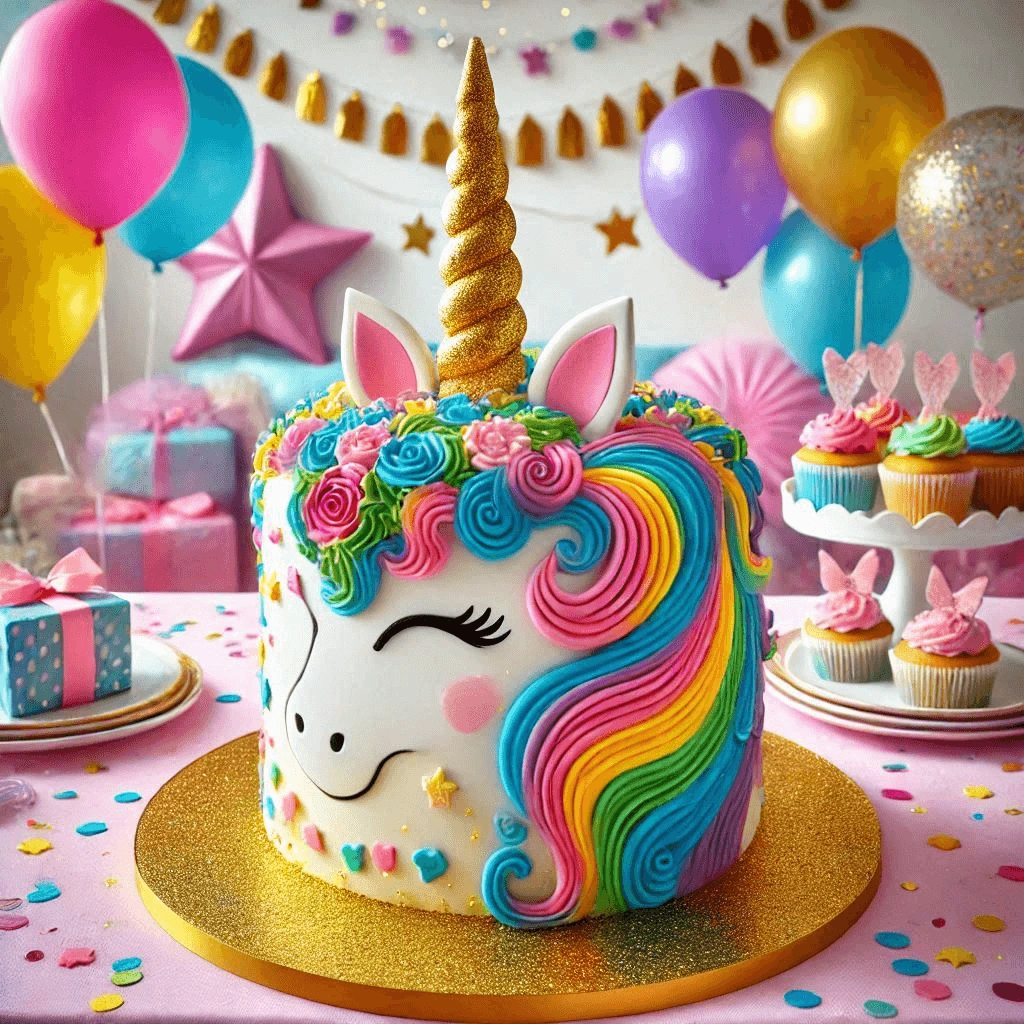
In this blog post, I’ll show you how to craft the perfect unicorn cake step by step. From baking the soft, fluffy layers to decorating with fondant horns and colorful buttercream swirls, you’ll learn everything you need to make your dream cake a reality. Whether it’s for a child’s birthday party or a fun DIY project, this guide will inspire your creativity and delight everyone who sees your masterpiece.
Get ready to sprinkle some magic into your baking – let’s create the perfect unicorn cake together!
Tools and Ingredients You Need for a Unicorn Cake
steps.
HOW TO MAKE A UNICORN CAKE – NERDY NUMMIES
Creating a beautiful and magical unicorn cake starts with the right tools and ingredients. This section will guide you through everything you need to ensure a smooth process and professional-looking results.
1. Essential Baking Tools
To achieve perfection, you’ll need some basic yet essential baking tools. These will make preparation, assembly, and decoration much easier:
- Piping Bags and Nozzles: Use these for creating colorful swirls, flowers, and the unicorn’s mane. Opt for star and round tips to achieve various designs.
- Cake Turntable: This tool makes frosting and decorating the cake seamless, giving you 360° control while you work.
- Fondant Tools: Invest in a fondant roller, cutters, and smoothers to shape and detail the unicorn’s horn, ears, and other decorative elements.
- Offset Spatula and Bench Scraper: These help to spread frosting evenly for a smooth finish.
- Measuring Cups and Digital Scale: Precision is key to getting the ingredients right, ensuring consistent cake texture and flavor.
2. Ingredients for the Cake and Decorations
Using high-quality ingredients makes a huge difference in the flavor and appearance of your unicorn cake. Here’s a checklist of what you’ll need:
- Cake Batter Essentials:
- All-purpose or cake flour for a light texture.
- Granulated sugar, unsalted butter, eggs, baking powder, and milk or buttermilk.
- Food Coloring: Choose gel food coloring to create vibrant pastel layers without altering the batter’s consistency. Colors like pink, blue, yellow, and purple work beautifully.
- Buttercream Frosting: Made with unsalted butter, powdered sugar, vanilla extract, and heavy cream. It serves as the canvas for your decorations.
- Edible Glitter and Sprinkles: These add a magical touch, perfect for the unicorn theme. Gold or rainbow sprinkles are popular choices.
3. Optional Extras
For those who want to elevate their cake to the next level or save time, consider adding these extras:
- Pre-made Fondant or Gum Paste: Ideal for crafting unicorn features without starting from scratch.
- Metallic Edible Paint: Use this to add gold or silver accents to the horn and ears.
- Unicorn-Themed Toppers: These can be purchased online and are a time-saving option for decoration.
By gathering all the tools and ingredients listed above, you’ll have everything you need to make a stunning unicorn cake that not only looks magical but also tastes incredible.
Step 1 – Preparing the Unicorn Cake Layers
The foundation of any stunning unicorn cake lies in its vibrant, flavorful layers. Preparing these layers correctly will ensure your cake is not only visually appealing but also delicious. In this section, we will guide you through every aspect of preparing the perfect cake layers for your magical creation.
1. Choosing the Right Cake Recipe
Before you begin, select a reliable cake recipe suited for layered cakes. Some popular choices include:
- Classic Vanilla Sponge: Light, fluffy, and versatile, perfect for absorbing pastel colors.
- Funfetti Cake: Adds a festive feel with rainbow sprinkles baked into the batter.
- Chocolate Cake: For those who prefer a rich and decadent flavor.
2. Coloring the Cake Batter
One of the hallmarks of a unicorn cake is its pastel-colored or rainbow layers. Follow these tips to achieve vibrant colors without compromising texture:
- Use Gel Food Coloring: Gel-based colors are more concentrated and don’t alter the batter consistency like liquid food colors might.
- Divide and Conquer: Divide your batter evenly into separate bowls, depending on how many colors you want. Popular choices include pink, purple, blue, yellow, and mint green.
- Blend Gently: Stir the colors in gently to maintain the batter’s airiness and avoid overmixing.
3. Baking the Layers
Getting the bake right is critical to ensure the layers are moist, fluffy, and evenly cooked. Here’s how:
- Prepare Your Pans: Grease the pans with butter or cooking spray and line them with parchment paper for easy removal.
- Use the Right Pan Sizes: Smaller pans (6-inch or 8-inch) work well for layered cakes, ensuring tall, even layers.
- Even Batter Distribution: Use a digital scale to weigh the batter for each layer, ensuring consistent thickness.
- Bake and Cool: Bake the layers at 350°F (175°C) until a toothpick inserted in the center comes out clean. Once baked, let the layers cool completely on a wire rack.
4. Layer Preparation
Once your layers have cooled, it’s time to prepare them for stacking and decorating:
- Trim for Evenness: Use a serrated knife to trim any domed tops, creating flat, even surfaces.
- Optional Syrup Soak: Lightly brush the layers with a sugar syrup for added moisture and enhanced flavor.
- Chill Before Stacking: Chill the layers in the fridge for 15–30 minutes. This step helps prevent crumbling and makes frosting easier.
5. Flavor Tips for Unicorn Cake Layers
To elevate your unicorn cake to the next level, consider flavor enhancements:
- Vanilla Bean Paste or Extract: Adds a warm, rich undertone to your cake.
- Citrus Zest: A touch of lemon or orange zest can brighten the flavor, especially for pastel layers.
- Layered Flavors: Incorporate subtle differences, like making one layer strawberry-flavored and another vanilla, for a playful taste experience.
With these steps, you’ll have perfectly baked and prepared unicorn cake layers, ready to be transformed into a magical dessert masterpiece. The colorful pastel hues and delicious flavors will be a sure hit for any occasion.
Step 2 – Decorating the Unicorn Cake
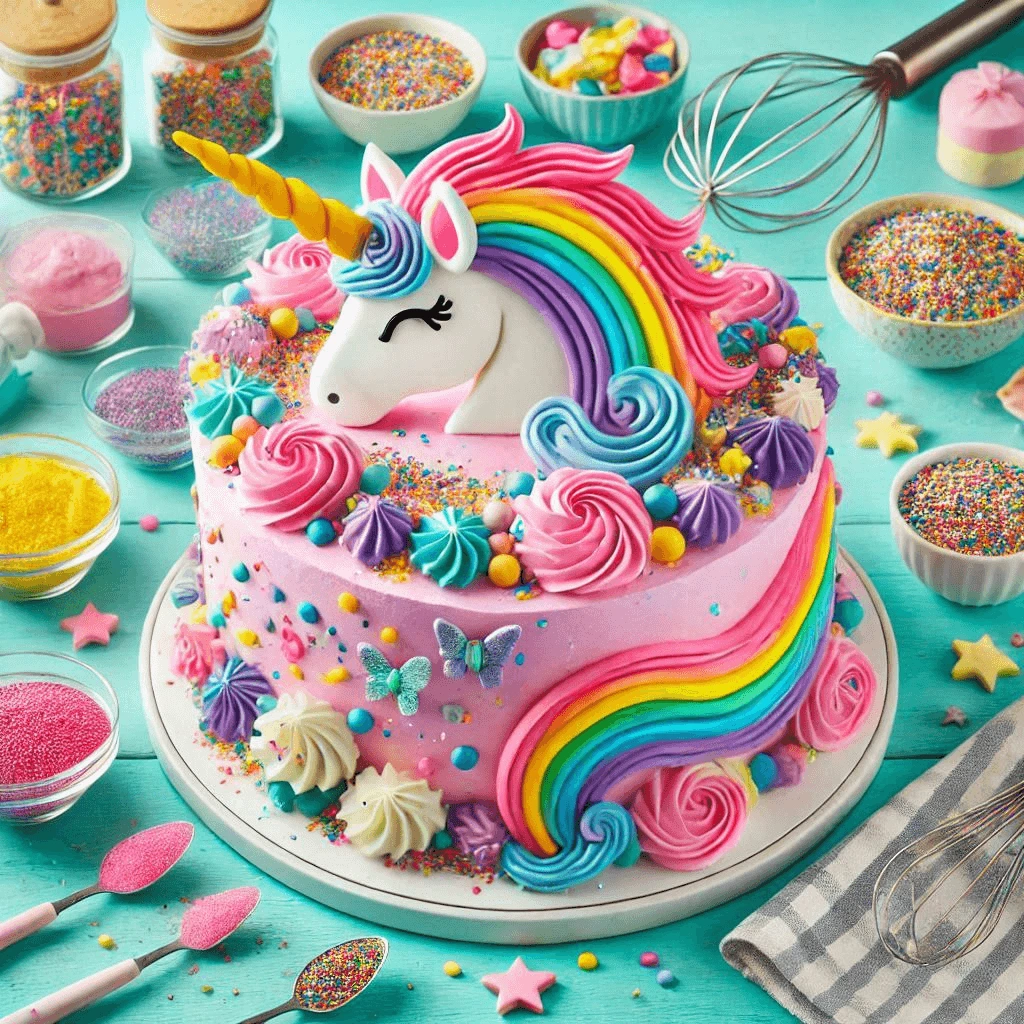
Decorating the unicorn cake is where the magic truly happens! This step is all about bringing your creativity to life through colorful buttercream, intricate fondant details, and edible embellishments. A well-decorated unicorn cake is not just a feast for the taste buds but also for the eyes. Let’s break down the process into manageable parts.
1. Frosting the Cake Base
Before adding the fun decorations, it’s important to frost the cake base smoothly and evenly:
- Apply a Crumb Coat: Start with a thin layer of frosting (called the crumb coat) to seal in the crumbs. Chill the cake for 15–20 minutes after applying this layer.
- Final Frosting Layer: Add the final layer of buttercream frosting using an offset spatula. Aim for a smooth finish, as this will be the foundation of your decorations.
- Use Colors Creatively: Consider making an ombré effect with pastel shades or stick to a single soft tone like pink or lilac for the classic unicorn look.
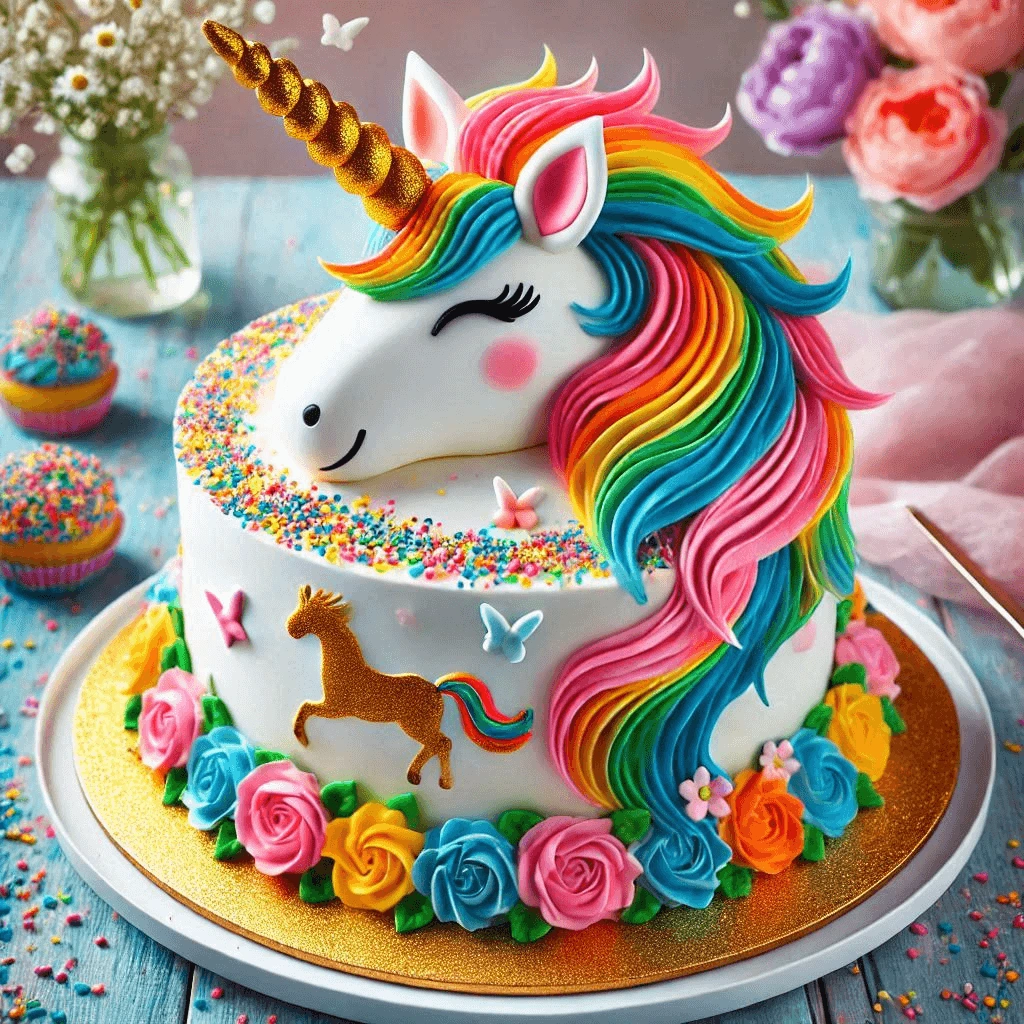
2. Creating the Unicorn’s Features
The unicorn’s horn, ears, and eyes are the signature elements of your cake:
- Unicorn Horn:
- Roll a piece of fondant (gold or pastel) into a long cone shape. Twist it gently to create the spiral horn effect.
- Brush with edible metallic paint or edible glitter for extra sparkle.
- Insert a sturdy wooden skewer or straw into the horn and stick it into the center of the cake.
- Ears:
- Use fondant to craft two teardrop-shaped pieces for the ears. Attach smaller pieces of fondant in a contrasting color to create the inner ears.
- Secure the ears next to the horn using toothpicks or edible glue.
- Eyes:
- Pipe closed eyes with black buttercream in a delicate curve, adding lashes for a cute, whimsical look.
3. Decorating the Mane
The mane is one of the most eye-catching parts of the unicorn cake, so go all out with vibrant buttercream:
- Colorful Buttercream Swirls: Use piping bags fitted with star or round tips to create swirls, rosettes, and ruffles in a variety of colors such as pink, blue, yellow, and purple.
- Add Edible Glitter and Sprinkles: Sprinkle edible glitter, pearls, and colorful sprinkles over the mane for a magical touch.
- Placement: Focus the mane flowing from the top (around the horn) to the sides, mimicking a real unicorn’s mane.
4. Adding Finishing Touches
These small details can make your unicorn cake truly unique:
- Rainbow or Gold Accents: Add fondant or edible decorations like tiny stars, hearts, or rainbows to complement the theme.
- Edible Flowers: Place small, edible flowers strategically on the mane or around the base of the cake for elegance.
- Personalized Touches: Write a message or name on the cake board using buttercream or fondant letters to make the cake more special.
5. Tips for a Polished Look
To ensure your unicorn cake looks professional and polished:
- Chill After Decorating: Let the cake sit in the fridge for 15–30 minutes after decorating to help the details set.
- Level Up with Texture: Use tools like textured fondant mats for an embossed effect on certain areas.
- Keep It Balanced: Avoid overcrowding decorations—less can sometimes be more for a clean, elegant finish.
What’s Next?
With your cake fully decorated, it’s time to showcase it! Present the unicorn cake at your celebration as the centerpiece. Don’t forget to capture photos of your masterpiece to share on social media or in your portfolio if you’re a baker.
Step 3 – DIY Unicorn Cake Topper Ideas

A unicorn cake topper is the crown jewel of your cake design, capturing the magical essence of a unicorn and making the cake truly extraordinary. Crafting your topper at home allows you to customize it to match your theme perfectly, and it’s an opportunity to let your creativity shine. Let’s explore some exciting DIY unicorn cake topper ideas and how you can make them.
1. Fondant Unicorn Horn Topper
The unicorn horn is iconic, and creating one with fondant is a simple yet impactful choice.
- Materials Needed: Fondant (white or gold), edible metallic paint or glitter, and a skewer or straw.
- Steps:
- Roll fondant into a long, thin cone.
- Twist it gently to form the spiral pattern of the horn.
- Insert a skewer or straw for support.
- Paint it with edible metallic paint or sprinkle glitter to make it shimmer.
- Optional Touches: Add pastel-colored streaks to the horn for a whimsical, multi-tonal effect.
2. Paper Unicorn Topper
A lightweight and colorful topper option is made from cardstock paper.
- Materials Needed: Cardstock, scissors, glue, glitter, and a toothpick or skewer.
- Steps:
- Cut out shapes for the horn, ears, and other elements like a small rainbow or star.
- Layer the paper pieces with glue for a 3D effect.
- Use glitter to enhance specific details like the horn or ears.
- Attach the completed design to a toothpick or skewer and insert it into the cake.
- Customizable Features: Write the guest of honor’s name or a festive message like “Happy Birthday!” on the topper.
3. Edible Unicorn Topper
For a topper that can be eaten, consider using fondant, marzipan, or modeling chocolate.
- What to Make:
- Sculpt a miniature unicorn figurine.
- Add tiny details like rainbow-colored hair, big expressive eyes, and cute hooves.
- Tools Needed: Modeling tools, food-safe paintbrush, and edible colors.
- Tips:
- Let each piece dry slightly before assembling to maintain shape.
- Dust the completed topper with edible pearl dust for a magical sheen.
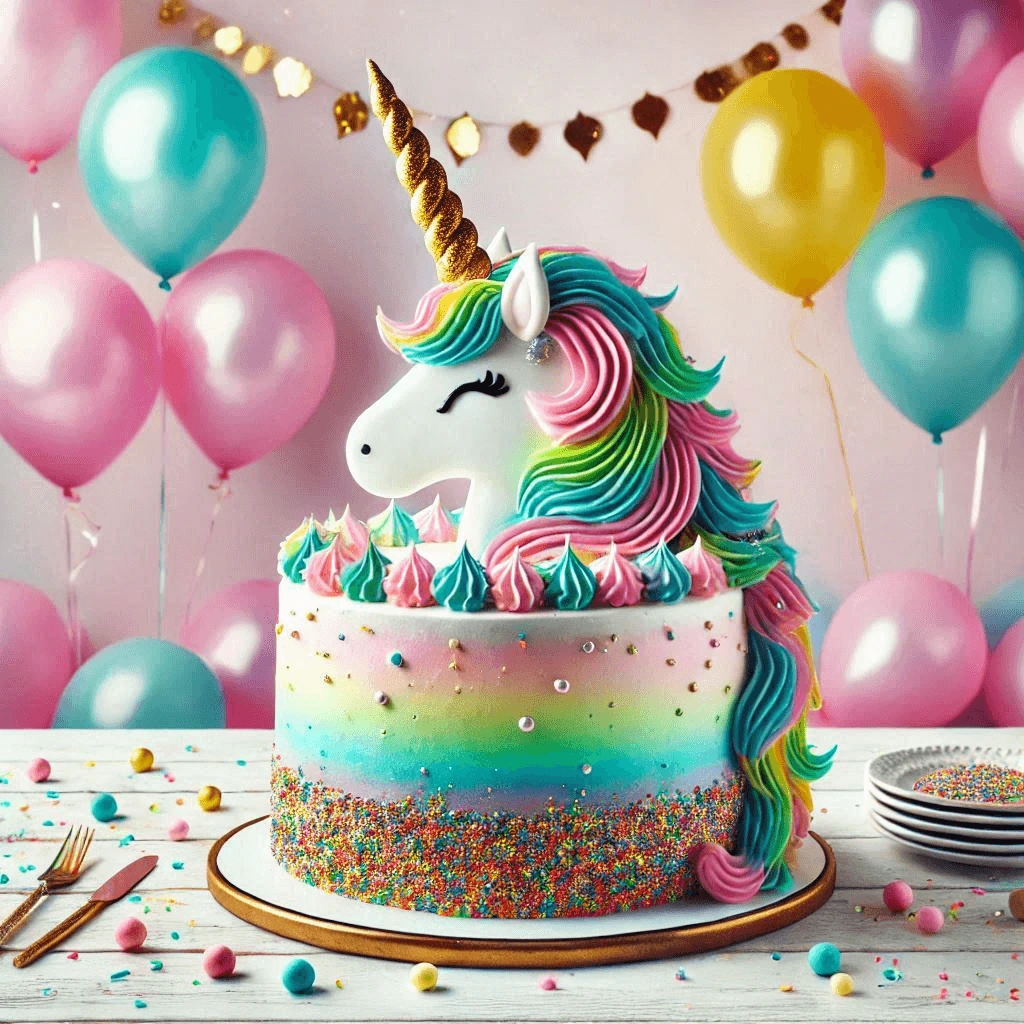
4. Balloon Unicorn Cake Topper
For a trendy and modern option, use mini balloons as part of the unicorn topper design.
- Materials Needed: Mini pastel balloons, a small golden balloon for the horn, and thin sticks or wires.
- Steps:
- Inflate the balloons to create clusters representing the unicorn’s mane.
- Attach the golden balloon at the center as the horn.
- Use floral wire to arrange the balloons on the cake seamlessly.
- Where to Use: This topper works well for large cakes with bold visual appeal.
5. Floral Unicorn Topper
For a more elegant and natural vibe, create a topper using fresh or edible flowers.
- Materials Needed: Edible or pesticide-free fresh flowers, floral tape, and a golden foil-wrapped horn.
- Steps:
- Wrap the horn with gold foil or use a pre-made horn.
- Select pastel-colored flowers (e.g., roses, peonies, or edible pansies).
- Arrange the flowers around the base of the horn to resemble a lush mane.
- Secure the flowers with floral tape or food-safe adhesive.
- Pro Tip: Pair flowers with edible pearls or glitter for added magic.
6. LED Light-Up Unicorn Topper
Add some sparkle and innovation with a light-up unicorn topper.
- Materials Needed: Battery-operated LED fairy lights, clear food-safe wire, and a translucent topper.
- Steps:
- Create a unicorn shape or simple horn with clear plastic or acrylic.
- Wrap the fairy lights around the topper for a glowing effect.
- Insert it gently onto the cake while hiding the battery pack underneath the base.
- Best for Evening Parties: This topper creates a mesmerizing, dreamy effect in dim lighting.
7. Personalized Topper Ideas
Custom toppers can add a unique, heartfelt touch:
- Name Toppers: Craft the recipient’s name using calligraphy-inspired paper or fondant.
- Photo Topper: Print an image of a unicorn or the guest of honor on edible wafer paper.
- Theme Match: Incorporate the party theme, like adding stars, moons, or other fantasy elements.
Tips for Topper Success
- Safety First: If using non-edible materials like paper or balloons, ensure they don’t come into contact with the edible parts of the cake. Wrap exposed ends with plastic wrap if necessary.
- Balance: Choose a topper size that complements your cake dimensions—too large or too small can overwhelm the overall look.
- Durability: For fragile toppers like fondant creations, allow time for them to dry completely before using.
With these DIY unicorn cake topper ideas, you can take your cake from impressive to truly magical, tailoring each design to fit your theme and event.
Tips for Storing and Presenting Your Unicorn Cake
Your beautifully crafted unicorn cake deserves both proper storage to maintain its freshness and an enchanting presentation to wow your audience. Below are practical tips and creative ideas to help you ensure your unicorn cake looks and tastes incredible for the big moment.
1. Storing Your Unicorn Cake
Proper Temperature and Humidity Control:
- Keep your unicorn cake in a cool, dry place if the event is within a few hours.
- For longer storage, refrigerate the cake in an airtight container to protect it from moisture loss or absorption of other food odors.
Handling Fondant and Buttercream:
- Fondant-covered cakes should not be stored in a high-humidity environment to prevent sweating and sticky surfaces.
- Buttercream cakes can go into the refrigerator but allow them to come to room temperature before serving to restore their creamy texture.
Freezing Tips for Advanced Prep:
- Wrap the cake tightly in plastic wrap and aluminum foil to avoid freezer burn.
- Thaw the cake overnight in the refrigerator and decorate it on the day of the event.
Separation of Tiers:
- If your unicorn cake is multi-tiered, store each tier separately to avoid pressure damage during storage.
2. Presenting Your Unicorn Cake
Choosing the Right Cake Stand:
- Use a decorative cake stand that complements the theme—think pastel-colored or gold-trimmed stands for a magical touch.
- For larger cakes, opt for a sturdy base that supports the weight without compromising the aesthetics.
Lighting the Scene:
- Add LED fairy lights or candles around the cake for an ethereal glow, especially for evening events.
- Use a soft spotlight to highlight the shimmering details of your topper and decorations.
Incorporating Decor Accents:
- Surround the cake stand with themed items like mini unicorn figurines, edible glitter jars, or pastel-colored flowers.
- Place the cake in the center of a dessert table adorned with confetti, streamers, or a rainbow tablecloth to amplify the magical vibes.
Photography-Friendly Setup:
- Ensure natural or soft lighting for photographs to capture the cake’s intricate details.
- Place the cake against a backdrop of clouds, rainbows, or unicorn-themed party props for a cohesive look.
3. Keeping the Cake Intact Until Serving
Transporting the Cake:
- If you need to move the cake to another location, use a tall cake box that secures the tiers and prevents sliding.
- Place non-slip mats under the cake box to avoid movement during transit.
Avoid Last-Minute Damage:
- Add delicate toppers and finishing decorations at the event venue to prevent damage during transport.
- Store the cake in a shaded, cool place until it’s ready to be served.
Timely Presentation:
- Unveil the cake right before serving for maximum impact. Cover it lightly with a food-safe dome if it’s displayed for longer periods to keep it fresh.
4. Creative Serving Ideas
Slice-and-Serve Presentation:
- Pre-slice the cake and serve each piece on matching unicorn-themed plates. Use edible glitter or a drizzle of colorful syrup on each slice for an extra magical effect.
Accompaniment Options:
- Pair slices of the cake with complementary treats like macarons, meringues, or fruit to enhance the dessert table.
- Offer different flavored syrups or sprinkles as toppings to cater to diverse preferences.
Interactive Cake Display:
- Add an element of fun by setting up a “Cake Decorating Station” where guests can add their own sprinkles or edible embellishments before taking their slice.
- Use a rotating cake stand to display all sides of the cake’s intricate details.
5. Preserving Leftovers
Wrapping Up Leftover Cake:
- Store any leftover slices in airtight containers or tightly wrapped in plastic wrap to retain moisture.
- Label containers with the date and flavor to avoid confusion later.
Creative Leftover Uses:
- Repurpose cake leftovers into fun treats like cake pops, trifles, or milkshakes.
- Use cake crumbs as ice cream toppings for a whimsical dessert option.
Final Thoughts
Proper storage and an enchanting presentation can transform your unicorn cake from a delightful dessert into the star of the event. By following these tips, you ensure that both the look and taste of your cake remain unforgettable for everyone who sees or tastes it.
Conclusion
Creating a unicorn cake is more than just baking and decorating; it’s about crafting a magical centerpiece that brings joy and awe to any celebration. From preparing the perfect cake layers to adding a personalized unicorn topper, every step is an opportunity to showcase your creativity and attention to detail. Whether you’re an experienced baker or a beginner, this project combines technical skills with a dash of imagination, resulting in a dessert that’s as visually stunning as it is delicious.
Recap of Key Steps
- Cake Layers: Start by baking soft, vibrant layers that form the foundation of your unicorn cake. Use food colors to achieve a mesmerizing pastel or rainbow effect.
- Decorations: From buttercream swirls to edible glitter, decorating the cake transforms it into a magical masterpiece. Don’t forget those iconic unicorn ears and horn!
- Topper Ideas: Add a personal touch with a DIY topper, whether crafted from fondant, paper, or edible materials. This is your chance to make the unicorn unique to the occasion.
- Storage and Presentation: Ensure your cake stays fresh and is displayed with charm. Proper planning can make the difference between a good dessert and a showstopper centerpiece.
Why Unicorn Cakes Are Special
Unicorn cakes have become a symbol of whimsy, imagination, and celebration. Their dreamy aesthetic appeals to all ages, from children’s birthday parties to sophisticated events with a magical theme. The endless possibilities for customization—colors, decorations, toppers—allow you to create a cake that perfectly matches the event’s vibe.
Tips for Your Unicorn Cake Journey
- Embrace Creativity: Don’t hesitate to try unique designs, mix unusual colors, or add playful details that resonate with your personality or the party theme.
- Practice Makes Perfect: If this is your first attempt, remember that each try improves your technique and boosts your confidence.
- Celebrate the Process: Beyond the final result, enjoy the joy of crafting something special. Baking and decorating can be just as rewarding as sharing the cake.
Call to Action
Are you ready to embark on your unicorn cake adventure? Whether for a special occasion or just a fun project, follow this guide to create a cake that will be remembered long after it’s been enjoyed. Share your creations on social media and inspire others to dive into this magical baking experience. We’d love to see your masterpiece—tag us and spread the magic!
End with Gratitude
Thank you for joining us on this journey to create the perfect unicorn cake. We hope this guide not only simplifies the process but also inspires you to bring your vision to life. Remember, a unicorn cake is more than a dessert—it’s a work of art, a piece of joy, and a memory to cherish.