How to Make Perfectly Baked Beans: Tips and Tricks

Delicious Homemade Baked Beans Recipe in a Rustic Pot

Introduction:

Baked beans are more than just a side dish—they’re a comforting classic that has graced tables worldwide for generations. From smoky barbecues to hearty breakfasts, this versatile dish holds a special place in culinary traditions. But what makes baked beans so beloved? Is it the creamy, melt-in-your-mouth texture of the beans? The rich, flavorful sauce that strikes the perfect balance between sweet, savory, and tangy? Or perhaps the way this dish effortlessly complements a variety of meals, adding both depth and nutrition?

In this blog, we’re diving deep into the art of making the perfect baked beans. Whether you’re an experienced cook or a kitchen novice, mastering this dish will bring both satisfaction and praise from your family and guests. We’ll guide you through essential techniques, the right ingredients, and common pitfalls to avoid, ensuring your homemade baked beans are miles ahead of the canned varieties.

Baked beans offer endless possibilities to cater to your preferences—whether you enjoy a smoky, barbecue-inspired flavor, or a more traditional take with molasses and brown sugar. Beyond flavor, they are a nutritional powerhouse packed with protein, fiber, and vitamins, making them not just delicious but wholesome too.

By the end of this guide, you’ll be equipped with all the tools, tips, and insights to create a version of baked beans that fits your taste, lifestyle, and dietary needs. So, let’s roll up our sleeves and transform this simple dish into a culinary masterpiece!
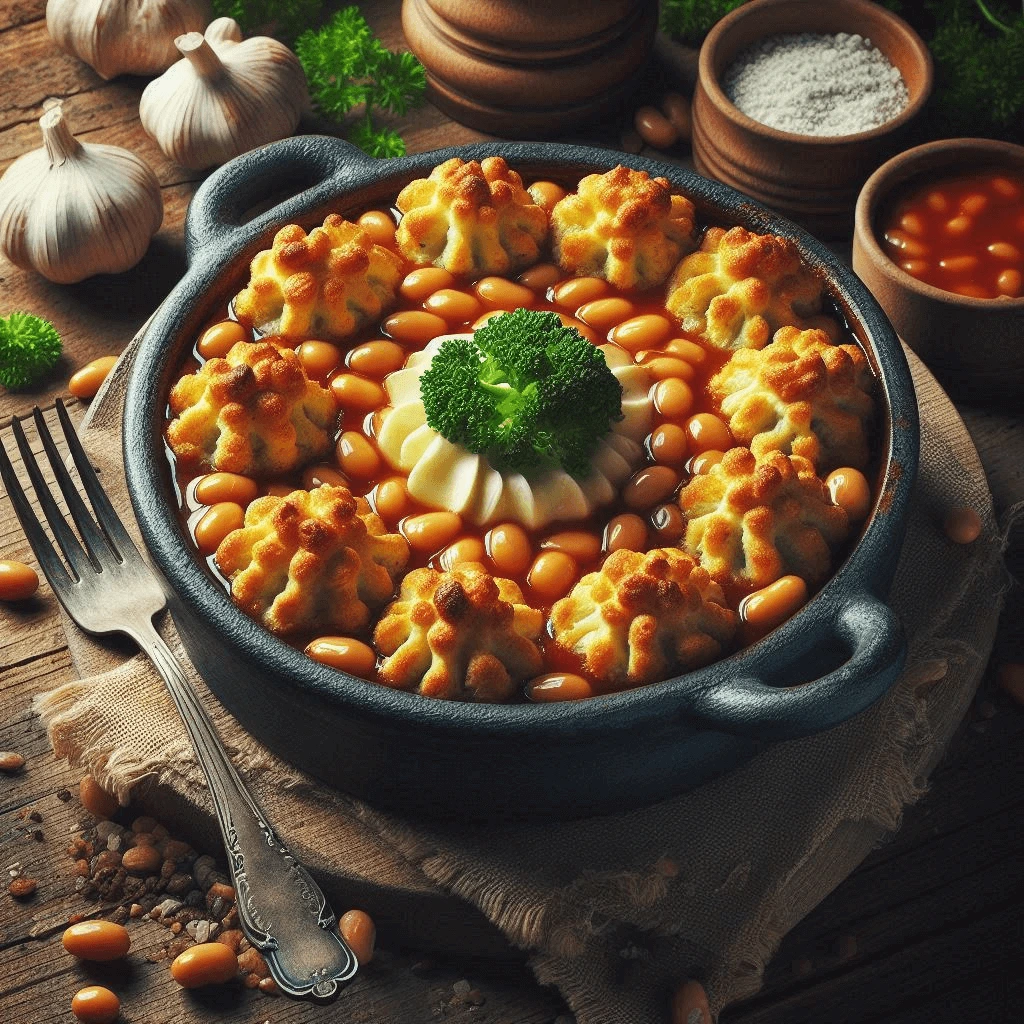
Delicious Homemade Baked Beans Recipe in a Rustic Pot
Comfort food at its finest – rich, flavorful baked beans made with love and the perfect blend of spices. Ideal for any occasion!

New to cooking beans? Check out this guide to different types of beans on The Spruce Eats for more information: The Spruce Eats – Guide to Different Types of Beans.”

Ingredients for Perfectly Baked Beans
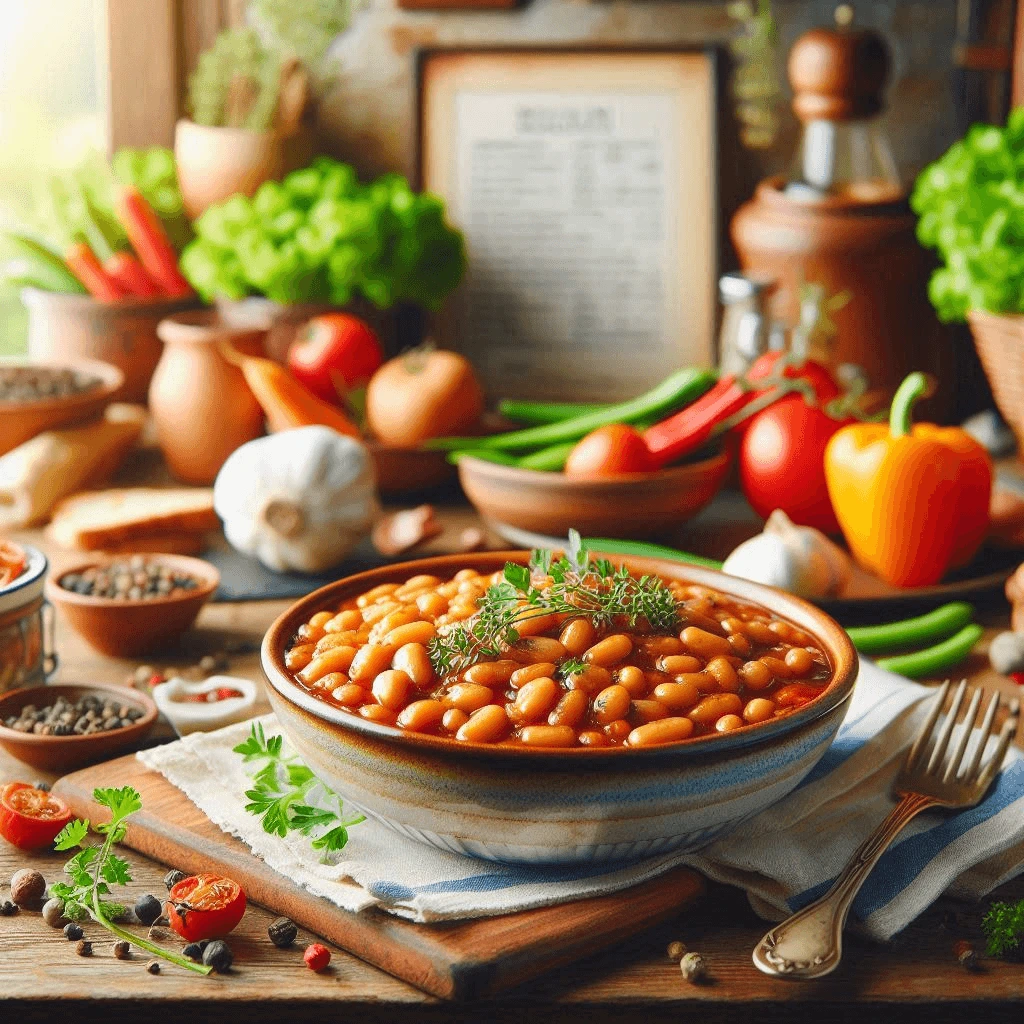
Homemade baked beans in a ceramic dish with a wooden spoon, garnished with fresh parsley.
Perfectly baked beans with a smoky, sweet, and savory flavor—ready to serve as a side dish or main course!

The secret to delicious baked beans lies in the thoughtful selection and preparation of high-quality ingredients. Each element contributes to the balance of flavors, textures, and aromas that make this dish so irresistible. Let’s explore the essential components and why they’re crucial for achieving perfectly baked beans.


1. Beans: The Heart of the Dish

The primary ingredient in baked beans is, of course, the beans themselves. While traditional recipes often call for navy beans, you can experiment with other varieties such as:

  • Pinto Beans: Creamy and slightly nutty, ideal for a rustic texture.
  • Cannellini Beans: Smooth and mild, great for absorbing flavors.
  • Great Northern Beans: Firm and buttery, offering a balanced consistency.
    Choose dried beans if you want more control over the cooking process and texture. Canned beans are a quick alternative, though rinsing and draining them is essential to reduce sodium content and improve flavor absorption.

2. Sweeteners: Balancing the Flavors

The sweetness in baked beans counterbalances the acidity of tomatoes and the smokiness of spices. Common sweeteners include:

  • Brown Sugar: Adds a deep molasses-like flavor and rich caramelization.
  • Molasses: Traditional in many recipes, molasses imparts a robust, slightly bitter-sweet character.
  • Maple Syrup: Offers a natural sweetness with a subtle, woodsy aroma.
    Adjust the quantity of sweeteners based on your preference for sweetness, but don’t skip them entirely, as they play a critical role in creating the dish’s signature taste.

3. Tomato Base: The Backbone of the Sauce

A rich and tangy tomato base forms the sauce that envelops the beans. Ingredients for this include:

  • Tomato Paste: Concentrated and flavorful, ideal for thickening the sauce.
  • Canned Tomatoes: Diced or crushed tomatoes add texture and moisture.
  • Ketchup: A convenient option that combines tomatoes, sugar, and vinegar in one.
    The acidic quality of tomatoes enhances the overall flavor, so ensure they’re included in some form.

4. Aromatics: Adding Depth and Aroma

Aromatics elevate the flavor profile of baked beans by creating a savory base. Popular choices include:

  • Onions: Provide a mellow sweetness when sautéed or caramelized.
  • Garlic: Adds a punch of savory goodness; use fresh minced garlic for the best results.
  • Bell Peppers: For additional texture and subtle sweetness.
    You can dice, sauté, or even roast these aromatics depending on the depth of flavor you want to achieve.

5. Spices and Seasonings: The Flavor Boosters

Spices and seasonings are crucial for achieving a well-rounded flavor. Common options include:

  • Smoked Paprika: Adds a smoky depth, mimicking the flavor of outdoor cooking.
  • Ground Mustard: Lends a tangy, slightly bitter note.
  • Chili Powder or Cayenne Pepper: Introduces a gentle or bold heat, depending on your preference.
  • Salt and Pepper: Essential for enhancing all other flavors.

6. Liquid Components: Ensuring the Right Consistency

Liquids prevent the beans from drying out during the cooking process while enhancing flavor. Common options include:

  • Water or Vegetable Broth: For a simple, neutral base.
  • Chicken or Beef Stock: Adds a savory richness to the beans.
  • Apple Cider Vinegar: A tangy addition that brightens the dish and balances the sweetness.

7. Meats for Added Flavor (Optional)

While baked beans can stand alone as a vegetarian dish, many traditional recipes include meats for additional depth. Common choices are:

  • Bacon: Adds smokiness and a crispy texture when cooked and crumbled over the dish.
  • Ham: Diced or shredded, it blends seamlessly into the beans.
  • Sausage: Smoky or spicy sausages pair wonderfully with the tangy sauce.

8. Optional Add-Ins for a Personal Touch

While not required, certain optional ingredients can elevate your baked beans, including:

  • Liquid Smoke: To deepen the smoky flavor without requiring outdoor cooking.
  • Worcestershire Sauce: Adds umami and complexity.
  • Herbs: Fresh thyme or bay leaves for an earthy aroma.

Key Components of the Dish

The beauty of baked beans lies in their simplicity, yet every ingredient contributes a vital element that brings the dish to life. Below, we take an in-depth look at the key components that define this timeless recipe.


1. The Beans: A Nutritious and Textural Foundation

The beans are the heart of the dish, forming the base on which all the other flavors are built.

  • Choosing the Right Beans: Navy beans are the classic choice for their creamy texture and ability to absorb flavors. However, other options such as pinto beans, Great Northern beans, or cannellini beans work wonderfully, offering slight variations in texture and flavor.
  • Why Beans Matter: Their ability to absorb the savory, sweet, and tangy elements of the sauce ensures every bite is packed with flavor.
  • Health Benefits: Rich in plant-based protein, fiber, and essential vitamins, beans are a nutritious addition that supports heart health, digestion, and sustained energy.

2. The Sauce: A Harmony of Flavors

The sauce is what transforms baked beans from a simple bean dish into a flavor-packed creation.

  • Sweetness: Molasses, brown sugar, or maple syrup add a touch of sweetness to balance the savory and tangy elements. These ingredients create the caramelized richness that defines baked beans.
  • Tanginess: A slight tang comes from tomato paste, ketchup, or vinegar, which brightens the dish and cuts through the richness.
  • Smoky and Savory Notes: Ingredients like smoked paprika or liquid smoke mimic the flavor of traditional outdoor cooking, while aromatics like onions and garlic add depth.
  • Consistency: The sauce should be thick enough to cling to the beans while keeping them moist during slow cooking.

3. Seasonings and Spices: Elevating the Dish

The right combination of seasonings and spices is crucial for creating a dish that’s vibrant and dynamic.

  • Smoked Paprika and Chili Powder: These spices introduce warmth and smoky undertones, adding complexity.
  • Mustard (Ground or Prepared): Offers a slightly spicy, tangy edge that cuts through the sweetness.
  • Salt and Black Pepper: Essential for enhancing all other flavors, creating balance in the dish.
  • Optional Heat: A pinch of cayenne pepper or a dash of hot sauce provides a subtle kick for those who like a bit of spice.

4. Aromatics: The Flavor Builders

Aromatics are essential for creating a savory backbone to the dish.

  • Onions: When sautéed, onions release natural sugars, imparting a mild sweetness and complexity to the beans.
  • Garlic: Adds a bold, savory note that complements both the sweet and smoky flavors in the sauce.
  • Bell Peppers: Optional but excellent for introducing a hint of sweetness and slight crunch, enhancing texture and depth.
    Pre-cooking these ingredients in oil or butter helps to fully release their aromas and flavors, ensuring they infuse the dish effectively.

5. Optional Proteins: Adding Heft and Flavor

For those who enjoy non-vegetarian versions, proteins like bacon or sausage bring richness and an umami boost.

  • Bacon: Crispy and smoky, it melds beautifully with the sweet and tangy sauce. A few pieces can be used as a garnish or stirred into the beans for a bold flavor boost.
  • Sausage or Ham: Smoky sausages or diced ham add heartiness, making the dish substantial enough to serve as a main course.
  • Balance: While meat can elevate the flavors, it’s crucial to avoid overpowering the beans or sauce.

6. Liquid Components: Perfecting Texture and Moisture

Baked beans rely on just the right amount of liquid to maintain their luscious texture during cooking.

  • Water or Broth: Plain water works, but vegetable or chicken broth deepens the savory profile.
  • Vinegar or Lemon Juice: A splash of acidity balances the sweetness and enhances the sauce’s brightness.

Optional Add-Ins for Flavor

While the core recipe for baked beans is already rich and delicious, optional add-ins can elevate the flavor profile and add layers of complexity. These extras allow you to customize the dish to suit different preferences, occasions, or nutritional needs.


1. Sweet Add-Ins for a Richer Flavor

Adding sweet ingredients enhances the caramelized notes in baked beans and balances out the tangy and savory components.

  • Maple Syrup: Provides a natural sweetness with a subtle woody undertone, complementing the smoky and savory elements of the dish.
  • Honey: Adds a milder, floral sweetness and contributes to a glossy finish.
  • Diced Apples: Introduce a fruity sweetness that softens as it cooks, blending seamlessly with the beans and sauce.

2. Smoky and Savory Enhancements

Smokiness is a hallmark of many baked beans recipes. These add-ins deepen the smoky and umami notes.

  • Smoked Sausage or Kielbasa: Thinly sliced or diced, these meats bring a bold smoky flavor and added texture.
  • Liquid Smoke: Just a few drops can mimic the flavor of slow-smoked beans cooked outdoors.
  • Chorizo or Bacon Lardons: These meats not only add smokiness but also provide a slightly crispy texture for contrast.

3. Spicy Additions for Heat Lovers

A touch of heat can give baked beans a spicy kick, taking the flavor in a bold and exciting direction.

  • Jalapeños: Fresh or pickled jalapeños offer a mild heat with a tangy finish. For less heat, remove the seeds and membranes.
  • Hot Sauce: A dash of your favorite hot sauce adds customizable heat levels without overpowering the dish.
  • Crushed Red Pepper Flakes or Cayenne Pepper: These spices deliver a steady, warming heat throughout the dish.

4. Herbal and Citrus Infusions

Fresh herbs and citrus zest can brighten the dish and balance its rich, hearty flavors.

  • Fresh Herbs: Chopped parsley, thyme, or rosemary adds earthy, fragrant notes that balance the sweetness and smokiness.
  • Lemon or Orange Zest: A sprinkle of citrus zest before serving enhances the dish’s aroma and creates a lively, fresh finish.

5. Vegetables for Added Texture and Nutrients

Adding vegetables boosts the dish’s nutritional profile while contributing new textures and flavors.

  • Bell Peppers: Diced and sautéed, these add a slight crunch and a sweet undertone.
  • Carrots: Finely grated carrots subtly enhance the dish’s sweetness without standing out.
  • Mushrooms: Chopped mushrooms bring umami richness and pair well with smoky flavors.

6. International Twists

For a unique take, incorporate ingredients that add an international flair.

  • Soy Sauce or Tamari: These bring depth and a touch of salty umami, especially in vegetarian versions.
  • Curry Powder: Adds a warm, earthy spice blend, offering a distinct twist on classic baked beans.
  • Coconut Milk: For a creamy, tropical vibe, mix a small amount into the sauce.

7. Toppings for Extra Texture

Finish the dish with toppings that introduce contrasting textures and flavors.

  • Crumbled Cheese: Sharp cheddar or feta melts slightly into the beans, creating a creamy element.
  • Toasted Bread Crumbs: A sprinkle of seasoned bread crumbs on top adds a crunchy finish.
  • Chopped Nuts: Toasted almonds or pecans offer a nutty crunch that complements the sweetness and smokiness.

Choosing the Right Beans

The choice of beans is a crucial step when preparing baked beans, as it sets the foundation for the dish’s texture, flavor absorption, and overall appeal. Here’s a detailed exploration of the best beans for baked beans, including factors to consider and tips for making the right selection.


1. Classic Beans for Traditional Flavor

  • Navy Beans: These small white beans are the traditional choice for baked beans. Their creamy texture and ability to soak up the flavors of the sauce make them a favorite for classic recipes.
  • Great Northern Beans: Slightly larger than navy beans, Great Northern beans have a mild flavor and firm texture. They are an excellent alternative for a subtle variation.
  • Cannellini Beans: Known as white kidney beans, these are larger and meatier than navy beans, offering a slightly different texture while still absorbing flavors well.

2. Alternative Beans for a Creative Twist

If you’re looking to put a unique spin on your baked beans, consider these options:

  • Pinto Beans: These light brown, speckled beans are slightly sweeter and creamier, providing a rich base for a Southwestern-style variation of baked beans.
  • Black Beans: For a darker and slightly earthy flavor, black beans are a good choice. They pair wonderfully with smoky and spicy seasonings.
  • Butter Beans (Lima Beans): Their larger size and buttery texture create a heartier version of baked beans, adding variety to your dish.

3. Dried Beans vs. Canned Beans

Your choice between dried and canned beans will impact the preparation time and flavor of your baked beans.

  • Dried Beans:
    • Advantages: They tend to have a fresher taste and firmer texture. You can control the level of salt and additives, creating a more natural flavor profile.
    • Preparation: Dried beans require soaking (optional, depending on your method) and a longer cooking time, which adds depth to the flavor.
  • Canned Beans:
    • Advantages: Convenient and time-saving, canned beans are pre-cooked and only require rinsing before use. They are ideal for quick meals or beginners.
    • Considerations: Look for low-sodium or no-salt-added options to control the saltiness of your dish.

4. Factors to Consider When Choosing Beans

  • Texture: Beans like navy or Great Northern are soft and tender, while cannellini or butter beans are firmer and meatier. Match your choice to the texture you want in the final dish.
  • Flavor Absorption: Smaller beans (like navy beans) absorb more sauce, making each bite packed with flavor, while larger beans can maintain a slight nuttiness that adds complexity.
  • Color: White or light-colored beans are traditional, but darker beans like black or pinto can create a visually striking dish.
  • Dish Size: Larger beans are better for main-course servings, while smaller beans are ideal for side dishes.

5. Tips for Cooking and Prepping Beans

  • Rinse and Sort: Always rinse dried or canned beans to remove debris or excess sodium. Sorting dried beans ensures no stones or damaged beans are included.
  • Season as You Go: For dried beans, add salt, bay leaves, or aromatics like garlic and onion to the cooking water to infuse the beans with flavor. Avoid adding acidic ingredients (like vinegar or tomato) until beans are tender, as they can hinder softening.
  • Don’t Overcook: The beans should remain intact yet tender, as they will continue cooking in the sauce.

Preparing Your Beans: The First Step to Success
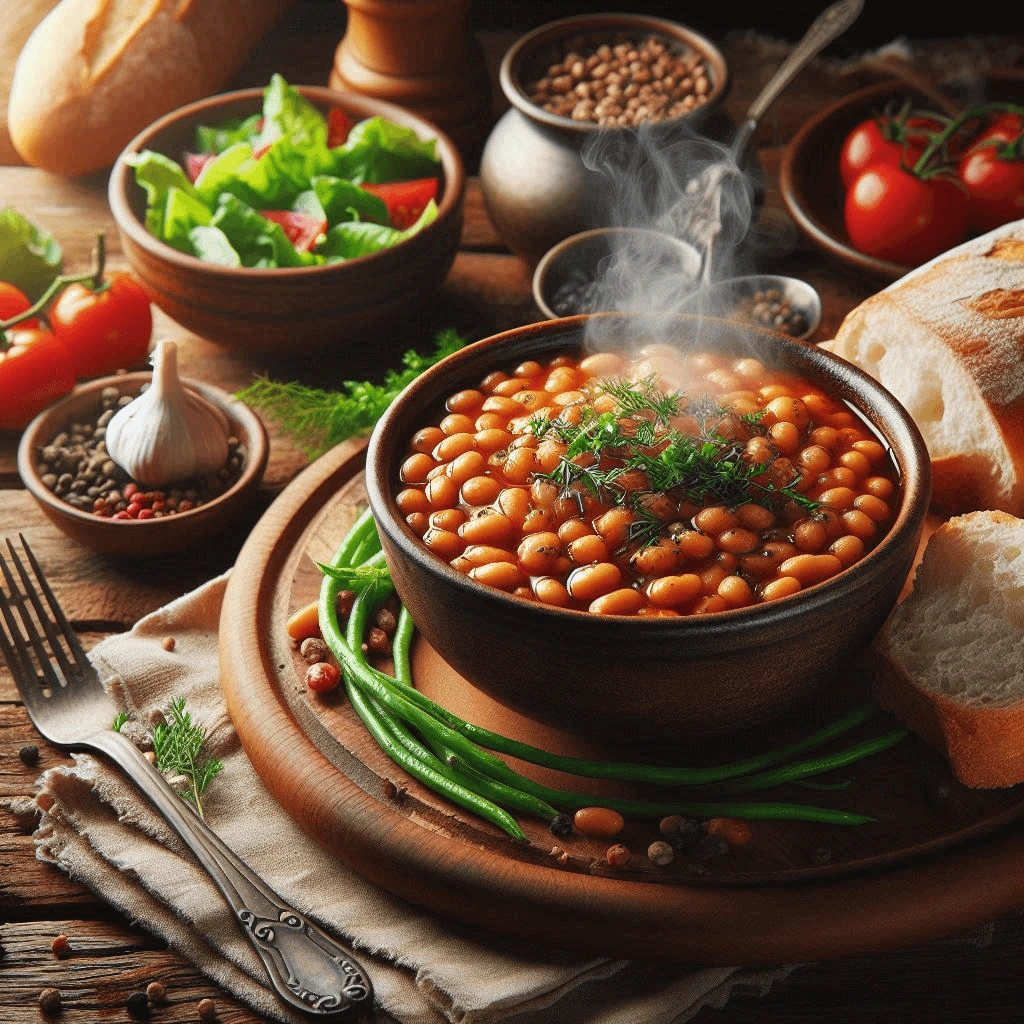
The preparation of beans is the cornerstone of creating perfectly baked beans. Proper preparation ensures the beans are tender, flavorful, and ready to absorb the rich and smoky sauce that defines this dish. Below is an expanded look at the essential steps to prepare your beans and set the foundation for culinary success.


1. Choosing Between Dried and Canned Beans

Preparation starts with selecting your beans—dried or canned. Each option has its unique steps and considerations:

  • Dried Beans:
    • Preferred for traditional recipes due to their robust flavor and texture.
    • Requires soaking and boiling to achieve tenderness.
  • Canned Beans:
    • A convenient, ready-to-use option that saves time.
    • Requires rinsing to remove excess sodium and improve the dish’s flavor balance.

2. Sorting and Cleaning Dried Beans

When using dried beans, sorting and cleaning are essential steps.

  • Sorting: Spread the beans on a clean surface and remove any debris, damaged beans, or small stones.
  • Rinsing: Place the sorted beans in a colander and rinse them thoroughly under cold running water to remove dirt or dust.

3. Soaking the Beans: To Soak or Not to Soak

Soaking is a key step that can significantly reduce cooking time and improve the beans’ texture. There are three soaking methods:

  • Traditional Overnight Soak:
    • Place the beans in a large bowl with enough cold water to cover them by at least two inches.
    • Let them soak for 8–12 hours or overnight.
    • Drain and rinse before cooking.
  • Quick Soak Method:
    • Boil the beans in a large pot of water for 2–3 minutes.
    • Remove from heat, cover, and let them sit for an hour.
    • Drain and rinse thoroughly.
  • No-Soak Option:
    • If short on time, you can skip soaking altogether and cook the beans longer.
    • Use a slow cooker or pressure cooker to ensure even cooking.

4. Cooking the Beans: The Perfect Tenderness

Once soaked (or skipped soaking), cooking the beans is the next step. Proper cooking is essential for the beans to achieve the right texture.

  • Simmering on the Stovetop:
    • Add the beans to a large pot and cover with fresh water (around 2 inches above the beans).
    • Bring to a boil, then reduce to a simmer.
    • Add aromatics like onions, garlic, or bay leaves to enhance the flavor during cooking.
    • Simmer for 1–2 hours or until the beans are tender but not mushy.
  • Pressure Cooker or Instant Pot:
    • Add the beans and water (following the cooker’s ratio guidelines).
    • Cook on high pressure for 25–30 minutes for soaked beans or 35–45 minutes for unsoaked beans.

5. Seasoning During Cooking

  • Timing of Salt: Adding salt too early can toughen the beans, so it’s best to season once the beans are tender.
  • Herbs and Spices: Including thyme, bay leaves, or garlic during the cooking process imparts subtle layers of flavor.
  • Avoid Acidity: Wait until the beans are tender before adding acidic ingredients like tomatoes, vinegar, or lemon juice, as these can hinder softening.

6. Preparing Canned Beans

Canned beans require minimal preparation, but a few steps can enhance their quality:

  • Rinse Thoroughly: Rinse the beans under cold water to remove the starchy liquid and excess salt from the canning process.
  • Season for Freshness: Toss the beans with olive oil, garlic powder, or fresh herbs before adding them to your recipe.

7. Storage and Ready-to-Use Beans

If you prepare dried beans in advance:

  • Store in the Fridge: Cooked beans can be stored in an airtight container in the refrigerator for up to 5 days.
  • Freeze for Later: Portion beans into freezer-safe bags or containers, ensuring you include some cooking liquid. Beans can be frozen for up to 3 months.

Soaking vs. No-Soak Method

When preparing baked beans, one of the foundational decisions you’ll need to make is whether to soak the dried beans before cooking or skip the soak altogether. Both methods have their merits and drawbacks, and your choice can influence the beans’ texture, flavor, and cooking time. Here’s an expanded look at the two approaches to help you decide which method works best for your recipe.


1. The Soaking Method: Tradition and Efficiency

Soaking beans before cooking is a classic approach and comes with several benefits:

  • Reduces Cooking Time: Soaking softens the beans, which significantly shortens the cooking time. This is particularly beneficial for large batches or recipes with longer cook times like baked beans.
  • Improves Texture: Pre-soaked beans tend to cook more evenly and develop a creamy, tender texture, which is ideal for absorbing the flavors of sauces and seasonings.
  • Eases Digestion: Soaking helps remove some of the complex sugars (oligosaccharides) responsible for digestive discomfort. Rinsing the soaking water can further reduce these elements.

Methods for Soaking:

  • Overnight Soak:
    • Add dried beans to a large bowl and cover with water, leaving enough room for the beans to expand.
    • Let them soak for 8–12 hours.
    • Drain and rinse before cooking.
  • Quick Soak:
    • Bring the beans and water to a boil.
    • Boil for 2–3 minutes, then remove from heat and let sit, covered, for an hour.
    • Drain and rinse before cooking.

Drawbacks of Soaking:

  • Time: It requires advance planning to allow soaking time.
  • Potential Over-Softening: If soaked for too long, some beans may break apart during cooking.

2. The No-Soak Method: Convenience and Flavor

The no-soak method involves cooking dried beans directly without pre-soaking. It’s increasingly popular due to its simplicity and for yielding rich, intense flavors.

  • Convenience: Ideal for when you’re short on time or planning a last-minute meal, as it eliminates the waiting period.
  • Enhanced Flavor: Cooking the beans directly in flavorful liquids like broth or alongside seasonings allows them to absorb robust flavors throughout the process.
  • Better Texture for Certain Dishes: Some recipes, like baked beans or stews, benefit from the slightly firmer texture of unsoaked beans.

Key Considerations:

  • Longer Cooking Time: No-soak beans typically require an additional 1–2 hours of cooking, depending on the type of bean and the cooking method.
  • Digestive Concerns: The complex sugars remain intact without the soaking step, which may cause more digestive discomfort for some individuals.

3. Which Method is Best for Baked Beans?

The decision between soaking and no-soaking depends on your needs and the desired result:

  • For a Softer, Traditional Texture: Soaking is ideal if you’re aiming for classic baked beans with a tender texture that melts into the sauce.
  • For Time Efficiency in Preparation: Use the no-soak method if you’re preparing a quick dish or prefer a slightly firmer texture for the beans.
  • To Balance Time and Texture: A quick soak can offer a middle ground, shaving some time off the cooking process without requiring overnight planning.

4. Tips for Success Regardless of the Method

  • Adjust your cooking method to compensate for the choice you make:
    • Soaked beans require less liquid and a shorter cook time.
    • No-soak beans benefit from the use of a pressure cooker or slow cooker to achieve even tenderness without excessive liquid loss.
  • Always test for doneness: Beans should be tender but not falling apart.
  • Add acidic ingredients (like tomatoes, vinegar, or molasses) only after the beans are fully tender.

Cooking Techniques for Tender Beans

Achieving perfectly tender beans is key to making baked beans that have the ideal texture: firm yet soft enough to absorb flavors without becoming mushy. The cooking process can seem straightforward, but using the right techniques ensures your beans cook evenly and become luxuriously tender. Here’s an in-depth look at the best cooking techniques for ensuring tender beans that are a perfect base for any baked beans recipe.


1. Slow and Steady Simmering

Slow cooking is one of the most effective methods for achieving tender beans, and it’s a technique that helps avoid overcooking or unevenly cooked beans:

  • Simmer on Low Heat: Once your beans are soaked or rinsed (if using canned), add them to a pot with plenty of water. Bring the water to a boil, then reduce the heat to a gentle simmer. High heat can cause beans to cook too quickly on the outside while the inside remains undercooked.
  • Avoid Boiling Rapidly: Rapid boiling causes beans to break apart or develop uneven textures, so make sure the heat stays low and the beans cook at a steady simmer.
  • Add Aromatics and Seasonings: Onions, garlic, and herbs can be added at this point to enhance the flavor of the beans as they cook.

2. Pressure Cooker or Instant Pot

Using a pressure cooker or an Instant Pot is a game-changer for reducing cooking time without sacrificing tenderness, especially when skipping the soaking step:

  • Faster Cooking: A pressure cooker can cook beans that are unsoaked in just 35–45 minutes, while soaked beans usually take just 25–30 minutes. This technique preserves the flavor and texture of the beans without the need to watch over them for extended periods.
  • Even Cooking: A pressure cooker ensures that every bean is cooked at the same time and remains tender. Pressure cooking also eliminates the need to keep adding liquid, making it ideal for dishes where you want your beans to absorb the flavors of the sauce or broth.
  • Use the Correct Water-to-Bean Ratio: Follow specific guidelines based on the type of bean. For example, 1 part beans to 3 parts water is generally recommended for cooking dried beans.

3. Slow Cooker

A slow cooker, or Crock-Pot, is a fantastic tool to cook beans slowly and gently over an extended period:

  • Ideal for Pre-Soaked Beans: If you’ve soaked your beans overnight, the slow cooker helps them cook at the perfect pace and prevents them from turning mushy. Generally, soaked beans take 4–6 hours on the low setting to become tender in a slow cooker.
  • No Overwatching: The slow cooker doesn’t require constant supervision, making it an easy and low-maintenance option. You can leave the beans to cook while you focus on other tasks.
  • Layer Flavors: Because beans are cooked in a tightly sealed pot, all the flavors from seasonings and aromatics are infused, creating deep, delicious flavors in every bite. You can add the beans, liquids, and seasonings all at once and let the slow cooker do the rest.

4. The Right Amount of Liquid

Liquid is crucial for cooking tender beans, and using the right amount ensures they cook through without becoming too dry or soupy:

  • Sufficient Water: Beans expand as they absorb liquid, so be sure to cover them completely in water during the initial stages of cooking. For soaked beans, you’ll want to ensure the water level stays about 2–3 inches above the beans.
  • Flavor-Rich Liquid: In addition to water, consider using broth (vegetable, chicken, or beef) for added richness. This gives your beans a more flavorful base that will be absorbed as they cook.
  • Adjust for the Desired Consistency: If you want your beans to have a bit of “sauce” for baked beans, make sure the liquid level is higher during cooking, as the beans will absorb quite a bit of it.

5. Timing for Tenderness

Beans vary in their cooking times depending on the variety, and knowing when to stop cooking is crucial:

  • Test Frequently: Check the beans at regular intervals, especially as you approach the recommended cooking time for your chosen method (on the stovetop, pressure cooker, or slow cooker).
  • Avoid Overcooking: It’s easy to overcook beans if you let them simmer too long. Once the beans are tender but not mushy, it’s time to remove them from heat or switch off the pressure cooker or slow cooker. Overcooked beans will fall apart, losing their texture and appealing bite.
  • The Bite Test: A simple bite test is one of the best ways to determine if your beans are done. They should feel tender and creamy when you bite into them, but they should still hold their shape.

6. Resting Time for Even Tenderness

Resting the beans after they finish cooking allows the flavor and moisture to settle, resulting in more evenly cooked beans:

  • Let Beans Sit: After the beans are cooked, let them sit in the pot, covered, for at least 10–15 minutes. This step allows the flavors to continue to develop and ensures the beans are evenly hydrated.
  • Redistribute the Heat: During the resting period, the heat inside the pot will distribute more evenly, helping any beans that are not fully tender to soften further.

Pro Tips for Ensuring Tender Beans

  • Stir Occasionally: When cooking beans, especially in a stovetop pot or slow cooker, stir them every now and then. This ensures even cooking and prevents burning at the bottom.
  • Add Seasoning at the Right Time: Add salt, vinegar, tomatoes, or other acidic ingredients toward the end of the cooking process, as adding them too early can interfere with the softening of the beans.
  • Use Fresh Beans: Beans that are older (past their expiration date) may not cook as evenly or tender. It’s always better to use fresh dried beans, if possible.

Common Mistakes to Avoid

1. Overcooking the Beans

  • What Happens: Overcooked beans become mushy and lose their texture, making the dish unappetizing.
  • How to Avoid:
    • Cook beans until they are tender but still hold their shape.
    • Check beans periodically during cooking (especially if using a slow cooker or pressure cooker).
    • Follow recommended cooking times for the type of beans you’re using.

2. Undercooking the Beans

  • What Happens: Undercooked beans are hard and difficult to digest, which can ruin the dish.
  • How to Avoid:
    • Soak beans overnight or use the quick-soak method to ensure even cooking.
    • Simmer beans gently until they are fully tender.
    • Taste-test a few beans to ensure they’re cooked through before proceeding with the recipe.

3. Skipping the Soaking Step

  • What Happens: Unsoaked beans take much longer to cook and may not cook evenly.
  • How to Avoid:
    • Always soak beans (either overnight or using the quick-soak method) to reduce cooking time and improve texture.
    • If you’re short on time, use canned beans as a shortcut (but adjust cooking times accordingly).

4. Adding Salt or Acid Too Early

  • What Happens: Adding salt, tomatoes, or acidic ingredients (like vinegar) too early can prevent beans from softening.
  • How to Avoid:
    • Wait until the beans are fully cooked before adding salt or acidic ingredients.
    • If using tomato-based sauces, add them during the final stages of cooking.

5. Using Old or Stale Beans

  • What Happens: Old beans take longer to cook and may never soften properly, no matter how long you cook them.
  • How to Avoid:
    • Use fresh, high-quality beans. Check the packaging date if possible.
    • Store beans in an airtight container in a cool, dry place to maintain freshness.

6. Not Adding Enough Liquid

  • What Happens: Beans need enough liquid to cook properly. Insufficient liquid can lead to uneven cooking or burning.
  • How to Avoid:
    • Use enough water or broth to fully cover the beans during cooking.
    • Check periodically and add more liquid if needed, especially during long cooking times.

7. Ignoring the Foam During Cooking

  • What Happens: Foam forms on the surface when cooking beans, and if not removed, it can affect the flavor and texture.
  • How to Avoid:
    • Skim off any foam that rises to the surface during the initial stages of cooking.
    • This step ensures a cleaner, smoother final dish.

8. Overloading the Pot

  • What Happens: Cooking too many beans at once can lead to uneven cooking and inconsistent texture.
  • How to Avoid:
    • Use a large enough pot to allow beans to move freely in the liquid.
    • Cook beans in batches if necessary.

9. Not Seasoning Properly

  • What Happens: Underseasoned baked beans can taste bland and unappetizing.
  • How to Avoid:
    • Taste and adjust seasoning (salt, pepper, spices) throughout the cooking process.
    • Add flavor enhancers like smoked paprika, garlic, or herbs to elevate the dish.

10. Rushing the Process

  • What Happens: Baked beans are a slow-cooked dish, and rushing can lead to undercooked beans or unbalanced flavors.
  • How to Avoid:
    • Plan ahead and allow enough time for soaking, cooking, and baking.
    • Use a slow cooker or oven for the best results, as these methods allow flavors to develop fully.

Final Tips for Perfect Beans

  • Always taste-test your beans before serving to ensure they’re cooked and seasoned properly.
  • If using canned beans, rinse them thoroughly to remove excess sodium and improve texture.
  • Experiment with flavors, but avoid making too many changes at once until you’ve mastered the basics.

Step-by-Step Guide to Cooking Baked Beans
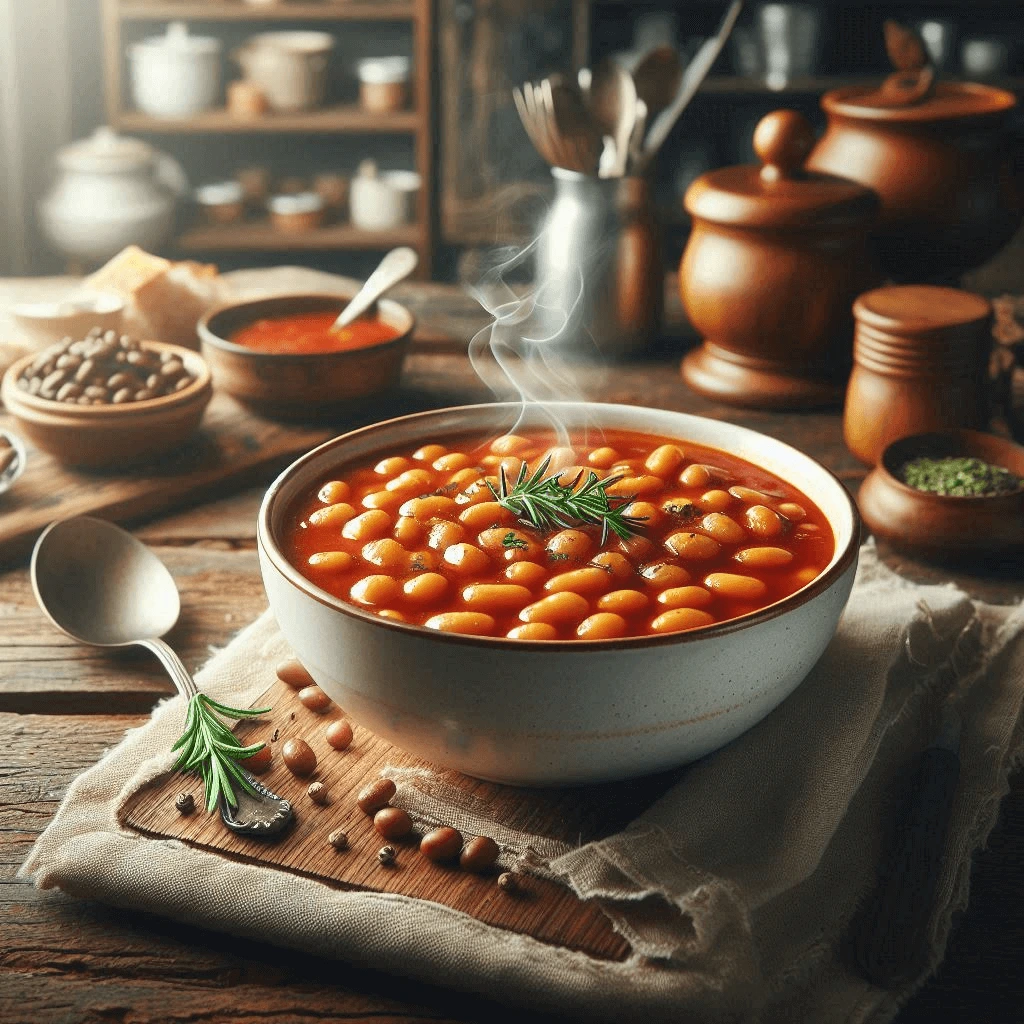
Homemade baked beans in a white ceramic bowl, garnished with fresh parsley and served with a wooden spoon."
Classic baked beans recipe: smoky, sweet, and savory flavors in every bite. Perfect for BBQs, breakfast, or a hearty side dish!

Making perfectly baked beans is all about layering flavors and using the right techniques to achieve a tender, creamy texture. This step-by-step guide will walk you through the process, whether you’re using an oven, slow cooker, or stovetop.


Step 1: Prepping Your Ingredients

  • Dice and Chop: Start by finely dicing one medium onion and mincing 2-3 cloves of garlic. These aromatics will form the flavor base of your dish.
  • Measure Spices and Sauces: Gather your spices (e.g., smoked paprika, mustard powder, black pepper) and measure out your wet ingredients (e.g., tomato sauce, molasses, brown sugar, and Worcestershire sauce). Having everything prepped and ready will make the cooking process smoother.
  • Prepare the Beans: If you soaked your beans overnight or used the quick-soak method, drain and rinse them thoroughly. If you’re using canned beans, rinse and drain them to remove excess sodium.

Step 2: Combining Ingredients in the Dish

  • Sauté the Aromatics: In a large skillet or Dutch oven, heat a tablespoon of oil or butter over medium heat. Sauté the diced onions until they’re translucent (about 5 minutes), then add the minced garlic and cook for another minute until fragrant.
  • Build the Sauce: Add your tomato sauce, molasses, brown sugar, mustard, and spices to the skillet. Stir well to combine and let the mixture simmer for 2-3 minutes to allow the flavors to meld.
  • Add the Beans: Gently fold in the prepared beans, ensuring they’re evenly coated with the sauce. If you’re using bacon or other add-ins, layer them in at this stage.

Step 3: Slow Cooking or Baking

  • Oven Method:
  • Preheat your oven to 325°F (160°C).
  • Transfer the bean mixture to an oven-safe baking dish or Dutch oven. Cover the dish with a lid or aluminum foil to trap moisture.
  • Bake for 2-3 hours, stirring occasionally, until the beans are tender and the sauce has thickened. For a caramelized top, remove the lid or foil during the last 30 minutes of cooking.
  • Slow Cooker Method:
  • Transfer the bean mixture to a slow cooker. Cover and cook on low for 6-8 hours or on high for 3-4 hours. Stir occasionally to prevent sticking.
  • The slow cooker method is ideal for achieving deeply infused flavors and ultra-tender beans.
  • Stovetop Method:
  • If you’re short on time, simmer the bean mixture on the stovetop over low heat for 1-2 hours, stirring occasionally. Add a splash of water or broth if the sauce becomes too thick.

Pro Tips for Success:

  • Taste and Adjust: Before the final cooking stage, taste the sauce and adjust the seasoning. Add more brown sugar for sweetness, a splash of vinegar for tang, or a pinch of salt for balance.
  • Low and Slow: Baking beans at a low temperature for a longer time ensures they become tender without breaking apart.
  • Rest Before Serving: Let the baked beans rest for 10-15 minutes after cooking. This allows the flavors to settle and the sauce to thicken further.

tep 1: Prepping Your Ingredients


The foundation of any great dish lies in the preparation, and baked beans are no exception. Taking the time to properly prep your ingredients ensures a smooth cooking process and a flavorful final result. Here’s a detailed breakdown of how to prep your ingredients for perfectly baked beans:


1. Dicing and Chopping Aromatics

  • Onions: Start with one medium onion. Peel off the outer skin, cut it in half from root to stem, and lay each half flat on the cutting board. Make vertical cuts (without cutting through the root end), then slice horizontally, and finally dice into small, even pieces. This ensures the onions cook evenly and blend seamlessly into the sauce.
  • Garlic: Use 2-3 cloves of garlic, depending on your preference for flavor. Peel the cloves and mince them finely. You can also use a garlic press for convenience. Garlic adds a savory depth to the dish, so don’t skip it!
  • Optional Add-Ins: If you’re using bacon, chop it into small pieces. For jalapeños or other fresh peppers, remove the seeds and dice them finely.

2. Measuring Spices and Sauces

  • Dry Spices: Gather your spices in small bowls or on a plate for easy access. Common spices for baked beans include:
  • Smoked paprika (1-2 teaspoons for a smoky flavor)
  • Mustard powder (1 teaspoon for tanginess)
  • Black pepper (½ teaspoon for a hint of heat)
  • Salt (to taste, but be cautious if using canned beans or bacon)
  • Wet Ingredients: Measure out the following and set them aside:
  • Tomato sauce (1-2 cups, depending on how saucy you like your beans)
  • Molasses (¼ cup for a rich, sweet flavor)
  • Brown sugar (¼ cup for added sweetness)
  • Worcestershire sauce (1-2 tablespoons for umami depth)
  • Apple cider vinegar or white vinegar (1-2 tablespoons for a tangy kick)
  • Optional Liquid Smoke: If you want a smoky flavor without bacon, add ½ teaspoon of liquid smoke.

3. Preparing the Beans

  • If Using Dried Beans:
  • Soak the beans overnight in a large bowl of water (use 3 cups of water for every 1 cup of beans). This softens the beans and reduces cooking time.
  • Alternatively, use the quick-soak method: Boil the beans in water for 2-3 minutes, then remove from heat, cover, and let them soak for 1 hour.
  • After soaking, drain and rinse the beans thoroughly to remove any impurities.
  • If Using Canned Beans:
  • Open the cans and drain the liquid. Rinse the beans under cold water to remove excess sodium and the starchy canning liquid.
  • Canned beans are already cooked, so they require less cooking time compared to dried beans.

4. Prepping Additional Ingredients

  • Bacon (Optional): If you’re using bacon, chop it into small pieces or strips. You can cook it beforehand to render the fat, which can then be used to sauté the onions for extra flavor.
  • Vegetables (Optional): If you’re adding bell peppers, carrots, or celery, dice them into small, uniform pieces so they cook evenly.
  • Fresh Herbs (Optional): If you’re using fresh herbs like thyme or parsley, chop them finely and set them aside for garnishing at the end.

5. Organizing Your Workspace

  • Mise en Place: This French term means “everything in its place.” Arrange all your prepped ingredients in small bowls or on a tray before you start cooking. This not only makes the process more efficient but also ensures you don’t forget any key ingredients.
  • Tools You’ll Need:
  • A sharp knife and cutting board for chopping.
  • Measuring cups and spoons for accuracy.
  • A colander for rinsing beans.
  • A large skillet, Dutch oven, or slow cooker for cooking.

Step 2: Combining Ingredients in the Dish

Once your ingredients are prepped and ready, the next step is to combine them in a way that maximizes flavor and ensures even cooking. This stage is where the magic happens—the aromatics, spices, sauces, and beans come together to create a rich, cohesive dish. Here’s a detailed guide to combining your ingredients for perfectly baked beans:


1. Sautéing the Aromatics

  • Heat the Pan: Start by heating a large skillet, Dutch oven, or saucepan over medium heat. Add 1-2 tablespoons of oil, butter, or bacon fat (if using bacon) to the pan.
  • Cook the Bacon (Optional): If you’re using bacon, add the chopped pieces to the pan and cook until crispy. Remove the bacon with a slotted spoon and set it aside, leaving the rendered fat in the pan for added flavor.
  • Sauté the Onions: Add the diced onions to the pan and cook for 5-7 minutes, stirring occasionally, until they become translucent and slightly golden. This step is crucial for building a flavorful base.
  • Add the Garlic: Stir in the minced garlic and cook for another 1-2 minutes until fragrant. Be careful not to burn the garlic, as it can turn bitter.

2. Building the Sauce

  • Add the Wet Ingredients: Pour in the tomato sauce, molasses, brown sugar, Worcestershire sauce, and vinegar. Stir well to combine. These ingredients form the sweet, tangy, and savory base of your baked beans.
  • Incorporate the Spices: Sprinkle in the smoked paprika, mustard powder, black pepper, and any other spices you’re using. Stir to evenly distribute the spices throughout the sauce.
  • Simmer the Sauce: Let the mixture simmer for 2-3 minutes, stirring occasionally. This allows the flavors to meld and the sauce to thicken slightly. Taste the sauce and adjust the seasoning if needed—add more brown sugar for sweetness, a splash of vinegar for tang, or a pinch of salt for balance.

3. Adding the Beans

  • Fold in the Beans: Gently add the prepared beans (soaked and cooked dried beans or rinsed canned beans) to the sauce. Use a spatula or spoon to fold the beans into the sauce, ensuring they’re evenly coated. Be careful not to mash the beans, as you want them to retain their shape and texture.
  • Incorporate Add-Ins: If you’re using cooked bacon, jalapeños, or other add-ins, stir them into the mixture at this stage. These ingredients will infuse the dish with additional layers of flavor.

4. Layering for Flavor (Optional)

  • For Baked Beans in the Oven: If you’re baking the beans, transfer the mixture to an oven-safe baking dish or Dutch oven. For extra flavor, you can layer additional ingredients like strips of bacon or slices of onion on top before baking.
  • For Slow Cooker Beans: If using a slow cooker, transfer the mixture to the slow cooker insert. Stir in any additional ingredients, such as diced bell peppers or carrots, for added texture and flavor.

5. Adjusting the Consistency

  • Check the Liquid Level: The sauce should be thick but not too dry. If the mixture looks too thick, add a splash of water, broth, or apple cider to loosen it up. If it’s too thin, let it simmer for a few more minutes to reduce.
  • Taste and Adjust Again: Before moving on to the cooking stage, taste the mixture one more time. Adjust the seasoning as needed to ensure the flavors are balanced.

Step 3: Slow Cooking or Baking

The final step in making perfectly baked beans is the cooking process itself. Whether you choose to bake them in the oven, simmer them on the stovetop, or use a slow cooker, this stage is where the flavors deepen, the beans become tender, and the sauce thickens into a rich, glossy coating. Here’s a detailed guide to each method, along with tips for achieving the best results:


1. Oven Method

The oven method is a classic way to cook baked beans, offering even heat and a slightly caramelized finish.

  • Preheat the Oven: Set your oven to 325°F (160°C). This low and slow temperature ensures the beans cook gently without becoming mushy.
  • Transfer to an Oven-Safe Dish: Pour the bean mixture into a deep baking dish or Dutch oven. Make sure the dish is large enough to hold the beans and sauce without overflowing.
  • Cover the Dish: Use a lid or aluminum foil to cover the dish tightly. This traps steam and keeps the beans moist during the long cooking process.
  • Bake the Beans: Place the dish in the preheated oven and bake for 2-3 hours. Stir the beans every 45 minutes to ensure even cooking and to prevent the top from drying out.
  • Uncover for the Final Stage: During the last 30 minutes of cooking, remove the lid or foil to allow the top layer to caramelize and thicken. This adds a delicious depth of flavor and a slightly crispy texture to the top.
  • Check for Doneness: The beans should be tender but not falling apart, and the sauce should be thick and glossy. If the sauce is too thin, return the dish to the oven uncovered for an additional 15-20 minutes.

2. Slow Cooker Method

The slow cooker method is ideal for hands-off cooking and infuses the beans with deep, rich flavors over several hours.

  • Transfer to the Slow Cooker: Pour the bean mixture into the slow cooker insert. If you’re using a liner for easy cleanup, make sure it’s securely in place.
  • Set the Cooking Time:
  • For a longer, more hands-off approach, cook on low heat for 6-8 hours.
  • If you’re short on time, cook on high heat for 3-4 hours.
  • Stir Occasionally: If possible, stir the beans every 1-2 hours to prevent sticking and ensure even cooking. However, if you’re unable to stir, the slow cooker will still do a great job.
  • Check the Consistency: Toward the end of the cooking time, check the sauce. If it’s too thin, remove the lid and let the beans cook uncovered for the last 30 minutes to thicken the sauce.
  • Taste and Adjust: Before serving, taste the beans and adjust the seasoning if needed. Add a pinch of salt, a splash of vinegar, or a sprinkle of brown sugar to balance the flavors.

3. Stovetop Method

The stovetop method is quicker than the oven or slow cooker and works well if you’re short on time.

  • Simmer on Low Heat: Transfer the bean mixture to a large, heavy-bottomed pot or Dutch oven. Place it on the stovetop over low heat.
  • Cover and Cook: Cover the pot with a lid and let the beans simmer gently for 1-2 hours. Stir occasionally to prevent sticking and ensure even cooking.
  • Monitor the Liquid Level: If the sauce becomes too thick, add a splash of water, broth, or apple cider to loosen it up. If it’s too thin, remove the lid and let the beans simmer uncovered for the last 15-20 minutes to reduce the sauce.
  • Check for Doneness: The beans should be tender, and the sauce should be thick and rich. Taste and adjust the seasoning as needed before serving.

Pro Tips for All Methods

  • Low and Slow is Key: Whether you’re using the oven, slow cooker, or stovetop, cooking the beans at a low temperature for a longer time ensures they become tender without breaking apart.
  • Stir Gently: When stirring the beans, use a spatula or spoon and fold them gently to avoid mashing them.
  • Rest Before Serving: Let the baked beans rest for 10-15 minutes after cooking. This allows the flavors to settle and the sauce to thicken further.
  • Customize the Cooking Time: If you prefer firmer beans, reduce the cooking time slightly. For creamier beans, cook them a bit longer.

Flavor Enhancements for a Delicious Twist

While classic baked beans are always a crowd-pleaser, adding unique flavor enhancements can take your dish to the next level. Whether you’re looking for a smoky, sweet, spicy, or even vegan twist, there are countless ways to customize your baked beans to suit your taste preferences or the occasion. Here’s a detailed guide to flavor enhancements that will make your baked beans stand out:


1. Sweet and Smoky Variations

Sweet and smoky flavors are a natural match for baked beans, adding depth and richness to the dish.

  • BBQ Sauce: Replace part of the tomato sauce with your favorite BBQ sauce for a tangy, smoky flavor. Use about ½ cup of BBQ sauce and reduce the tomato sauce accordingly.
  • Honey or Maple Syrup: Swap out some or all of the brown sugar for honey or maple syrup. These natural sweeteners add a unique flavor profile and a touch of richness.
  • Smoked Bacon: Cook and crumble smoked bacon into the beans, or layer strips on top before baking. The smoky fat from the bacon infuses the dish with incredible flavor.
  • Liquid Smoke: For a vegetarian-friendly smoky flavor, add ½ to 1 teaspoon of liquid smoke to the sauce. A little goes a long way, so start with a small amount and adjust to taste.
  • Smoked Paprika or Chipotle Powder: Add 1-2 teaspoons of smoked paprika or a pinch of chipotle powder for a smoky, slightly spicy kick.

2. Spicy Touches

If you love a bit of heat, there are plenty of ways to add a spicy twist to your baked beans.

  • Chili Powder or Cayenne Pepper: Stir in 1-2 teaspoons of chili powder or a pinch of cayenne pepper for a warm, spicy flavor. Adjust the amount based on your heat tolerance.
  • Jalapeños or Serrano Peppers: Dice fresh jalapeños or serrano peppers and sauté them with the onions and garlic. For extra heat, leave the seeds in.
  • Hot Sauce: Add a few dashes of your favorite hot sauce (e.g., Tabasco, Sriracha, or Cholula) to the sauce mixture. Start with 1-2 teaspoons and adjust to taste.
  • Crushed Red Pepper Flakes: Sprinkle in ½ to 1 teaspoon of crushed red pepper flakes for a subtle, lingering heat.

3. Vegan Options

You don’t need meat or animal products to create deeply flavorful baked beans. Here’s how to make a vegan version that’s just as satisfying:

  • Umami Boosters: Replace Worcestershire sauce (which often contains anchovies) with a vegan alternative or use soy sauce, tamari, or coconut aminos for a savory, umami-rich flavor.
  • Smoky Flavors: Use liquid smoke or smoked paprika to mimic the smoky depth typically provided by bacon.
  • Sweeteners: Stick with plant-based sweeteners like maple syrup, agave nectar, or coconut sugar instead of honey.
  • Vegetable Add-Ins: Add diced vegetables like bell peppers, carrots, or mushrooms for extra texture and flavor. Sauté them with the onions and garlic at the beginning.
  • Beans: Use a mix of beans, such as navy beans, black beans, or kidney beans, to add variety and heartiness.

4. International Twists

Give your baked beans a global flair by incorporating flavors from different cuisines:

  • Tex-Mex Style: Add cumin, chili powder, and a can of diced tomatoes with green chilies. Top with fresh cilantro and a squeeze of lime juice before serving.
  • Caribbean-Inspired: Use coconut milk instead of tomato sauce, and add a pinch of allspice, thyme, and a dash of hot sauce for a tropical twist.
  • Mediterranean Flair: Stir in sun-dried tomatoes, olives, and a sprinkle of oregano. Finish with a drizzle of olive oil and a handful of fresh parsley.
  • Asian Fusion: Add ginger, garlic, soy sauce, and a touch of sesame oil. Garnish with green onions and sesame seeds for an Asian-inspired twist.

5. Creative Add-Ins

Experiment with unexpected ingredients to create a unique flavor profile:

  • Beer or Bourbon: Replace part of the liquid with a dark beer or a splash of bourbon for a rich, complex flavor.
  • Mustard Varieties: Swap out regular mustard for Dijon, whole-grain, or spicy brown mustard to add depth and tanginess.
  • Cheese: Stir in shredded cheddar or smoked gouda during the last 10 minutes of cooking for a creamy, cheesy twist.
  • Fresh Herbs: Add fresh herbs like thyme, rosemary, or parsley during the cooking process or as a garnish for a bright, fresh flavor.

6. Balancing Flavors

No matter which enhancements you choose, it’s important to balance the flavors:

  • Sweet vs. Tangy: If your dish is too sweet, add a splash of vinegar or lemon juice. If it’s too tangy, stir in a bit more brown sugar or maple syrup.
  • Spicy vs. Mild: If the heat level is too intense, balance it with a dollop of honey or a splash of cream. If it’s too mild, add more chili powder or hot sauce.
  • Saltiness: Taste before adding salt, especially if you’re using bacon, canned beans, or soy sauce. Adjust with a pinch of salt or a splash of water if needed.

Sweet and Smoky Variations

Sweet and smoky flavors are a match made in heaven when it comes to baked beans. These variations add depth, richness, and a touch of complexity to the dish, making it even more irresistible. Whether you’re cooking for a summer BBQ, a cozy winter meal, or a potluck, these sweet and smoky twists will elevate your baked beans to a whole new level. Here’s a detailed guide to creating these delicious variations:


1. BBQ Sauce Infusion

BBQ sauce is a natural addition to baked beans, bringing a tangy, smoky, and slightly sweet flavor that complements the beans perfectly.

  • How to Use: Replace part of the tomato sauce in your recipe with your favorite BBQ sauce. For example, if your recipe calls for 2 cups of tomato sauce, use 1 cup of tomato sauce and 1 cup of BBQ sauce.
  • Types of BBQ Sauce: Experiment with different styles of BBQ sauce, such as:
  • Kansas City Style: Sweet, thick, and tomato-based.
  • Texas Style: Smoky and tangy with a hint of spice.
  • Carolina Style: Vinegar-based for a tangier flavor.
  • Pro Tip: If you’re using a store-bought BBQ sauce, taste it first to adjust the sweetness or tanginess of your baked beans. You may need to reduce the amount of brown sugar or vinegar in your recipe accordingly.

2. Honey or Maple Syrup Sweetness

For a natural, rich sweetness, consider using honey or maple syrup instead of (or in addition to) brown sugar.

  • How to Use: Replace the brown sugar in your recipe with an equal amount of honey or maple syrup. For example, if your recipe calls for ¼ cup of brown sugar, use ¼ cup of honey or maple syrup instead.
  • Flavor Profile:
  • Honey: Adds a floral, slightly earthy sweetness.
  • Maple Syrup: Brings a warm, caramel-like flavor with a hint of smokiness.
  • Pro Tip: If you want to enhance the smoky flavor, pair honey or maple syrup with smoked paprika or liquid smoke.

3. Smoked Bacon Bliss

Bacon is a classic addition to baked beans, providing both smoky flavor and a satisfying savory element.

  • How to Use:
  • Cook 4-6 slices of smoked bacon in a skillet until crispy. Remove the bacon and set it aside, leaving the rendered fat in the pan.
  • Use the bacon fat to sauté the onions and garlic for extra flavor.
  • Crumble the cooked bacon and stir it into the bean mixture before baking or slow cooking.
  • Layering Option: For a show-stopping presentation, layer strips of uncooked bacon on top of the bean mixture before baking. As the beans cook, the bacon will become crispy and infuse the dish with smoky goodness.
  • Pro Tip: For a vegetarian-friendly version, use coconut bacon or smoked tofu as a bacon substitute.

4. Liquid Smoke for Depth

Liquid smoke is a concentrated flavoring that adds a smoky aroma and taste without the need for bacon or a smoker.

  • How to Use: Add ½ to 1 teaspoon of liquid smoke to the sauce mixture. Start with a small amount and adjust to taste, as liquid smoke is potent.
  • Pairing Ideas: Combine liquid smoke with sweeteners like molasses, brown sugar, or maple syrup for a balanced sweet-and-smoky flavor.
  • Pro Tip: Look for natural liquid smoke made from real smoke condensate, without artificial additives.

5. Smoked Paprika or Chipotle Powder

Smoked paprika and chipotle powder are easy ways to add a smoky, slightly spicy kick to your baked beans.

  • How to Use:
  • Add 1-2 teaspoons of smoked paprika to the spice mixture for a mild, smoky flavor.
  • Use ½ to 1 teaspoon of chipotle powder for a smokier, spicier twist.
  • Pairing Ideas: Combine smoked paprika or chipotle powder with sweet ingredients like brown sugar, honey, or molasses for a harmonious balance of flavors.
  • Pro Tip: If you’re using chipotle powder, taste as you go to ensure the heat level is to your liking.

6. Molasses for Richness

Molasses adds a deep, robust sweetness and a hint of bitterness that pairs beautifully with smoky flavors.

  • How to Use: Replace part or all of the brown sugar in your recipe with molasses. For example, use 2 tablespoons of molasses and 2 tablespoons of brown sugar for a balanced flavor.
  • Types of Molasses:
  • Light Molasses: Mild and sweet, perfect for a subtle flavor.
  • Dark Molasses: Richer and more intense, ideal for a deeper flavor profile.
  • Blackstrap Molasses: Bitter and strong, use sparingly unless you love its bold taste.
  • Pro Tip: Pair molasses with smoked paprika, bacon, or liquid smoke for a classic sweet-and-smoky combination.

7. Bourbon or Whiskey Infusion

For a grown-up twist, add a splash of bourbon or whiskey to your baked beans. The alcohol cooks off, leaving behind a rich, complex flavor.

  • How to Use: Stir in 2-3 tablespoons of bourbon or whiskey when combining the sauce ingredients. Let the mixture simmer for a few minutes to allow the flavors to meld.
  • Pairing Ideas: Combine bourbon with brown sugar, molasses, or maple syrup for a decadent, smoky-sweet flavor.
  • Pro Tip: Use a high-quality bourbon or whiskey for the best results.

8. Caramelized Onions

Caramelized onions add a natural sweetness and depth to baked beans, complementing smoky flavors beautifully.

  • How to Use: Sauté the onions low and slow until they turn golden brown and sweet (about 20-30 minutes). Add them to the bean mixture as usual.
  • Pairing Ideas: Combine caramelized onions with smoked bacon, smoked paprika, or BBQ sauce for a rich, layered flavor.
  • Pro Tip: Add a pinch of sugar to the onions while cooking to speed up the caramelization process.

Spicy Touches

Adding a spicy kick to your baked beans can take them from comforting to unforgettable. Whether you’re a fan of mild heat or crave a fiery punch, there are countless ways to incorporate spice into your dish. From fresh chilies to bold spices, these spicy touches will awaken your taste buds and add an exciting dimension to your baked beans. Here’s a detailed guide to creating a spicy twist on this classic dish:


1. Fresh Chilies for Vibrant Heat

Fresh chilies are a fantastic way to add both heat and a burst of fresh flavor to your baked beans.

  • Jalapeños:
  • Dice 1-2 fresh jalapeños (seeds removed for milder heat) and sauté them with the onions and garlic.
  • For extra heat, leave the seeds in or add a few slices of pickled jalapeños.
  • Serrano Peppers:
  • These are hotter than jalapeños, so use 1 finely chopped serrano pepper for a noticeable kick.
  • Habaneros or Scotch Bonnets:
  • Use sparingly—these chilies are extremely hot. A small amount (¼ to ½ of a pepper, finely minced) will add intense heat.
  • Pro Tip: Wear gloves when handling hot chilies, and avoid touching your face to prevent irritation.

2. Dried Spices for Warmth and Depth

Dried spices are an easy way to add heat and complexity to your baked beans.

  • Chili Powder:
  • Add 1-2 teaspoons of chili powder to the spice mixture for a warm, earthy heat.
  • Look for blends that include cumin, garlic, and oregano for added flavor.
  • Cayenne Pepper:
  • A pinch of cayenne pepper (¼ to ½ teaspoon) will add a sharp, fiery heat. Adjust to your tolerance level.
  • Crushed Red Pepper Flakes:
  • Sprinkle in ½ to 1 teaspoon for a subtle, lingering heat.
  • Chipotle Powder:
  • This smoked chili powder adds both heat and a smoky flavor. Use ½ to 1 teaspoon, depending on your preference.
  • Pro Tip: Toast dried spices in a dry skillet for 1-2 minutes before adding them to the dish to enhance their flavor.

3. Hot Sauce for Tangy Heat

Hot sauce is a quick and easy way to add both heat and tanginess to your baked beans.

  • Classic Hot Sauces:
  • Add a few dashes of Tabasco, Sriracha, or Cholula to the sauce mixture. Start with 1-2 teaspoons and adjust to taste.
  • Specialty Hot Sauces:
  • Experiment with flavored hot sauces, such as habanero, garlic, or mango, to add unique twists.
  • Pro Tip: If you’re using a vinegar-based hot sauce, reduce the amount of vinegar in your recipe to avoid overpowering the dish.

4. Spicy Mustard for Tangy Heat

Mustard isn’t just for tanginess—it can also add a subtle spicy kick.

  • Dijon Mustard:
  • Replace regular mustard with 1-2 tablespoons of Dijon mustard for a sharper, spicier flavor.
  • Spicy Brown Mustard:
  • Use 1-2 tablespoons of spicy brown mustard for a bolder, more complex heat.
  • Whole-Grain Mustard:
  • Add 1-2 tablespoons of whole-grain mustard for a textured, mildly spicy twist.
  • Pro Tip: Mustard pairs well with sweet ingredients like brown sugar or maple syrup, creating a balanced sweet-and-spicy flavor.

5. Spicy Meat Add-Ins

If you’re adding meat to your baked beans, consider using spicy varieties to amp up the heat.

  • Spicy Sausage:
  • Cook and crumble spicy Italian sausage or chorizo into the bean mixture for a hearty, spicy addition.
  • Pepperoni or Salami:
  • Dice and sauté pepperoni or salami for a salty, spicy kick.
  • Pro Tip: If using spicy meats, reduce the amount of additional spices or chilies to avoid overwhelming the dish.

6. Spicy Beans for Extra Kick

Using spicy canned beans or adding a spicy bean variety can enhance the heat level of your dish.

  • Spicy Baked Beans:
  • Start with a can of spicy baked beans and build on the flavor with additional spices or chilies.
  • Black Beans or Kidney Beans:
  • Add a can of black beans or kidney beans seasoned with chili powder or cayenne pepper for extra heat and texture.
  • Pro Tip: Rinse canned beans to remove excess sodium and starchy liquid before adding them to the dish.

7. Spicy Garnishes for a Fresh Finish

Add a final touch of heat with spicy garnishes that also bring freshness and texture.

  • Fresh Chilies:
  • Top the baked beans with thinly sliced jalapeños, serranos, or Thai chilies for a vibrant, spicy garnish.
  • Pickled Chilies:
  • Add a few slices of pickled jalapeños or banana peppers for tangy heat.
  • Hot Sauce Drizzle:
  • Drizzle a bit of hot sauce over the finished dish for an extra kick.
  • Pro Tip: Garnishes add both flavor and visual appeal, making your dish look as good as it tastes.

8. Balancing Spicy Flavors

When adding spice, it’s important to balance the heat with other flavors to create a harmonious dish.

  • Sweetness:
  • Counteract the heat with sweet ingredients like brown sugar, honey, or maple syrup.
  • Acidity:
  • Add a splash of vinegar, lemon juice, or lime juice to brighten the flavors and balance the spice.
  • Creaminess:
  • Stir in a dollop of sour cream, Greek yogurt, or coconut milk to mellow the heat.
  • Pro Tip: Taste as you go and adjust the seasoning to ensure the heat level is just right.

Vegan Options

Baked beans are a versatile dish that can easily be adapted to suit a vegan diet without sacrificing flavor or texture. By using plant-based ingredients and creative substitutions, you can create a vegan version that’s just as hearty, smoky, and delicious as the traditional recipe. Here’s a detailed guide to making vegan baked beans that will satisfy everyone at the table:


1. Umami Boosters for Depth of Flavor

Umami is the savory, meaty flavor that makes dishes deeply satisfying. In vegan baked beans, you can achieve this without animal products.

  • Soy Sauce or Tamari:
  • Add 1-2 tablespoons of soy sauce or tamari (a gluten-free alternative) to the sauce mixture for a rich, savory flavor.
  • Coconut Aminos:
  • Use coconut aminos as a soy-free, slightly sweeter alternative to soy sauce.
  • Miso Paste:
  • Stir in 1-2 teaspoons of miso paste (white or red) for a complex, umami-rich flavor.
  • Nutritional Yeast:
  • Sprinkle in 1-2 tablespoons of nutritional yeast for a cheesy, nutty flavor that adds depth.
  • Pro Tip: Taste as you go and adjust the amount of umami boosters to avoid overpowering the dish.

2. Smoky Flavors Without Meat

Smoky flavors are a hallmark of traditional baked beans, and you can achieve them without bacon or other animal products.

  • Liquid Smoke:
  • Add ½ to 1 teaspoon of liquid smoke to the sauce mixture for a smoky aroma and flavor. Start with a small amount and adjust to taste.
  • Smoked Paprika:
  • Use 1-2 teaspoons of smoked paprika for a mild, smoky flavor.
  • Chipotle Peppers in Adobo Sauce:
  • Finely chop 1-2 chipotle peppers and add them to the sauce for a smoky, spicy kick. Use the adobo sauce for extra flavor.
  • Pro Tip: Pair smoky flavors with sweet ingredients like maple syrup or molasses for a balanced taste.

3. Plant-Based Sweeteners

Sweetness is a key component of baked beans, and there are plenty of vegan-friendly options to choose from.

  • Maple Syrup:
  • Use ¼ cup of maple syrup for a natural, rich sweetness with a hint of caramel flavor.
  • Molasses:
  • Add 2-3 tablespoons of molasses for a deep, robust sweetness and a touch of bitterness.
  • Coconut Sugar or Date Syrup:
  • These are great alternatives to brown sugar, offering a similar sweetness with a slightly different flavor profile.
  • Pro Tip: Adjust the amount of sweetener based on your preference, and balance it with tangy or spicy ingredients.

4. Protein-Packed Beans

Beans are the star of the dish, and using a variety of beans can add texture and heartiness.

  • Navy Beans:
  • The classic choice for baked beans, navy beans are creamy and mild.
  • Black Beans or Kidney Beans:
  • Add a can of black beans or kidney beans for extra protein and a slightly firmer texture.
  • Chickpeas or Cannellini Beans:
  • These beans add a unique twist and make the dish more filling.
  • Pro Tip: If using dried beans, soak and cook them thoroughly before adding them to the dish. For canned beans, rinse and drain to remove excess sodium.

5. Vegetable Add-Ins for Texture and Flavor

Adding vegetables not only enhances the nutritional value but also adds texture and flavor to your vegan baked beans.

  • Bell Peppers:
  • Dice 1-2 bell peppers and sauté them with the onions and garlic for a sweet, crunchy addition.
  • Carrots or Celery:
  • Finely chop carrots or celery and cook them with the aromatics for extra depth.
  • Mushrooms:
  • Sauté sliced mushrooms until golden brown for a meaty texture and umami flavor.
  • Pro Tip: Roast the vegetables before adding them to the dish for a caramelized, smoky flavor.

6. Creamy Vegan Additions

For a richer, creamier texture, consider adding plant-based ingredients that mimic the creaminess of dairy.

  • Coconut Milk:
  • Stir in ½ cup of full-fat coconut milk for a creamy, slightly sweet flavor.
  • Cashew Cream:
  • Blend soaked cashews with water until smooth and add a few tablespoons to the sauce for richness.
  • Tahini:
  • Add 1-2 tablespoons of tahini for a nutty, creamy texture.
  • Pro Tip: These additions work best in small amounts to avoid overpowering the dish.

7. Tangy and Bright Flavors

Adding tangy ingredients helps balance the sweetness and richness of the dish.

  • Apple Cider Vinegar:
  • Stir in 1-2 tablespoons of apple cider vinegar for a bright, tangy flavor.
  • Lemon or Lime Juice:
  • Add a squeeze of lemon or lime juice at the end of cooking for a fresh, zesty finish.
  • Tomato Paste:
  • Use 1-2 tablespoons of tomato paste to add depth and a slight tanginess to the sauce.
  • Pro Tip: Taste and adjust the acidity to ensure the flavors are well-balanced.

8. Creative Garnishes

Finish your vegan baked beans with fresh, flavorful garnishes that add texture and visual appeal.

  • Fresh Herbs:
  • Sprinkle chopped parsley, cilantro, or green onions on top for a fresh, vibrant touch.
  • Vegan Cheese:
  • Add a sprinkle of vegan cheddar or smoked gouda for a cheesy finish.
  • Toasted Nuts or Seeds:
  • Top with toasted pumpkin seeds, sunflower seeds, or chopped nuts for crunch.
  • Pro Tip: Garnishes not only enhance the flavor but also make the dish look more inviting.

Serving and Storing Your Baked Beans

Once you’ve mastered the art of making perfectly baked beans, the next step is serving them in a way that highlights their flavor and storing any leftovers properly to maintain their quality. Whether you’re hosting a BBQ, preparing a weeknight dinner, or planning ahead for future meals, here’s a detailed guide to serving and storing your baked beans:


1. Perfect Pairings

Baked beans are a versatile side dish that pairs well with a variety of main courses and accompaniments. Here are some ideas to inspire your meal planning:

  • Classic BBQ Fare:
  • Serve baked beans alongside BBQ ribs, pulled pork, or grilled chicken for a hearty, smoky meal.
  • Add cornbread, coleslaw, or potato salad to complete the spread.
  • Breakfast or Brunch:
  • Pair baked beans with scrambled tofu, vegan sausages, or avocado toast for a savory breakfast or brunch option.
  • Serve with a side of roasted tomatoes or sautéed greens for a balanced meal.
  • Vegetarian or Vegan Meals:
  • Combine baked beans with grilled vegetables, quinoa, or a fresh green salad for a plant-based feast.
  • Use them as a filling for vegan tacos or burritos.
  • Comfort Food Classics:
  • Serve baked beans with mac and cheese, mashed potatoes, or garlic bread for a comforting, indulgent meal.
  • Pro Tip: Garnish your baked beans with fresh herbs, a drizzle of hot sauce, or a sprinkle of vegan cheese to elevate the presentation and flavor.

2. How to Store Baked Beans

Proper storage ensures your baked beans stay fresh and delicious for future meals. Here’s how to store them safely:

  • Refrigeration:
  • Let the baked beans cool to room temperature before storing.
  • Transfer them to an airtight container or cover the baking dish tightly with plastic wrap or aluminum foil.
  • Store in the refrigerator for up to 4-5 days.
  • Freezing:
  • For longer storage, freeze baked beans in a freezer-safe container or heavy-duty freezer bag.
  • Leave about 1 inch of headspace to allow for expansion.
  • Label the container with the date and use within 3-6 months for the best quality.
  • Pro Tip: Portion the beans into smaller containers before freezing for easy reheating of individual servings.

3. How to Reheat Baked Beans

Reheating baked beans properly ensures they retain their texture and flavor. Here are the best methods:

  • Stovetop:
  • Transfer the beans to a saucepan and heat over medium-low heat, stirring occasionally.
  • Add a splash of water, broth, or tomato sauce if the beans seem too thick.
  • Microwave:
  • Place the beans in a microwave-safe dish and cover with a microwave-safe lid or paper towel.
  • Heat in 1-minute intervals, stirring between each, until warmed through.
  • Oven:
  • Preheat the oven to 325°F (160°C).
  • Transfer the beans to an oven-safe dish, cover with foil, and bake for 20-30 minutes, or until heated through.
  • Slow Cooker:
  • Reheat the beans in a slow cooker on low for 1-2 hours, stirring occasionally.
  • Pro Tip: If the beans have thickened in the fridge, add a bit of liquid (water, broth, or tomato sauce) while reheating to restore the desired consistency.

4. Creative Leftover Ideas

Don’t let leftover baked beans go to waste! Here are some creative ways to repurpose them into new meals:

  • Baked Bean Tacos or Burritos:
  • Use the beans as a filling for tacos or burritos. Add toppings like avocado, salsa, shredded lettuce, and vegan cheese.
  • Bean and Veggie Casserole:
  • Layer baked beans with roasted vegetables, cooked rice, or mashed potatoes, and top with breadcrumbs or vegan cheese. Bake until bubbly.
  • Bean Dip:
  • Blend leftover baked beans with a bit of vegetable broth or coconut milk until smooth. Serve as a dip with tortilla chips or veggie sticks.
  • Breakfast Hash:
  • Sauté diced potatoes, onions, and peppers, then stir in baked beans for a hearty breakfast hash. Top with a fried egg or tofu scramble.
  • Stuffed Bell Peppers:
  • Hollow out bell peppers and fill them with a mixture of baked beans, cooked rice, and diced vegetables. Bake until the peppers are tender.
  • Pro Tip: Leftover baked beans can also be added to soups, stews, or chili for extra flavor and texture.

5. Tips for Serving a Crowd

If you’re serving baked beans at a party or gathering, here are some tips to make the process easier:

  • Keep Them Warm:
  • Use a slow cooker or chafing dish to keep the beans warm throughout the event.
  • Set the slow cooker to the “warm” setting and stir occasionally to prevent sticking.
  • Offer Toppings:
  • Set up a toppings bar with options like chopped green onions, shredded cheese, crispy bacon bits (or vegan bacon), hot sauce, and sour cream (or vegan sour cream).
  • Portion Control:
  • Serve the beans in small bowls or ramekins for individual portions, especially at a buffet-style event.
  • Pro Tip: Double or triple the recipe if you’re feeding a large group, and make sure to have plenty of serving utensils on hand.

Perfect Pairings

Baked beans are a beloved comfort food that can shine as a side dish or even take center stage in a meal. Their sweet, smoky, and savory flavors make them incredibly versatile, pairing well with a wide range of dishes. Whether you’re hosting a summer BBQ, preparing a cozy family dinner, or planning a hearty breakfast, here’s a detailed guide to perfect pairings that will elevate your baked beans and create a memorable meal:


1. Classic BBQ and Grill Favorites

Baked beans are a staple at any BBQ or cookout, and they pair beautifully with grilled and smoked meats.

  • BBQ Ribs or Pulled Pork:
  • The rich, smoky flavors of ribs or pulled pork complement the sweetness of baked beans. Serve with coleslaw and cornbread for a classic BBQ spread.
  • Grilled Chicken or Turkey:
  • Whether it’s a smoky grilled chicken breast or a juicy turkey burger, baked beans add a hearty side that balances the meal.
  • Brisket or Sausages:
  • Smoked brisket or spicy sausages are a match made in heaven with baked beans. Add a side of pickles or mustard for extra zing.
  • Pro Tip: For a complete BBQ experience, serve baked beans alongside grilled corn on the cob, potato salad, and a fresh green salad.

2. Breakfast and Brunch Classics

Baked beans are a popular addition to breakfast and brunch menus, especially in British and American cuisine.

  • Eggs:
  • Serve baked beans with scrambled eggs, fried eggs, or an omelet for a protein-packed breakfast.
  • For a British-inspired twist, pair them with poached eggs and toast.
  • Vegan Breakfast:
  • Combine baked beans with tofu scramble, avocado toast, or vegan sausages for a plant-based brunch.
  • Hash Browns or Home Fries:
  • The crispy texture of hash browns or home fries contrasts beautifully with the creamy beans.
  • Pro Tip: Add a side of roasted tomatoes, sautéed mushrooms, or fresh fruit to round out the meal.

3. Vegetarian and Vegan Pairings

Baked beans are a fantastic option for vegetarian and vegan meals, offering protein and flavor in one dish.

  • Grilled Vegetables:
  • Serve baked beans with grilled zucchini, eggplant, bell peppers, or portobello mushrooms for a hearty, plant-based meal.
  • Grain Bowls:
  • Pair baked beans with quinoa, brown rice, or farro, and top with fresh herbs, avocado, or a drizzle of tahini.
  • Vegan Burgers or Sausages:
  • Use baked beans as a side for veggie burgers, lentil patties, or plant-based sausages.
  • Pro Tip: Add a fresh green salad or steamed greens like kale or spinach for a balanced, nutrient-rich meal.

4. Comfort Food Combinations

Baked beans are the ultimate comfort food, and they pair wonderfully with other cozy dishes.

  • Mac and Cheese:
  • The creamy, cheesy goodness of mac and cheese is perfectly complemented by the sweet and smoky flavors of baked beans.
  • Mashed Potatoes:
  • Serve baked beans over a bed of creamy mashed potatoes for a comforting, stick-to-your-ribs meal.
  • Cornbread or Biscuits:
  • The slightly sweet, crumbly texture of cornbread or biscuits is ideal for soaking up the flavorful sauce of baked beans.
  • Pro Tip: Add a side of roasted vegetables or a simple green salad to balance the richness of these comfort foods.

5. International Flavors

Baked beans can be adapted to suit a variety of cuisines, making them a versatile addition to global-inspired meals.

  • Tex-Mex:
  • Pair baked beans with tacos, enchiladas, or nachos. Add toppings like guacamole, salsa, and vegan cheese for a festive meal.
  • Caribbean-Inspired:
  • Serve baked beans with jerk tofu, plantains, and coconut rice for a tropical twist.
  • Mediterranean:
  • Combine baked beans with falafel, tabbouleh, and hummus for a Mediterranean-inspired feast.
  • Pro Tip: Experiment with spices and herbs to tailor the flavor of your baked beans to the cuisine you’re pairing them with.

6. Light and Fresh Pairings

If you’re looking for a lighter meal, baked beans can still play a starring role when paired with fresh, vibrant ingredients.

  • Green Salad:
  • Serve baked beans alongside a crisp green salad with a tangy vinaigrette to balance the richness of the beans.
  • Grilled Vegetables:
  • Lightly grilled asparagus, zucchini, or bell peppers add a fresh, smoky element that complements baked beans.
  • Fresh Salsa or Pico de Gallo:
  • Top baked beans with a spoonful of fresh salsa or pico de gallo for a burst of brightness.
  • Pro Tip: Add a squeeze of lemon or lime juice to your baked beans for a fresh, zesty finish.

7. Creative Serving Ideas

Think outside the box and use baked beans as a base or topping for creative dishes.

  • Baked Potato Topping:
  • Load a baked potato with baked beans, vegan cheese, and green onions for a hearty meal.
  • Taco or Burrito Filling:
  • Use baked beans as a filling for tacos, burritos, or quesadillas. Add toppings like avocado, lettuce, and salsa.
  • Casserole Layer:
  • Layer baked beans with cooked rice, roasted vegetables, and vegan cheese in a casserole dish. Bake until bubbly and golden.
  • Pro Tip: Use baked beans as a dip for tortilla chips or toasted bread for a fun appetizer or snack.

How to Store and Reheat

Properly storing and reheating baked beans ensures they stay fresh, flavorful, and safe to eat. Whether you’ve made a big batch for a party or have leftovers from dinner, knowing how to handle your baked beans can make all the difference. Here’s a detailed guide to storing and reheating baked beans to maintain their quality and deliciousness:


1. Storing Baked Beans

Storing baked beans correctly is key to preserving their texture and flavor. Follow these steps to keep them fresh:

A. Cooling Down

  • Let Them Cool: Allow the baked beans to cool to room temperature before storing. Hot food can raise the temperature inside your fridge or container, leading to condensation and potential spoilage.
  • Avoid Leaving Out Too Long: Don’t leave baked beans at room temperature for more than 2 hours to prevent bacterial growth.

B. Refrigeration

  • Use Airtight Containers: Transfer the baked beans to an airtight container or cover the baking dish tightly with plastic wrap or aluminum foil.
  • Label and Date: Write the date on the container to keep track of freshness.
  • Storage Duration: Baked beans can be stored in the refrigerator for up to 4-5 days.

C. Freezing

  • Portion for Convenience: Divide the baked beans into smaller portions for easy reheating. Use freezer-safe containers or heavy-duty freezer bags.
  • Leave Room for Expansion: Leave about 1 inch of headspace in containers to allow for expansion during freezing.
  • Label and Date: Clearly label the containers with the date and contents.
  • Storage Duration: Baked beans can be frozen for up to 3-6 months without significant loss of quality.

2. Reheating Baked Beans

Reheating baked beans properly ensures they retain their texture and flavor. Here are the best methods for reheating:

A. Stovetop Method

  • Transfer to a Saucepan: Place the baked beans in a saucepan or skillet.
  • Add Liquid if Needed: If the beans have thickened, add a splash of water, vegetable broth, or tomato sauce to loosen them up.
  • Heat Gently: Warm over medium-low heat, stirring occasionally, until heated through (about 5-10 minutes).
  • Pro Tip: Stir gently to avoid breaking the beans, and taste to adjust seasoning if necessary.

B. Microwave Method

  • Use a Microwave-Safe Dish: Transfer the baked beans to a microwave-safe bowl or container.
  • Cover to Retain Moisture: Cover the dish with a microwave-safe lid or a damp paper towel to prevent splattering and retain moisture.
  • Heat in Intervals: Microwave on high in 1-minute intervals, stirring between each, until heated through (about 2-4 minutes total).
  • Pro Tip: Stirring ensures even heating and prevents hot spots.

C. Oven Method

  • Preheat the Oven: Set the oven to 325°F (160°C).
  • Transfer to an Oven-Safe Dish: Place the baked beans in an oven-safe dish and cover with aluminum foil to prevent drying out.
  • Reheat: Bake for 20-30 minutes, stirring halfway through, until heated through.
  • Pro Tip: For a caramelized top, remove the foil during the last 5-10 minutes of reheating.

D. Slow Cooker Method

  • Transfer to the Slow Cooker: Place the baked beans in the slow cooker insert.
  • Add Liquid if Needed: If the beans are too thick, add a splash of water or broth.
  • Reheat: Cook on low for 1-2 hours, stirring occasionally, until heated through.
  • Pro Tip: This method is ideal for keeping baked beans warm during a party or gathering.

3. Tips for Maintaining Quality

  • Avoid Overheating: Reheat baked beans gently to prevent them from becoming mushy or losing their flavor.
  • Adjust Consistency: If the beans have thickened too much during storage, add a bit of liquid (water, broth, or tomato sauce) while reheating.
  • Taste and Adjust: After reheating, taste the beans and adjust the seasoning if needed. A pinch of salt, a dash of vinegar, or a sprinkle of sugar can refresh the flavors.

4. Creative Uses for Leftover Baked Beans

If you’re tired of eating baked beans as-is, here are some creative ways to repurpose them:

  • Baked Bean Tacos or Burritos:
  • Use the beans as a filling for tacos or burritos. Add toppings like avocado, salsa, and shredded lettuce.
  • Bean and Veggie Casserole:
  • Layer baked beans with roasted vegetables, cooked rice, or mashed potatoes, and top with breadcrumbs or vegan cheese. Bake until bubbly.
  • Bean Dip:
  • Blend leftover baked beans with a bit of vegetable broth or coconut milk until smooth. Serve as a dip with tortilla chips or veggie sticks.
  • Breakfast Hash:
  • Sauté diced potatoes, onions, and peppers, then stir in baked beans for a hearty breakfast hash. Top with a fried egg or tofu scramble.
  • Stuffed Bell Peppers:
  • Hollow out bell peppers and fill them with a mixture of baked beans, cooked rice, and diced vegetables. Bake until the peppers are tender.

Creative Leftover Ideas

Leftover baked beans don’t have to be boring! With a little creativity, you can transform them into entirely new dishes that are just as delicious as the original. Whether you’re looking to spice up your meals, reduce food waste, or simply try something new, here’s a detailed guide to repurposing your baked beans into exciting and flavorful creations:


1. Baked Bean Tacos or Burritos

Turn your baked beans into a filling for tacos or burritos for a quick and satisfying meal.

  • How to Make:
  • Warm the baked beans in a skillet or microwave.
  • Fill tortillas with the beans and add toppings like shredded lettuce, diced tomatoes, avocado, vegan cheese, and salsa.
  • For burritos, add cooked rice, sautéed peppers, and onions before rolling them up.
  • Pro Tip: Use corn tortillas for tacos or large flour tortillas for burritos. Add a squeeze of lime juice for a fresh, zesty finish.

2. Baked Bean Casserole

Combine baked beans with other ingredients to create a hearty casserole that’s perfect for a family dinner.

  • How to Make:
  • Layer baked beans with cooked rice, quinoa, or mashed potatoes in a baking dish.
  • Add roasted vegetables like zucchini, bell peppers, or mushrooms for extra flavor and texture.
  • Top with breadcrumbs, crushed crackers, or vegan cheese.
  • Bake at 375°F (190°C) for 20-30 minutes, or until the top is golden and bubbly.
  • Pro Tip: Add a drizzle of BBQ sauce or a sprinkle of smoked paprika for extra flavor.

3. Baked Bean Dip

Transform your baked beans into a creamy, flavorful dip that’s perfect for parties or snacks.

  • How to Make:
  • Blend the baked beans in a food processor or blender until smooth. Add a splash of vegetable broth, coconut milk, or water to achieve the desired consistency.
  • Serve the dip warm or cold with tortilla chips, pita bread, or veggie sticks.
  • Garnish with chopped green onions, cilantro, or a dollop of vegan sour cream.
  • Pro Tip: Add a pinch of chili powder or a dash of hot sauce for a spicy kick.

4. Baked Bean Breakfast Hash

Start your day with a hearty and flavorful breakfast hash featuring leftover baked beans.

  • How to Make:
  • Sauté diced potatoes, onions, and bell peppers in a skillet until tender and golden.
  • Stir in the baked beans and cook until heated through.
  • Top with a fried egg, tofu scramble, or avocado slices for extra protein and richness.
  • Pro Tip: Add a sprinkle of smoked paprika or a dash of hot sauce for extra flavor.

5. Stuffed Bell Peppers

Use baked beans as a filling for stuffed bell peppers for a nutritious and colorful meal.

  • How to Make:
  • Cut the tops off bell peppers and remove the seeds and membranes.
  • Mix the baked beans with cooked rice, quinoa, or lentils, and add diced vegetables like corn, zucchini, or tomatoes.
  • Stuff the mixture into the bell peppers and place them in a baking dish.
  • Bake at 375°F (190°C) for 25-30 minutes, or until the peppers are tender.
  • Pro Tip: Top the stuffed peppers with shredded vegan cheese or breadcrumbs before baking for a crispy finish.

6. Baked Bean Soup

Turn your baked beans into a hearty soup that’s perfect for a cozy meal.

  • How to Make:
  • In a large pot, sauté onions, garlic, and celery until softened.
  • Add the baked beans, vegetable broth, diced tomatoes, and your choice of vegetables (e.g., carrots, zucchini, or spinach).
  • Simmer for 20-30 minutes, stirring occasionally, until the flavors meld together.
  • Season with salt, pepper, and your favorite herbs.
  • Pro Tip: Blend half of the soup for a creamy texture, or leave it chunky for a heartier feel.

7. Baked Bean Pizza Topping

Use baked beans as a unique and flavorful topping for homemade pizza.

  • How to Make:
  • Spread a thin layer of tomato sauce or BBQ sauce on your pizza dough.
  • Top with baked beans, sautéed onions, bell peppers, and vegan cheese.
  • Bake according to your pizza dough instructions, or until the crust is golden and the cheese is melted.
  • Pro Tip: Add a sprinkle of smoked paprika or chili flakes for extra flavor.

8. Baked Bean Shepherd’s Pie

Create a comforting shepherd’s pie using baked beans as the base.

  • How to Make:
  • Spread the baked beans in the bottom of a baking dish.
  • Top with a layer of cooked vegetables like peas, carrots, and corn.
  • Finish with a layer of mashed potatoes or mashed sweet potatoes.
  • Bake at 375°F (190°C) for 20-30 minutes, or until the top is golden and the filling is bubbly.
  • Pro Tip: Add a sprinkle of vegan cheese or breadcrumbs to the mashed potato layer for a crispy topping.

9. Baked Bean Stuffed Sweet Potatoes

Turn baked sweet potatoes into a meal by stuffing them with baked beans.

  • How to Make:
  • Bake sweet potatoes until tender.
  • Split them open and fill with warmed baked beans.
  • Top with avocado slices, green onions, or a dollop of vegan sour cream.
  • Pro Tip: Add a sprinkle of chili powder or a drizzle of tahini for extra flavor.

10. Baked Bean Breakfast Bowl

Create a hearty breakfast bowl using baked beans as the base.

  • How to Make:
  • Warm the baked beans and place them in a bowl.
  • Add cooked quinoa, roasted vegetables, and avocado slices.
  • Top with a fried egg or tofu scramble for extra protein.
  • Pro Tip: Drizzle with hot sauce or a squeeze of lime juice for a fresh, zesty finish.

Conclusion

Baked beans are more than just a humble side dish—they’re a versatile, comforting, and deeply satisfying food that can be enjoyed in countless ways. From mastering the basics of preparing and cooking them to exploring creative flavor enhancements and inventive leftover ideas, this guide has shown you how to make baked beans a star in your kitchen.

Whether you’re serving them at a summer BBQ, pairing them with breakfast favorites, or transforming leftovers into entirely new meals, baked beans offer endless possibilities. Their sweet, smoky, and savory flavors make them a crowd-pleaser, while their adaptability ensures they can fit into any dietary preference or culinary style.

As you experiment with different ingredients, cooking methods, and pairings, remember that the key to perfect baked beans lies in balance—balancing sweetness with tanginess, smokiness with spice, and richness with freshness. Don’t be afraid to get creative and make the recipe your own. After all, cooking is as much about personal expression as it is about following a recipe.

So, the next time you make a batch of baked beans, think beyond the basics. Try a new spice, add a surprising ingredient, or repurpose leftovers into something entirely unexpected. And most importantly, share your creations with others. Food is meant to be enjoyed together, and baked beans are the perfect dish to bring people to the table.

We hope this guide has inspired you to embrace the versatility of baked beans and explore all the delicious ways you can enjoy them. Now it’s your turn—grab your ingredients, fire up the stove, and start cooking. Don’t forget to share your experiences, tips, and favorite variations in the comments below. Happy cooking!

How to Make the Perfect Unicorn Cake: Step-by-Step Guide

Outline for Unicorn Cake Blog Post - Step-by-Step Guide

Introduction

Unicorn cakes have become the ultimate showstopper for birthdays, baby showers, and any celebration that calls for a touch of magic. These whimsical cakes capture the imagination with their pastel colors, glittery accents, and enchanting designs. Whether you’re a seasoned baker or a beginner, creating a unicorn cake at home is easier than you might think with the right guidance.

In this blog post, I’ll show you how to craft the perfect unicorn cake step by step. From baking the soft, fluffy layers to decorating with fondant horns and colorful buttercream swirls, you’ll learn everything you need to make your dream cake a reality. Whether it’s for a child’s birthday party or a fun DIY project, this guide will inspire your creativity and delight everyone who sees your masterpiece.

Get ready to sprinkle some magic into your baking – let’s create the perfect unicorn cake together!

Tools and Ingredients You Need for a Unicorn Cake

Outline for Unicorn Cake Blog Post - Step-by-Step Guide
Plan your perfect unicorn cake creation with this detailed blog post outline, featuring essential tools, ingredients, and decoration
steps.

HOW TO MAKE A UNICORN CAKE – NERDY NUMMIES

Step-by-Step Unicorn Cake Blog Outline
A well-structured outline for crafting a delicious and visually stunning unicorn cake.

Creating a beautiful and magical unicorn cake starts with the right tools and ingredients. This section will guide you through everything you need to ensure a smooth process and professional-looking results.


1. Essential Baking Tools

To achieve perfection, you’ll need some basic yet essential baking tools. These will make preparation, assembly, and decoration much easier:

  • Piping Bags and Nozzles: Use these for creating colorful swirls, flowers, and the unicorn’s mane. Opt for star and round tips to achieve various designs.
  • Cake Turntable: This tool makes frosting and decorating the cake seamless, giving you 360° control while you work.
  • Fondant Tools: Invest in a fondant roller, cutters, and smoothers to shape and detail the unicorn’s horn, ears, and other decorative elements.
  • Offset Spatula and Bench Scraper: These help to spread frosting evenly for a smooth finish.
  • Measuring Cups and Digital Scale: Precision is key to getting the ingredients right, ensuring consistent cake texture and flavor.

2. Ingredients for the Cake and Decorations

Using high-quality ingredients makes a huge difference in the flavor and appearance of your unicorn cake. Here’s a checklist of what you’ll need:

  • Cake Batter Essentials:
    • All-purpose or cake flour for a light texture.
    • Granulated sugar, unsalted butter, eggs, baking powder, and milk or buttermilk.
  • Food Coloring: Choose gel food coloring to create vibrant pastel layers without altering the batter’s consistency. Colors like pink, blue, yellow, and purple work beautifully.
  • Buttercream Frosting: Made with unsalted butter, powdered sugar, vanilla extract, and heavy cream. It serves as the canvas for your decorations.
  • Edible Glitter and Sprinkles: These add a magical touch, perfect for the unicorn theme. Gold or rainbow sprinkles are popular choices.

3. Optional Extras

For those who want to elevate their cake to the next level or save time, consider adding these extras:

  • Pre-made Fondant or Gum Paste: Ideal for crafting unicorn features without starting from scratch.
  • Metallic Edible Paint: Use this to add gold or silver accents to the horn and ears.
  • Unicorn-Themed Toppers: These can be purchased online and are a time-saving option for decoration.

By gathering all the tools and ingredients listed above, you’ll have everything you need to make a stunning unicorn cake that not only looks magical but also tastes incredible.

Step 1 – Preparing the Unicorn Cake Layers

Unicorn Cake Creation Process: Blog Post Outline

The foundation of any stunning unicorn cake lies in its vibrant, flavorful layers. Preparing these layers correctly will ensure your cake is not only visually appealing but also delicious. In this section, we will guide you through every aspect of preparing the perfect cake layers for your magical creation.


1. Choosing the Right Cake Recipe

Before you begin, select a reliable cake recipe suited for layered cakes. Some popular choices include:

  • Classic Vanilla Sponge: Light, fluffy, and versatile, perfect for absorbing pastel colors.
  • Funfetti Cake: Adds a festive feel with rainbow sprinkles baked into the batter.
  • Chocolate Cake: For those who prefer a rich and decadent flavor.

2. Coloring the Cake Batter

One of the hallmarks of a unicorn cake is its pastel-colored or rainbow layers. Follow these tips to achieve vibrant colors without compromising texture:

  • Use Gel Food Coloring: Gel-based colors are more concentrated and don’t alter the batter consistency like liquid food colors might.
  • Divide and Conquer: Divide your batter evenly into separate bowls, depending on how many colors you want. Popular choices include pink, purple, blue, yellow, and mint green.
  • Blend Gently: Stir the colors in gently to maintain the batter’s airiness and avoid overmixing.

3. Baking the Layers

Getting the bake right is critical to ensure the layers are moist, fluffy, and evenly cooked. Here’s how:

  • Prepare Your Pans: Grease the pans with butter or cooking spray and line them with parchment paper for easy removal.
  • Use the Right Pan Sizes: Smaller pans (6-inch or 8-inch) work well for layered cakes, ensuring tall, even layers.
  • Even Batter Distribution: Use a digital scale to weigh the batter for each layer, ensuring consistent thickness.
  • Bake and Cool: Bake the layers at 350°F (175°C) until a toothpick inserted in the center comes out clean. Once baked, let the layers cool completely on a wire rack.

4. Layer Preparation

Once your layers have cooled, it’s time to prepare them for stacking and decorating:

  • Trim for Evenness: Use a serrated knife to trim any domed tops, creating flat, even surfaces.
  • Optional Syrup Soak: Lightly brush the layers with a sugar syrup for added moisture and enhanced flavor.
  • Chill Before Stacking: Chill the layers in the fridge for 15–30 minutes. This step helps prevent crumbling and makes frosting easier.

5. Flavor Tips for Unicorn Cake Layers

To elevate your unicorn cake to the next level, consider flavor enhancements:

  • Vanilla Bean Paste or Extract: Adds a warm, rich undertone to your cake.
  • Citrus Zest: A touch of lemon or orange zest can brighten the flavor, especially for pastel layers.
  • Layered Flavors: Incorporate subtle differences, like making one layer strawberry-flavored and another vanilla, for a playful taste experience.

With these steps, you’ll have perfectly baked and prepared unicorn cake layers, ready to be transformed into a magical dessert masterpiece. The colorful pastel hues and delicious flavors will be a sure hit for any occasion.

Step 2 – Decorating the Unicorn Cake

Step-by-Step Unicorn Cake Blog Post Outline
Explore a detailed outline for crafting a magical unicorn cake, guiding you through every step of the journey.

Decorating the unicorn cake is where the magic truly happens! This step is all about bringing your creativity to life through colorful buttercream, intricate fondant details, and edible embellishments. A well-decorated unicorn cake is not just a feast for the taste buds but also for the eyes. Let’s break down the process into manageable parts.


1. Frosting the Cake Base

Before adding the fun decorations, it’s important to frost the cake base smoothly and evenly:

  • Apply a Crumb Coat: Start with a thin layer of frosting (called the crumb coat) to seal in the crumbs. Chill the cake for 15–20 minutes after applying this layer.
  • Final Frosting Layer: Add the final layer of buttercream frosting using an offset spatula. Aim for a smooth finish, as this will be the foundation of your decorations.
  • Use Colors Creatively: Consider making an ombré effect with pastel shades or stick to a single soft tone like pink or lilac for the classic unicorn look.

2. Creating the Unicorn’s Features

The unicorn’s horn, ears, and eyes are the signature elements of your cake:

  • Unicorn Horn:
    • Roll a piece of fondant (gold or pastel) into a long cone shape. Twist it gently to create the spiral horn effect.
    • Brush with edible metallic paint or edible glitter for extra sparkle.
    • Insert a sturdy wooden skewer or straw into the horn and stick it into the center of the cake.
  • Ears:
    • Use fondant to craft two teardrop-shaped pieces for the ears. Attach smaller pieces of fondant in a contrasting color to create the inner ears.
    • Secure the ears next to the horn using toothpicks or edible glue.
  • Eyes:
    • Pipe closed eyes with black buttercream in a delicate curve, adding lashes for a cute, whimsical look.

3. Decorating the Mane

The mane is one of the most eye-catching parts of the unicorn cake, so go all out with vibrant buttercream:

  • Colorful Buttercream Swirls: Use piping bags fitted with star or round tips to create swirls, rosettes, and ruffles in a variety of colors such as pink, blue, yellow, and purple.
  • Add Edible Glitter and Sprinkles: Sprinkle edible glitter, pearls, and colorful sprinkles over the mane for a magical touch.
  • Placement: Focus the mane flowing from the top (around the horn) to the sides, mimicking a real unicorn’s mane.

4. Adding Finishing Touches

These small details can make your unicorn cake truly unique:

  • Rainbow or Gold Accents: Add fondant or edible decorations like tiny stars, hearts, or rainbows to complement the theme.
  • Edible Flowers: Place small, edible flowers strategically on the mane or around the base of the cake for elegance.
  • Personalized Touches: Write a message or name on the cake board using buttercream or fondant letters to make the cake more special.

5. Tips for a Polished Look

To ensure your unicorn cake looks professional and polished:

  • Chill After Decorating: Let the cake sit in the fridge for 15–30 minutes after decorating to help the details set.
  • Level Up with Texture: Use tools like textured fondant mats for an embossed effect on certain areas.
  • Keep It Balanced: Avoid overcrowding decorations—less can sometimes be more for a clean, elegant finish.

What’s Next?

With your cake fully decorated, it’s time to showcase it! Present the unicorn cake at your celebration as the centerpiece. Don’t forget to capture photos of your masterpiece to share on social media or in your portfolio if you’re a baker.

Step 3 – DIY Unicorn Cake Topper Ideas

Detailed Blog Outline for Crafting the Perfect Unicorn Cake
A comprehensive step-by-step guide to making a magical unicorn cake, from preparation to presentation.

A unicorn cake topper is the crown jewel of your cake design, capturing the magical essence of a unicorn and making the cake truly extraordinary. Crafting your topper at home allows you to customize it to match your theme perfectly, and it’s an opportunity to let your creativity shine. Let’s explore some exciting DIY unicorn cake topper ideas and how you can make them.


1. Fondant Unicorn Horn Topper

The unicorn horn is iconic, and creating one with fondant is a simple yet impactful choice.

  • Materials Needed: Fondant (white or gold), edible metallic paint or glitter, and a skewer or straw.
  • Steps:
    • Roll fondant into a long, thin cone.
    • Twist it gently to form the spiral pattern of the horn.
    • Insert a skewer or straw for support.
    • Paint it with edible metallic paint or sprinkle glitter to make it shimmer.
  • Optional Touches: Add pastel-colored streaks to the horn for a whimsical, multi-tonal effect.

2. Paper Unicorn Topper

A lightweight and colorful topper option is made from cardstock paper.

  • Materials Needed: Cardstock, scissors, glue, glitter, and a toothpick or skewer.
  • Steps:
    • Cut out shapes for the horn, ears, and other elements like a small rainbow or star.
    • Layer the paper pieces with glue for a 3D effect.
    • Use glitter to enhance specific details like the horn or ears.
    • Attach the completed design to a toothpick or skewer and insert it into the cake.
  • Customizable Features: Write the guest of honor’s name or a festive message like “Happy Birthday!” on the topper.

3. Edible Unicorn Topper

For a topper that can be eaten, consider using fondant, marzipan, or modeling chocolate.

  • What to Make:
    • Sculpt a miniature unicorn figurine.
    • Add tiny details like rainbow-colored hair, big expressive eyes, and cute hooves.
  • Tools Needed: Modeling tools, food-safe paintbrush, and edible colors.
  • Tips:
    • Let each piece dry slightly before assembling to maintain shape.
    • Dust the completed topper with edible pearl dust for a magical sheen.

4. Balloon Unicorn Cake Topper

For a trendy and modern option, use mini balloons as part of the unicorn topper design.

  • Materials Needed: Mini pastel balloons, a small golden balloon for the horn, and thin sticks or wires.
  • Steps:
    • Inflate the balloons to create clusters representing the unicorn’s mane.
    • Attach the golden balloon at the center as the horn.
    • Use floral wire to arrange the balloons on the cake seamlessly.
  • Where to Use: This topper works well for large cakes with bold visual appeal.

5. Floral Unicorn Topper

For a more elegant and natural vibe, create a topper using fresh or edible flowers.

  • Materials Needed: Edible or pesticide-free fresh flowers, floral tape, and a golden foil-wrapped horn.
  • Steps:
    • Wrap the horn with gold foil or use a pre-made horn.
    • Select pastel-colored flowers (e.g., roses, peonies, or edible pansies).
    • Arrange the flowers around the base of the horn to resemble a lush mane.
    • Secure the flowers with floral tape or food-safe adhesive.
  • Pro Tip: Pair flowers with edible pearls or glitter for added magic.

6. LED Light-Up Unicorn Topper

Add some sparkle and innovation with a light-up unicorn topper.

  • Materials Needed: Battery-operated LED fairy lights, clear food-safe wire, and a translucent topper.
  • Steps:
    • Create a unicorn shape or simple horn with clear plastic or acrylic.
    • Wrap the fairy lights around the topper for a glowing effect.
    • Insert it gently onto the cake while hiding the battery pack underneath the base.
  • Best for Evening Parties: This topper creates a mesmerizing, dreamy effect in dim lighting.

7. Personalized Topper Ideas

Custom toppers can add a unique, heartfelt touch:

  • Name Toppers: Craft the recipient’s name using calligraphy-inspired paper or fondant.
  • Photo Topper: Print an image of a unicorn or the guest of honor on edible wafer paper.
  • Theme Match: Incorporate the party theme, like adding stars, moons, or other fantasy elements.

Tips for Topper Success

  • Safety First: If using non-edible materials like paper or balloons, ensure they don’t come into contact with the edible parts of the cake. Wrap exposed ends with plastic wrap if necessary.
  • Balance: Choose a topper size that complements your cake dimensions—too large or too small can overwhelm the overall look.
  • Durability: For fragile toppers like fondant creations, allow time for them to dry completely before using.

With these DIY unicorn cake topper ideas, you can take your cake from impressive to truly magical, tailoring each design to fit your theme and event.

Tips for Storing and Presenting Your Unicorn Cake

Your beautifully crafted unicorn cake deserves both proper storage to maintain its freshness and an enchanting presentation to wow your audience. Below are practical tips and creative ideas to help you ensure your unicorn cake looks and tastes incredible for the big moment.


1. Storing Your Unicorn Cake

Proper Temperature and Humidity Control:
  • Keep your unicorn cake in a cool, dry place if the event is within a few hours.
  • For longer storage, refrigerate the cake in an airtight container to protect it from moisture loss or absorption of other food odors.
Handling Fondant and Buttercream:
  • Fondant-covered cakes should not be stored in a high-humidity environment to prevent sweating and sticky surfaces.
  • Buttercream cakes can go into the refrigerator but allow them to come to room temperature before serving to restore their creamy texture.
Freezing Tips for Advanced Prep:
  • Wrap the cake tightly in plastic wrap and aluminum foil to avoid freezer burn.
  • Thaw the cake overnight in the refrigerator and decorate it on the day of the event.
Separation of Tiers:
  • If your unicorn cake is multi-tiered, store each tier separately to avoid pressure damage during storage.

2. Presenting Your Unicorn Cake

Choosing the Right Cake Stand:
  • Use a decorative cake stand that complements the theme—think pastel-colored or gold-trimmed stands for a magical touch.
  • For larger cakes, opt for a sturdy base that supports the weight without compromising the aesthetics.
Lighting the Scene:
  • Add LED fairy lights or candles around the cake for an ethereal glow, especially for evening events.
  • Use a soft spotlight to highlight the shimmering details of your topper and decorations.
Incorporating Decor Accents:
  • Surround the cake stand with themed items like mini unicorn figurines, edible glitter jars, or pastel-colored flowers.
  • Place the cake in the center of a dessert table adorned with confetti, streamers, or a rainbow tablecloth to amplify the magical vibes.
Photography-Friendly Setup:
  • Ensure natural or soft lighting for photographs to capture the cake’s intricate details.
  • Place the cake against a backdrop of clouds, rainbows, or unicorn-themed party props for a cohesive look.

3. Keeping the Cake Intact Until Serving

Transporting the Cake:
  • If you need to move the cake to another location, use a tall cake box that secures the tiers and prevents sliding.
  • Place non-slip mats under the cake box to avoid movement during transit.
Avoid Last-Minute Damage:
  • Add delicate toppers and finishing decorations at the event venue to prevent damage during transport.
  • Store the cake in a shaded, cool place until it’s ready to be served.
Timely Presentation:
  • Unveil the cake right before serving for maximum impact. Cover it lightly with a food-safe dome if it’s displayed for longer periods to keep it fresh.

4. Creative Serving Ideas

Slice-and-Serve Presentation:
  • Pre-slice the cake and serve each piece on matching unicorn-themed plates. Use edible glitter or a drizzle of colorful syrup on each slice for an extra magical effect.
Accompaniment Options:
  • Pair slices of the cake with complementary treats like macarons, meringues, or fruit to enhance the dessert table.
  • Offer different flavored syrups or sprinkles as toppings to cater to diverse preferences.
Interactive Cake Display:
  • Add an element of fun by setting up a “Cake Decorating Station” where guests can add their own sprinkles or edible embellishments before taking their slice.
  • Use a rotating cake stand to display all sides of the cake’s intricate details.

5. Preserving Leftovers

Wrapping Up Leftover Cake:
  • Store any leftover slices in airtight containers or tightly wrapped in plastic wrap to retain moisture.
  • Label containers with the date and flavor to avoid confusion later.
Creative Leftover Uses:
  • Repurpose cake leftovers into fun treats like cake pops, trifles, or milkshakes.
  • Use cake crumbs as ice cream toppings for a whimsical dessert option.

Final Thoughts

Proper storage and an enchanting presentation can transform your unicorn cake from a delightful dessert into the star of the event. By following these tips, you ensure that both the look and taste of your cake remain unforgettable for everyone who sees or tastes it.

Conclusion

Creating a unicorn cake is more than just baking and decorating; it’s about crafting a magical centerpiece that brings joy and awe to any celebration. From preparing the perfect cake layers to adding a personalized unicorn topper, every step is an opportunity to showcase your creativity and attention to detail. Whether you’re an experienced baker or a beginner, this project combines technical skills with a dash of imagination, resulting in a dessert that’s as visually stunning as it is delicious.


Recap of Key Steps

  1. Cake Layers: Start by baking soft, vibrant layers that form the foundation of your unicorn cake. Use food colors to achieve a mesmerizing pastel or rainbow effect.
  2. Decorations: From buttercream swirls to edible glitter, decorating the cake transforms it into a magical masterpiece. Don’t forget those iconic unicorn ears and horn!
  3. Topper Ideas: Add a personal touch with a DIY topper, whether crafted from fondant, paper, or edible materials. This is your chance to make the unicorn unique to the occasion.
  4. Storage and Presentation: Ensure your cake stays fresh and is displayed with charm. Proper planning can make the difference between a good dessert and a showstopper centerpiece.

Why Unicorn Cakes Are Special

Unicorn cakes have become a symbol of whimsy, imagination, and celebration. Their dreamy aesthetic appeals to all ages, from children’s birthday parties to sophisticated events with a magical theme. The endless possibilities for customization—colors, decorations, toppers—allow you to create a cake that perfectly matches the event’s vibe.


Tips for Your Unicorn Cake Journey

  • Embrace Creativity: Don’t hesitate to try unique designs, mix unusual colors, or add playful details that resonate with your personality or the party theme.
  • Practice Makes Perfect: If this is your first attempt, remember that each try improves your technique and boosts your confidence.
  • Celebrate the Process: Beyond the final result, enjoy the joy of crafting something special. Baking and decorating can be just as rewarding as sharing the cake.

Call to Action

Are you ready to embark on your unicorn cake adventure? Whether for a special occasion or just a fun project, follow this guide to create a cake that will be remembered long after it’s been enjoyed. Share your creations on social media and inspire others to dive into this magical baking experience. We’d love to see your masterpiece—tag us and spread the magic!


End with Gratitude

Thank you for joining us on this journey to create the perfect unicorn cake. We hope this guide not only simplifies the process but also inspires you to bring your vision to life. Remember, a unicorn cake is more than a dessert—it’s a work of art, a piece of joy, and a memory to cherish.

Disney’s Chocolate Chip Cookie Recipe in Metric Measurements

Disney Chocolate Chip Cookie Recipe with Metric Measurements

Baking is a magical experience, especially when it involves a beloved treat like Disney’s famous chocolate chip cookies. Known for their perfect balance of crisp edges and gooey centers, these cookies bring the enchantment of Disney right into your kitchen. Whether you’ve had them at a Disney park or simply heard about their iconic flavor, now you can recreate the magic at home.

One key to baking success is using precise measurements, and with metric measurements, you can achieve the perfect cookie every time. Unlike the sometimes ambiguous cup measurements, grams and milliliters offer an exact science for more consistent and delicious results. This guide will walk you through Disney’s chocolate chip cookie recipe, providing you with metric measurements to ensure you get it just right. From choosing the right ingredients to mixing and baking with confidence, let’s dive into a fun and straightforward recipe that will leave everyone asking for seconds!

Why Disney’s Chocolate Chip Cookies Are a Fan Favorite

Disney Chocolate Chip Cookie Recipe Metric Measurements

Disney Chocolate Chip Cookie Recipe with Metric Measurements
Perfectly baked Disney-style chocolate chip cookies made with metric measurements for consistent and delicious results.

Disney’s chocolate chip cookies hold a special place in the hearts of fans worldwide. These cookies are more than just a treat—they represent the magic of Disney’s storytelling and their exceptional attention to detail, even in the culinary world. Here’s why they are so beloved:


1. A Taste of Nostalgia

The name “Disney” evokes fond memories of childhood trips to theme parks, beloved movies, and the magical world of imagination. Recreating these cookies at home allows fans to relive those cherished experiences. Each bite transports you back to the magic of Main Street, USA, where the smell of freshly baked cookies wafts through the air.


2. The Perfect Balance of Texture and Flavor

Disney’s recipe is famous for striking a perfect balance: crispy on the outside with a gooey, soft center. The rich flavor of premium chocolate chips and the buttery, caramelized base make these cookies irresistible. The addition of brown sugar ensures a hint of molasses-like sweetness, making the cookies complex and memorable.


3. Replicating the Disney Magic at Home

There’s something enchanting about bringing the essence of Disney into your kitchen. The recipe allows fans to not just bake cookies but create an experience. Sharing these cookies with loved ones feels like sharing a piece of the Disney experience. Plus, baking them with family or friends becomes a fun, nostalgic activity, just like a visit to the parks.


4. A Cookie for Everyone

Disney’s recipes are designed with wide appeal. Whether you’re baking for children, teens, or adults, these cookies are a hit at every table. The straightforward recipe and the use of classic ingredients make it accessible for beginners while leaving room for creativity with variations and mix-ins.


This combination of nostalgia, taste, experience, and universal appeal makes Disney’s chocolate chip cookies a timeless favorite among bakers and Disney enthusiasts alike.

The Importance of Metric Measurements in Baking

Disney Chocolate Chip Cookies Made with Precise Metric Measurements
Recreate the magic of Disney with these perfectly measured chocolate chip cookies using metric units for flawless results

Baking is often referred to as a science, and for a good reason. Precise measurements and accurate ingredient ratios are critical to achieving consistent results. Switching to metric measurements, known for their accuracy and simplicity, is a game changer for both novice and professional bakers. Here’s why metric measurements are so important:


1. Precision Equals Perfection

Unlike cooking, where “a pinch of this” or “a dash of that” works, baking demands precise proportions. Even a slight variation in the amount of flour, sugar, or butter can drastically alter the texture, taste, and structure of your baked goods.

  • Metric measurements, based on grams and milliliters, are far more precise than their cup-and-teaspoon counterparts.
  • A gram is a fixed unit, whereas measuring cups can vary based on how ingredients are packed or scooped.

2. Simplifies Scaling Recipes

Metric measurements make it easier to double, halve, or otherwise adjust recipes. When using grams or milliliters, scaling is straightforward with simple arithmetic.

  • Example: Doubling “125 grams of butter” gives a clear “250 grams,” whereas doubling a “1/2 cup of butter” can be confusing without a proper conversion tool.
  • Precision ensures that ratios of wet to dry ingredients remain consistent, which is essential for baking success.

3. Universality in Baking

The metric system is the standard for most of the world, which makes recipes using metric measurements universal.

  • For international recipes, especially French, Italian, or Asian baking recipes, metric units allow you to follow instructions as intended without conversions.
  • Baking with grams ensures consistency and makes it easier to replicate recipes exactly as they were developed.

4. Minimizes Errors in Conversion

When converting recipes from imperial to metric, errors are common.

  • Miscalculating the weight of flour, for instance, can lead to dense, tough cookies instead of light, soft ones.
  • A single teaspoon misjudged during conversion might alter the leavening effect of baking soda or powder, ruining the final product.

5. Professional-Level Baking at Home

Using metric units elevates your baking skills to a professional level.

  • Bakeries and professional kitchens worldwide use scales and grams for consistency.
  • By adopting their techniques, you can improve your results and bake with greater confidence.

Tips for Transitioning to Metric Measurements

  1. Invest in a digital kitchen scale for accurate weighing.
  2. Get familiar with common metric conversions (e.g., 1 cup of flour = approximately 120 grams).
  3. Practice with recipes already written in grams or milliliters to build your confidence.

Switching to metric measurements is not just about precision; it’s about making your baking journey simpler, more enjoyable, and filled with consistently delicious results.

Ingredients You’ll Need for Disney’s Chocolate Chip Cookie Recipe

The key to making Disney’s chocolate chip cookies lies in using high-quality, thoughtfully chosen ingredients that come together to create a magical treat. Here’s a closer look at the ingredients and their roles in this beloved recipe, along with tips to make your baking even better.


1. Flour: The Foundation of Cookies

The recipe calls for plain or all-purpose flour, which provides the structure to hold the cookie together.

  • Why it matters: Too much flour can make cookies dense, while too little can result in overly spread cookies.
  • Tips: Use a kitchen scale to measure precisely, avoiding the “scoop and pack” method. Sift the flour for a more uniform texture.

2. Baking Soda: The Secret to Light and Airy Cookies

This leavening agent helps the cookies rise slightly, giving them a soft and chewy texture.

  • Why it matters: It reacts with acidic ingredients like brown sugar, ensuring the cookies don’t turn out flat.
  • Tips: Make sure your baking soda is fresh (less than six months old) for optimal results.

3. Butter: The Flavor Booster

Unsalted butter is the fat base, lending rich flavor and tenderness to the cookies.

  • Why it matters: Butter plays a key role in creating the balance between crisp edges and chewy centers.
  • Tips: Use softened butter at room temperature to blend more easily with sugar, creating a smooth and creamy base.

4. Sugars: The Sweeteners and Caramelizers

The recipe uses two types of sugar: granulated and brown sugar. Each serves a unique purpose:

  • Granulated sugar: Adds sweetness and helps the cookies spread.
  • Brown sugar: Enhances flavor with its molasses content and keeps the cookies moist.
  • Tips: For a deeper flavor, use dark brown sugar, or adjust the ratio of the two sugars slightly to achieve your preferred texture.

5. Eggs: The Binder

Eggs are essential for holding the dough together and contributing to its structure.

  • Why it matters: Eggs add moisture and richness, ensuring a tender bite.
  • Tips: Use large eggs at room temperature for better blending with other ingredients.

6. Vanilla Extract: The Flavor Enhancer

This ingredient adds warmth and depth of flavor to the cookies.

  • Why it matters: Vanilla brings out the sweetness and complements the chocolate.
  • Tips: Use pure vanilla extract instead of artificial vanilla for a more authentic taste.

7. Chocolate Chips: The Star Ingredient

The semi-sweet chocolate chips are the highlight of this recipe, providing bursts of chocolaty goodness.

  • Why it matters: The balance of sweetness and bitterness in semi-sweet chocolate pairs perfectly with the cookie dough.
  • Tips: Consider using a mix of chip sizes or even chunks of high-quality chocolate for variation in texture.

8. Optional Add-Ins for Customization

While the basic recipe is already fantastic, you can add your touch with some optional ingredients:

  • Nuts: Walnuts or pecans for added crunch.
  • Sea Salt: A sprinkle of flaky salt on top for a gourmet touch.
  • Spices: A pinch of cinnamon or nutmeg for a warm twist.

Having the right ingredients and using them correctly are key to recreating Disney’s chocolate chip cookies. With high-quality components and a few tips in mind, you’ll enjoy the magic of Disney in your kitchen with every batch!

Step-by-Step Guide to Baking Disney’s Chocolate Chip Cookies
Disney Chocolate Chip Cookie Recipe with Metric Precision
Enjoy the perfect blend of soft and chewy with Disney’s iconic chocolate chip cookies, made with accurate metric measurements for flawless results

Making Disney’s chocolate chip cookies at home can be a magical and rewarding experience. With attention to detail and a few tricks, you’ll create delicious cookies that rival those served at Disney resorts. Follow this detailed guide to achieve perfection:


1. Preparing Your Ingredients and Equipment

Preparation is key to stress-free baking.

  • Gather ingredients: Ensure all ingredients are at room temperature for smoother mixing and better results, particularly butter and eggs.
  • Preheat the oven: Set your oven to the specified temperature (usually 175°C or 350°F). This ensures cookies bake evenly right from the start.
  • Prepare the baking trays: Line your baking sheets with parchment paper or silicone mats to prevent sticking and promote even browning.
  • Measure ingredients: Use a digital scale to weigh ingredients accurately, ensuring consistent results.

2. Mixing the Dough: Wet and Dry Components

Creating the perfect cookie dough involves mixing your ingredients properly.

  • Step 1: Cream butter and sugar
    Beat the softened butter with granulated and brown sugars until the mixture is light and fluffy. This incorporates air into the dough, helping achieve soft, chewy cookies.
    • Tip: Use a stand mixer or hand mixer for efficiency.
  • Step 2: Add eggs and vanilla extract
    Gradually beat in the eggs one at a time, ensuring each is fully incorporated. Add the vanilla extract for flavor enhancement.
  • Step 3: Combine dry ingredients
    In a separate bowl, whisk together the flour, baking soda, and a pinch of salt to distribute the leavening agents evenly.
  • Step 4: Bring it together
    Gradually add the dry ingredients to the wet mixture. Mix just until the dough comes together—overmixing can make the cookies tough.
  • Step 5: Fold in chocolate chips
    Use a spatula to gently mix in the semi-sweet chocolate chips, ensuring even distribution without breaking them.

3. Chilling the Dough: A Key to Success

Chilling the dough enhances flavor and texture.

  • Why chill? Cooling the dough solidifies the butter, preventing the cookies from spreading too much during baking.
  • How long to chill? Refrigerate the dough for at least 30 minutes, or up to overnight for deeper flavor.

4. Shaping and Portioning the Cookies

Consistent portions ensure even baking.

  • Scoop the dough: Use a cookie scoop or a tablespoon to portion the dough into even balls.
  • Space them out: Arrange the dough balls on the prepared baking sheets, leaving enough space (2–3 inches) between each ball to allow for spreading.
  • Optional: For aesthetic appeal, press a few extra chocolate chips on top of each ball before baking.

5. Baking the Cookies: Achieving the Perfect Texture

Timing and temperature are everything.

  • Bake time: Place the trays in the preheated oven and bake for 10–12 minutes, or until the edges are golden brown but the centers are slightly soft.
  • Rotate the tray: If your oven has hot spots, rotate the baking sheet halfway through to ensure even baking.
  • Check for doneness: The cookies should look underbaked in the center when you take them out—this ensures they remain chewy as they cool.

6. Cooling and Enjoying the Cookies

Proper cooling ensures the best texture and flavor.

  • Initial cooling: Let the cookies rest on the baking tray for 2–3 minutes after removing them from the oven. They will
Pro Tips and Variations to Try

Baking Disney’s chocolate chip cookies is an enjoyable and simple process, but there are a few professional tips and creative variations to elevate your cookies and make them truly your own. Whether you want to fine-tune the texture, enhance the flavor, or try out a new twist, these tips and variations can take your cookies from great to extraordinary.


1. Chill the Dough for Best Results

While it may be tempting to bake the cookies immediately after mixing, chilling the dough for at least 30 minutes (or up to overnight) helps improve texture and flavor. Chilled dough prevents cookies from spreading too much during baking, allowing them to retain a thicker, chewier texture and enhancing the flavor as the flour fully absorbs the wet ingredients.

  • Pro Tip: For even better results, chill the dough in an airtight container, and if you prefer slightly thicker cookies, let the dough sit for a couple of hours in the refrigerator before baking.

2. Adjust the Ratio of Chocolate

Disney’s chocolate chip cookies use semi-sweet chocolate chips, but you can customize the recipe by mixing different types of chocolate for added depth of flavor.

  • Dark Chocolate: Use dark chocolate chips or chopped dark chocolate for a more intense, bittersweet flavor.
  • Milk Chocolate: If you prefer sweeter cookies, try using milk chocolate chips instead of semi-sweet.
  • Chocolate Chunks: Chopped chocolate bars add extra pockets of gooey chocolate, giving you a thicker, more indulgent texture.
  • Pro Tip: Combine semi-sweet, dark, and milk chocolate for the ultimate variety and flavor contrast in every bite.

3. Incorporate Nuts for Crunch and Flavor

If you like a bit of crunch and depth, try adding nuts to the dough. Walnuts, pecans, or even macadamia nuts are great additions, complementing the chocolate and adding a rich, earthy taste.

  • Pro Tip: Toast the nuts lightly before folding them in for a roasted flavor boost. This will enhance their natural oils and bring out more of their richness.

4. Try a Sea Salt Sprinkle for a Touch of Luxury

If you love the contrast between sweet and salty, try a sprinkling of flaky sea salt on top of your cookie dough balls before baking. As the cookies bake, the salt will add a lovely balance to the sweetness, and it will also give the cookies a sophisticated touch.

  • Pro Tip: Use flaky sea salt like Maldon for the best texture and flavor. A pinch on each cookie just before baking creates a melt-in-the-mouth experience.

5. Experiment with Spices for Added Warmth

While Disney’s original recipe relies on the rich taste of vanilla, adding spices like cinnamon, nutmeg, or a dash of instant coffee can bring extra warmth to the flavor profile.

  • Cinnamon: A pinch of cinnamon will create a cozy, warm spiced flavor, perfect for the holiday season.
  • Instant Coffee: Just a teaspoon of finely ground instant coffee will amplify the chocolate flavor, adding complexity and depth.
  • Nutmeg: Nutmeg brings a light, aromatic note that pairs wonderfully with chocolate.
  • Pro Tip: Mix in the spices when you add the flour and baking soda to ensure even distribution.

6. Make Them Gluten-Free or Dairy-Free

If you have dietary restrictions or prefer alternative ingredients, you can easily modify the recipe to make it gluten-free or dairy-free.

  • Gluten-Free Option: Substitute the all-purpose flour with a high-quality gluten-free all-purpose flour blend, making sure it contains xanthan gum to maintain structure.
  • Dairy-Free Option: Replace the butter with vegan butter or coconut oil, and use dairy-free chocolate chips.
  • Pro Tip: When making substitutions, keep the dough chilled for longer, as some gluten-free blends may cause the dough to become stickier than regular dough.

7. Add a Touch of Toffee for Extra Sweetness

For a rich, buttery flavor with added caramel undertones, try folding in a handful of toffee bits into the dough. They will melt slightly during baking, creating pockets of sweetness that complement the chocolate.

  • Pro Tip: Opt for high-quality toffee bits or chop up your own toffee bars for a gourmet twist.

8. Freeze the Cookie Dough for Future Baking

One of the best things about chocolate chip cookies is how well the dough freezes. You can scoop and roll the dough into individual cookie balls and freeze them on a baking sheet. Once frozen, transfer the dough balls into a ziplock bag or airtight container for up to 3 months.

  • Pro Tip: When baking from frozen, add 1–2 extra minutes to the baking time to ensure your cookies are fully baked. This makes for easy and quick baking whenever a cookie craving strikes.
Conclusion

Baking Disney’s chocolate chip cookies with metric measurements brings consistency and precision to your kitchen, making it easier than ever to create a perfectly balanced, delicious treat. By following each step carefully—from gathering the right ingredients and using accurate measurements to perfecting your baking technique—you’re sure to enjoy cookies that are just as magical as the ones served at Disney parks.

The beauty of this recipe lies not only in the wonderful flavor and texture of the cookies but also in how adopting metric measurements takes the guesswork out of baking. With grams and milliliters as your guide, every batch you make can be as perfect as the last. This simple yet delicious recipe can be adapted to suit your own preferences, whether that’s through adding extra chocolate chips, adding nuts, or experimenting with various types of chocolate.

Ultimately, the joy of baking Disney’s chocolate chip cookies at home isn’t just about the end result—it’s about creating lasting memories in the kitchen and sharing these delightful cookies with friends and family. So next time you’re craving something sweet, grab your ingredients, measure with precision, and embark on your own magical baking adventure!

Authentic Matjesbrötchen Recipe: A Step-by-Step Guide

Traditional Matjesbrötchen Sandwich with Pickled Herring and Fresh Toppings

Introduction

If you’re looking to explore authentic German street food, Matjesbrötchen is the perfect place to start. This beloved dish is a culinary treasure, especially popular in Northern Germany, where it is often enjoyed by locals and tourists alike. Combining the rich, tangy flavor of pickled herring (Matjes) with soft, fresh bread (Brötchen), this sandwich is a harmonious blend of simplicity and bold flavor.

In this blog post, we’ll take a closer look at the ingredients that make this dish so special and guide you step-by-step to recreate this authentic treat in your own kitchen. Whether you’re a fan of seafood or simply eager to try something new, this Matjesbrötchen recipe promises to bring a taste of Germany to your dining table.

Let’s dive in and discover why this traditional snack has become a favorite for so many!

Traditional Matjesbrötchen Sandwich with Pickled Herring and Fresh Toppings

“If you’re a fan of German cuisine, explore our collection of authentic German recipes.”

What is Matjesbrötchen?

For a comprehensive guide on preparing an authentic Matjesbrötchen, you can visit Fouzia’s Kitchen.

Fouzia’s Kitchen This website offers detailed, step-by-step instructions to help you recreate this traditional German herring sandwich at home.

Additionally, for a visual demonstration, you might find this video tutorial helpful:

Classic Matjesbrötchen Sandwich with Pickled Herring and Fresh Toppings
An irresistible Matjesbrötchen sandwich highlighting pickled herring fillets, crisp lettuce, and sliced onions, all nestled in a fluffy bread roll. A delicious taste of Northern Germany’s culinary tradition.


Matjesbrötchen is a popular German dish, particularly in the northern regions, consisting of pickled herring (Matjes) served in a soft, fresh bread roll (Brötchen). This simple yet flavorful sandwich brings together the rich, tangy taste of pickled herring and the soft texture of the bread, making it a beloved snack or meal. It’s often eaten for breakfast, as a snack, or during festivals and outdoor events.

What is Matjes?
Matjes (pronounced MAHT-yess) is a traditional German term for young, mild pickled herring. The term “Matjes” is specifically used to describe fresh herring that has been caught before it reaches full maturity and then cured through a process of brining and mild fermentation. The fish used for Matjes is typically a young herring that is fatty, making it especially tender and flavorful once it’s pickled.

The fish are typically soaked in a brine made from a mixture of salt, sugar, vinegar, and sometimes wine, along with aromatic spices like mustard seeds, juniper berries, and peppercorns. This marinating process gives the herring a unique combination of flavors — mild, sweet, and slightly tangy, which contrasts well with the soft, breaded base when served in a Brötchen.


The Role of Brötchen (German Bread Rolls)
Brötchen, which means “little breads” in German, is a type of bread roll that has a crisp crust and a soft, airy interior. The bread is typically slightly chewy but delicate enough to complement the rich and tangy Matjes. The combination of the Matjes with Brötchen makes for an easy-to-eat, hand-held meal that is perfect for enjoying on the go.

In Matjesbrötchen, the bread roll serves as more than just a vessel for the fish – it enhances the overall experience by providing a slightly sweet contrast to the salty, sour herring and providing a satisfying, chewy texture with each bite.


Cultural Significance of Matjesbrötchen
Matjesbrötchen has deep roots in German culture, particularly in the northern regions where herring has been a staple food for centuries. The tradition of pickling fish like Matjes can be traced back to times when preserving fish for consumption during long winters was essential. Matjesbrötchen is not only enjoyed at home but is often found in street food stalls and festivals.

In Germany, Matjesbrötchen is a seasonal dish. It is especially popular during “Heringstagen” (Herring Days), typically celebrated during the spring when fresh herring is plentiful. It’s also common during Easter and summer, often enjoyed as part of a refreshing, light meal.

Ingredients for the Perfect Matjesbrötchen

Classic Matjesbrötchen Sandwich with Pickled Herring and Fresh Toppings
An irresistible Matjesbrötchen sandwich highlighting pickled herring fillets, crisp lettuce, and sliced onions, all nestled in a fluffy bread roll. A delicious taste of Northern Germany’s culinary tradition.

Creating the perfect Matjesbrötchen involves a careful selection of ingredients, each contributing to the delicious and unique taste of this German dish. The combination of tender pickled herring (Matjes), soft bread (Brötchen), and complementary toppings results in a fresh, satisfying meal that is both easy to make and delightful to eat. Here’s a breakdown of the key ingredients you’ll need:


Key Ingredients:

1. Matjes (Pickled Herring)
Matjes is the heart of the Matjesbrötchen. It’s a young, fatty herring that is prepared through a gentle pickling process involving brine made with salt, sugar, vinegar, and a variety of spices. When buying Matjes, choose high-quality, well-brined herring for the most authentic taste.

  • Flavor: Matjes is mild, slightly sweet, and tangy, with a soft texture that makes it ideal for sandwiches.
  • Preparation: Typically, the herring is already prepared, but ensure it’s soaked for the right amount of time to achieve the balance of saltiness and sweetness.
  • Alternative: If you can’t find Matjes, substitute with other types of mild pickled herring or even smoked herring, though the taste will be slightly different.

2. Fresh Brötchen (German Bread Rolls)
Brötchen is a soft yet slightly crispy German bread roll that holds the Matjes and toppings beautifully. A fresh, lightly toasted Brötchen adds texture, absorbing some of the brine from the herring while offering a perfect balance of softness inside and crispness outside.

  • Flavor and Texture: Look for rolls that are slightly chewy and soft inside, with a crisp, golden crust on the outside.
  • Alternative: If Brötchen is unavailable, you can use small, crusty rolls like baguette slices or similar bread that won’t overpower the fish but complements its mild flavor.

3. Onions (Yellow or Red)
Onions provide a crucial element of crunch and sharpness to balance the richness of the pickled herring. Choose either red or yellow onions depending on your personal preference: red onions add a sweeter, milder flavor, while yellow onions provide a more savory, slightly stronger taste.

  • Preparation: Slice the onions thinly to ensure they don’t overpower the delicate herring but provide just the right amount of bite.
  • Alternative: You can marinate onions in a bit of vinegar to make them less harsh if you prefer a more subdued flavor.

4. Fresh Dill
Dill is a key herb that complements pickled herring beautifully. Its subtle, slightly grassy flavor enhances the taste of Matjes without competing with the primary flavors. Fresh dill also adds a pleasant green color and fragrance to the sandwich.

  • Use: Simply chop fresh dill finely and sprinkle it generously over the Matjes before placing it on the bread.
  • Alternative: If fresh dill is unavailable, dried dill can be used, though fresh is recommended for maximum flavor and aroma.

5. Optional Additions:
To give your Matjesbrötchen an extra touch of flavor and texture, consider these optional ingredients:

  • Lettuce or Arugula: Adding a handful of crisp lettuce or arugula offers a fresh, peppery contrast to the rich Matjes and soft bread.
  • Cucumbers (Fresh or Pickled): Thinly sliced cucumbers add a light, refreshing crunch, either as a fresh garnish or in pickled form for an extra tangy element.
  • Capers: Small, brined capers bring a briny, slightly tangy burst that complements the fish and works well if you enjoy an additional salty punch.
  • Cream Sauce: A light sauce made from sour cream or yogurt with a touch of lemon juice and dill can be added to make the sandwich creamier and add a touch of richness

Ingredients for the Perfect Matjesbrötchen

Creating the perfect Matjesbrötchen involves a careful selection of ingredients, each contributing to the delicious and unique taste of this German dish. The combination of tender pickled herring (Matjes), soft bread (Brötchen), and complementary toppings results in a fresh, satisfying meal that is both easy to make and delightful to eat. Here’s a breakdown of the key ingredients you’ll need:


Key Ingredients:

1. Matjes (Pickled Herring)
Matjes is the heart of the Matjesbrötchen. It’s a young, fatty herring that is prepared through a gentle pickling process involving brine made with salt, sugar, vinegar, and a variety of spices. When buying Matjes, choose high-quality, well-brined herring for the most authentic taste.

  • Flavor: Matjes is mild, slightly sweet, and tangy, with a soft texture that makes it ideal for sandwiches.
  • Preparation: Typically, the herring is already prepared, but ensure it’s soaked for the right amount of time to achieve the balance of saltiness and sweetness.
  • Alternative: If you can’t find Matjes, substitute with other types of mild pickled herring or even smoked herring, though the taste will be slightly different.

2. Fresh Brötchen (German Bread Rolls)
Brötchen is a soft yet slightly crispy German bread roll that holds the Matjes and toppings beautifully. A fresh, lightly toasted Brötchen adds texture, absorbing some of the brine from the herring while offering a perfect balance of softness inside and crispness outside.

  • Flavor and Texture: Look for rolls that are slightly chewy and soft inside, with a crisp, golden crust on the outside.
  • Alternative: If Brötchen is unavailable, you can use small, crusty rolls like baguette slices or similar bread that won’t overpower the fish but complements its mild flavor.

3. Onions (Yellow or Red)
Onions provide a crucial element of crunch and sharpness to balance the richness of the pickled herring. Choose either red or yellow onions depending on your personal preference: red onions add a sweeter, milder flavor, while yellow onions provide a more savory, slightly stronger taste.

  • Preparation: Slice the onions thinly to ensure they don’t overpower the delicate herring but provide just the right amount of bite.
  • Alternative: You can marinate onions in a bit of vinegar to make them less harsh if you prefer a more subdued flavor.

4. Fresh Dill
Dill is a key herb that complements pickled herring beautifully. Its subtle, slightly grassy flavor enhances the taste of Matjes without competing with the primary flavors. Fresh dill also adds a pleasant green color and fragrance to the sandwich.

  • Use: Simply chop fresh dill finely and sprinkle it generously over the Matjes before placing it on the bread.
  • Alternative: If fresh dill is unavailable, dried dill can be used, though fresh is recommended for maximum flavor and aroma.

5. Optional Additions:
To give your Matjesbrötchen an extra touch of flavor and texture, consider these optional ingredients:

  • Lettuce or Arugula: Adding a handful of crisp lettuce or arugula offers a fresh, peppery contrast to the rich Matjes and soft bread.
  • Cucumbers (Fresh or Pickled): Thinly sliced cucumbers add a light, refreshing crunch, either as a fresh garnish or in pickled form for an extra tangy element.
  • Capers: Small, brined capers bring a briny, slightly tangy burst that complements the fish and works well if you enjoy an additional salty punch.
  • Cream Sauce: A light sauce made from sour cream or yogurt with a touch of lemon juice and dill can be added to make the sandwich creamier and add a touch of richness.

Step-by-Step Instructions to Make Matjesbrötchen

Classic Matjesbrötchen Sandwich with Pickled Herring and Fresh Toppings
An irresistible Matjesbrötchen sandwich highlighting pickled herring fillets, crisp lettuce, and sliced onions, all nestled in a fluffy bread roll. A delicious taste of Northern Germany’s culinary tradition.

Making Matjesbrötchen is a simple yet delightful process that requires only a few ingredients, but when prepared correctly, it offers a combination of rich and delicate flavors. Whether you’re making it as a quick snack or an elegant meal, follow this step-by-step guide to create an authentic Matjesbrötchen that captures the essence of traditional German cuisine.


Step 1: Prepare the Ingredients

Before you begin assembling your Matjesbrötchen, ensure all the necessary components are ready:

  • Matjes (Pickled Herring): If you purchased pre-marinated Matjes, ensure the fish is well-drained. You may want to remove excess liquid from the herring to prevent the sandwich from becoming soggy. If the Matjes is too large, cut it into smaller pieces (about 2-3 inches long) for easier handling and to fit well in the bread rolls.
  • Brötchen (Bread Rolls): Slice your bread rolls horizontally, but don’t slice all the way through, leaving a small hinge for ease of use. Optionally, lightly toast the rolls to enhance their crunch and add a layer of texture that complements the fish.
  • Onions: Thinly slice the onions to ensure they don’t overwhelm the dish. You can also soak them in a little water or vinegar for a few minutes if you prefer a milder taste.
  • Fresh Dill: Finely chop fresh dill leaves to scatter over the Matjes for an aromatic and refreshing taste.

Step 2: Assemble the Matjesbrötchen

The most exciting part of the process is assembling your Matjesbrötchen. Follow these steps:

  1. Open the Brötchen: Lay your bread roll flat with the sliced side facing up.
  2. Layer the Matjes: Place the pieces of pickled herring on the bottom of the roll. Spread them out so the fish is evenly distributed, allowing each bite to have a generous portion of Matjes.
  3. Add the Onions: Sprinkle the thinly sliced onions evenly over the fish. The sharpness and crunch of the onions provide a nice contrast to the soft, pickled herring.
  4. Sprinkle Fresh Dill: Add a sprinkle of freshly chopped dill over the fish and onions. The dill adds brightness and freshness to the sandwich, and its distinctive flavor beautifully complements the richness of the herring.
  5. Optional Additions: This is the point where you can get creative with your Matjesbrötchen. If you’re using optional ingredients like pickles, capers, or a drizzle of sour cream, now’s the time to add them. Place the pickles or capers on top, or spread a thin layer of sour cream over the top of the herring. The creaminess enhances the overall texture and flavor of the sandwich.

Step 3: Close and Serve

Once you’ve assembled the Matjesbrötchen, gently close the sandwich. Make sure it’s not too tightly packed, as you still want a comfortable bite with room to experience the textures and flavors of each ingredient. If desired, you can lightly press the sandwich together to make it more stable.

At this point, your Matjesbrötchen is ready to serve! You can either serve it immediately as a casual, handheld meal, or for a more elegant presentation, you could plate it and garnish with a few extra sprigs of fresh dill or a slice of lemon on the side for an added touch of freshness.


Step 4: Additional Tips for Serving

  • Side Dishes: Matjesbrötchen can be served with light side dishes such as a green salad, coleslaw, or potato salad. These sides provide a nice balance to the richness of the Matjes and the crunch of the bread.
  • Drink Pairings: Matjesbrötchen pairs wonderfully with light beverages, such as beer or a crisp white wine. For a non-alcoholic option, a cold sparkling water with a slice of lemon is refreshing and complements the tanginess of the herring.
  • Serving Time: Serve your Matjesbrötchen immediately after assembling for the freshest taste. While it’s best enjoyed fresh, if left to sit for a short time, the sandwich may absorb more of the brine from the herring, making it slightly juicier.

Tips for Perfecting Your Matjesbrötchen:

  1. Balance the Fish to Bread Ratio: Ensure that the herring is the star of the dish without overwhelming the bread. The bread should complement the fish, not compete with it.
  2. Taste Test the Matjes: Before assembling, taste the Matjes to check for the right amount of tang and saltiness. If it’s too salty, rinse the fish briefly in cold water before using it.
  3. Use Quality Bread: Opt for freshly baked, high-quality Brötchen. The texture and freshness of the bread are just as important as the filling in making the perfect Matjesbrötchen.

Tips for Serving and Pairing Matjesbrötchen

Classic Matjesbrötchen Sandwich with Pickled Herring and Fresh Toppings
An irresistible Matjesbrötchen sandwich highlighting pickled herring fillets, crisp lettuce, and sliced onions, all nestled in a fluffy bread roll. A delicious taste of Northern Germany’s culinary tradition.

Matjesbrötchen is a simple yet refined dish, and the way you serve and pair it can elevate the experience. Whether you’re serving it as a quick snack, a casual meal, or at a gathering, there are various ways to make the most of this flavorful sandwich. The right side dishes, beverages, and even the presentation can turn your Matjesbrötchen into a memorable dining experience. Here are some expert tips to enhance both your Matjesbrötchen and its accompaniments.


1. Serve Fresh and Simple for the Best Experience

Matjesbrötchen is best enjoyed fresh and made just before serving. The delicate balance of flavors and textures, particularly the tenderness of the pickled herring and the crunch of the bread, is most pronounced when consumed shortly after assembly.

  • Serve Immediately: After assembling your Matjesbrötchen, serve it straight away. If allowed to sit too long, the bread may become soggy from the brine, and the freshness of the sandwich will be compromised.
  • Serve with Extra Dill: Fresh dill can enhance the fragrance and taste of the sandwich. Sprinkle a little extra on top for an aromatic finish before serving.

2. Pairing with Light, Fresh Side Dishes

Matjesbrötchen is naturally rich with the flavor of pickled herring and the softness of bread. To keep the meal balanced, it’s ideal to serve it with light, refreshing side dishes that contrast the richness of the sandwich.

  • Green Salad: A crisp green salad with a light vinaigrette dressing works wonderfully as a side. The tangy dressing in the salad can help balance the saltiness of the Matjes, while the freshness of lettuce, cucumbers, or arugula adds texture and contrast.
  • Potato Salad: If you’re looking for something heartier, a traditional German potato salad is a great complement. The creamy yet tangy flavor of the salad pairs well with the fish, and it provides a satisfying counterpoint to the sandwich.
  • Pickled Vegetables: Since Matjes is already pickled, you might opt for pickled cucumbers or gherkins on the side. Their mild acidity provides a nice counterbalance to the sweetness and richness of the Matjes.
  • Crispy Fries or Roasted Potatoes: For a more indulgent option, crispy fries or roasted potatoes with a little rosemary and sea salt would also complement the Matjesbrötchen, enhancing the flavor profile without overpowering it.

3. Pairing Drinks to Enhance the Experience

The type of drink you choose can accentuate the flavors in your Matjesbrötchen, helping to clean your palate between bites or accentuating the richness of the dish. Here are some ideal drink pairings:

  • Beer (Especially Lager or Pilsner): In Germany, beer is a classic drink pairing for any fish dish, and Matjesbrötchen is no exception. A light lager or pilsner beer, with its crispness and subtle bitterness, is an ideal match. The beer’s refreshing qualities cleanse the palate and complement the saltiness of the fish.
  • White Wine (Dry or Crisp): A dry, crisp white wine, such as a Riesling or Sauvignon Blanc, is an excellent choice. These wines have a nice balance of acidity that pairs well with the creamy and tangy notes of the pickled herring. They also work well with the freshness of any side dishes, like salads or pickled vegetables.
  • Seltzer or Sparkling Water: For a non-alcoholic alternative, cold sparkling water or seltzer with a slice of lemon or lime can be a refreshing accompaniment. The fizziness and acidity help cut through the richness of the fish, leaving your taste buds refreshed between bites.
  • Cider: If you’re looking for something slightly sweeter, a crisp, dry apple cider can add an intriguing flavor contrast. The apple’s fruitiness pairs nicely with the herring’s tang, and the bubbles enhance the lightness of the sandwich.

4. Garnishing for Visual Appeal

Matjesbrötchen is not only a treat for your taste buds but also for your eyes. Presentation can make your meal feel even more inviting. Adding garnishes and serving it neatly can elevate your dining experience.

  • Lemon Wedges: A wedge of lemon placed on the plate can be squeezed over the Matjesbrötchen to add a bit of fresh acidity and enhance the flavor of the pickled fish.
  • Fresh Dill Sprigs: Garnish the sandwich with fresh sprigs of dill to add a touch of elegance and fragrance. This simple garnish complements the flavors of the fish and adds visual appeal.
  • Cucumber Slices: Adding a few thin slices of cucumber as a garnish can make the sandwich look more appetizing while providing a light crunch that contrasts with the tenderness of the herring.

5. Perfecting the Presentation

Besides garnishes, presentation can involve how you cut or serve your Matjesbrötchen.

  • Open-Faced Style: In traditional German fashion, serve the Matjesbrötchen open-faced (i.e., without top bread), allowing the fillings to be visible and adding an aesthetic touch.
  • Plating for Gatherings: If serving more than one person, consider plating the sandwiches in individual servings, each with their own small garnish of dill, onions, and fresh vegetables. This makes it feel more like a well-prepared meal than a casual snack.
  • Baskets or Wooden Trays: For rustic flair, serve the Matjesbrötchen in a small basket or on a wooden tray. It enhances the traditional German look and feel of the dish.

6. Adding Variations for Different Occasions

While Matjesbrötchen is traditionally served in a simple manner, you can customize it to suit different occasions.

  • For a Breakfast or Brunch: Serve Matjesbrötchen with hard-boiled eggs, freshly sliced tomatoes, or even a bit of butter on the Brötchen for extra richness.
  • For a Special Occasion: If preparing Matjesbrötchen for a festive gathering, consider serving small finger-sized portions as appetizers. These bite-sized versions are great for appetizers at parties or family gatherings.
  • For a Modern Twist: If you’re feeling adventurous, experiment with adding other elements like avocado, tomato slices, or even a dash of hot sauce for a contemporary take on this classic dish.

Conclusion

Matjesbrötchen isn’t just a recipe; it’s a journey through the culinary heritage of Northern Germany. From its humble origins as a quick street food staple to its status as a beloved cultural dish, this sandwich holds a special place in the hearts of food lovers. The combination of pickled herring, fresh toppings, and soft bread makes it a unique, flavorful experience that stands out from everyday meals.

By trying this recipe at home, you’re not just preparing a delicious dish but also paying homage to a rich tradition. It’s a dish that reflects simplicity and authenticity, proving that great food doesn’t need to be complicated. With readily available ingredients and a straightforward preparation process, Matjesbrötchen is an excellent way to introduce yourself and your loved ones to the vibrant flavors of Germany.

Taste the Best Taco Soup Fritos Recipe for Your Next Meal

Bowl of Delicious Taco Soup Topped with Crunchy Fritos

Introduction

Taco soup is a true celebration of flavors that brings the vibrant taste of Tex-Mex cuisine straight to your dining table. It’s a warm, hearty, and incredibly satisfying dish that combines the rich goodness of beans, ground beef, tomatoes, and bold spices. Whether you’re hosting a family dinner, enjoying a cozy night in, or looking for a quick one-pot meal, taco soup has you covered.

What sets this taco soup recipe apart, however, is the unique addition of Fritos. These crispy corn chips add an irresistible crunch, making every spoonful a delightful mix of textures. Not only are Fritos the perfect finishing touch, but they also take the overall flavor experience to the next level.

This dish is beloved by many for its ease of preparation and versatility. You can customize it to suit your taste, experiment with toppings, or even make it vegetarian-friendly. In this blog, you’ll learn how to create the best taco soup with Fritos, complete with step-by-step instructions, helpful tips, and plenty of ideas to make it uniquely yours.

Prepare to fall in love with this comforting and flavorful recipe that’s guaranteed to become a staple in your kitchen!


Here is the link: How to Make the Best Taco Soup Fritos Recipe in Just 30 Minutes

What Makes Taco Soup with Fritos Special?

Bowl of Delicious Taco Soup Topped with Crunchy Fritos
A hearty bowl of taco soup with Fritos, topped with cheese, sour cream, and fresh cilantro—perfect for your next meal!

Taco soup is a beloved dish in Tex-Mex cuisine, but adding Fritos elevates it from a simple meal to a uniquely satisfying experience. Here are several reasons why this combination is special and worth trying:


1. Irresistible Crunch and Texture
Fritos, with their iconic crispy texture, provide a delightful contrast to the soup’s creamy, hearty base. Unlike traditional crackers or bread, Fritos remain crunchy even when soaked in the flavorful broth, making every bite exciting. The corn flavor of Fritos also complements the bold, spicy notes of the soup, creating a harmonious taste profile.


2. A Crowd-Pleaser for All Ages
The addition of Fritos makes taco soup a hit across all age groups. Kids enjoy the playful, finger-food aspect of adding chips to their meal, while adults appreciate the comfort and nostalgia associated with this combination. Whether for a family dinner, a game-day gathering, or a potluck, this dish pleases even the pickiest eaters.


3. Versatility in Serving
Taco soup with Fritos isn’t just a meal—it’s an experience. Serve it as a comforting dinner on cold nights, as an appetizer for a Tex-Mex-themed party, or even as part of a build-your-own soup bar where guests can customize their toppings. Fritos add a layer of fun and creativity, allowing diners to control the amount of crunch and flavor in each bite.


4. Amplifies Tex-Mex Authenticity
Fritos have a long history in Tex-Mex and Southern cuisine. Incorporating them into taco soup not only enhances the flavor but also adds an authentic Tex-Mex touch. This makes the dish feel closer to its cultural roots while still offering room for innovation and personalization.


5. Budget-Friendly and Convenient
Using Fritos as a topping is an inexpensive way to elevate your taco soup. A single bag of Fritos is affordable, widely available, and perfect for adding that extra flair without the need for complicated or expensive ingredients.


6. Perfect Fusion of Flavors
The salty crunch of Fritos combined with the hearty, savory flavor of taco soup creates a fusion that’s hard to resist. Each spoonful delivers a balance of tender beans, juicy ground beef, zesty tomatoes, and smoky seasonings, all accented by the crunchy goodness of Fritos on top.


By combining the rich, hearty flavors of taco soup with the delightful crunch of Fritos, you’re not just making a meal—you’re creating a dish that’s unique, fun, and unforgettable. This pairing is what makes taco soup with Fritos a favorite for gatherings, comfort food cravings, and Tex-Mex enthusiasts everywhere

Ingredients You’ll Need for the Best Taco Soup Recipe

Taco Soup with Fritos and Toppings in a Bowl
Delicious taco soup served in a bowl with Fritos, cheese, and sour cream—perfectly satisfying for any meal.

Creating the perfect taco soup with Fritos requires a combination of basic, everyday ingredients that come together to form a flavorful, hearty dish. Below, we’ve broken down the essential components that will turn your taco soup into a beloved favorite—whether it’s for a weeknight dinner, game day, or a comforting meal to share.


1. Ground Beef (or Substitutes)

The base of the soup usually includes ground beef, which brings richness and savory flavor to the dish. You can opt for lean ground beef to reduce the fat content or use ground turkey for a lighter, leaner alternative. If you’re going vegetarian, use a mix of beans or lentils as a substitute. The protein in this base helps make the soup filling, turning it into a satisfying meal on its own.


2. Beans: Black, Kidney, or Pinto

Beans are an essential part of taco soup. They not only add depth to the soup’s texture but also a hearty and nutritional aspect. Black beans, kidney beans, and pinto beans are all popular choices. Beans help create a nice contrast to the richness of the beef while contributing to the dish’s fiber and protein. For added variety, mix different types of beans, or choose one to highlight in your soup.


3. Diced Tomatoes and Tomato Sauce

Diced tomatoes and tomato sauce are the base of your soup’s rich, flavorful broth. The tomatoes provide natural sweetness and acidity, balancing the earthiness of the beans and beef. Tomato sauce smooths out the texture and adds a slightly tangy depth that makes this dish so comforting. A can of Rotel (diced tomatoes with chilies) is also a great option for those who enjoy a spicy kick.


4. Onion and Garlic

Onions and garlic serve as aromatic foundations, offering savory and slightly sweet notes to enhance the soup’s overall flavor. As you sauté the onions and garlic, they release essential oils that elevate the depth of the dish. Red or yellow onions work well, and you can easily increase or decrease the amount of garlic based on your preference for bold flavor.


5. Taco Seasoning (or Homemade Blend)

No taco soup would be complete without taco seasoning, the perfect blend of spices that infuses the soup with the signature Tex-Mex flavor. Commercial taco seasoning is quick and convenient, but you can make your own by combining chili powder, cumin, paprika, onion powder, garlic powder, oregano, and cayenne pepper. Adjust the spice levels to fit your taste—this way, you control the heat and intensity.


6. Broth (Beef, Chicken, or Vegetable)

The broth brings everything together, making it easier for the soup to cook and blend flavors. Beef broth provides a deep, savory base, while chicken or vegetable broth works well for lighter versions. Using broth instead of water creates a richer, more flavorful soup, and if you want a slightly thicker consistency, add just a bit less liquid.


7. Fritos (For Topping)

The star of the taco soup’s crunch factor—Fritos. This classic corn chip adds an irresistible crunch that beautifully contrasts the smooth broth and tender ingredients. The saltiness of the chips helps elevate the flavor of the entire dish, and they maintain their crunch even when submerged in the soup. For those wanting more flavor, consider trying different varieties of Fritos, like the chili cheese version, for an extra savory kick.


8. Optional Toppings

Toppings are what turn taco soup into a personalized meal. Customize your dish with sour cream, shredded cheddar cheese, shredded lettuce, sliced avocado, fresh cilantro, or chopped green onions. Each topping adds a different layer of texture and flavor, and you can mix and match to your preferences. Jalapeños are a great option for spice lovers, while a squeeze of lime adds a refreshing citrus burst.


9. Fresh Herbs (Optional)

Fresh herbs like cilantro can add a touch of brightness to taco soup, balancing out the rich flavors and adding freshness. Garnish each bowl with freshly chopped cilantro before serving to give your taco soup a vibrant pop of color and flavor. This can be a crucial step in achieving the perfect flavor balance between the hearty base and fresh, crisp toppings.


Step-by-Step Guide to Making Taco Soup with Fritos

Bowl of Taco Soup with Fritos Toppings
A comforting bowl of taco soup topped with crunchy Fritos, melted cheese, and a dollop of sour cream—perfect for any meal.

These simple ingredients come together in one pot to create an outstanding taco soup experience. By layering textures—from the tender soup base to the crunchy Fritos on top—and balancing rich and tangy flavors, you’re sure to have a taco soup that will satisfy everyone at the table. Whether you prefer classic or spicy variations, you can easily adjust each component to suit your taste.

Creating a comforting bowl of taco soup topped with crunchy Fritos is simple and can be done in just a few easy steps. Whether you’re an experienced cook or just starting, this guide will walk you through the process with clear instructions and tips to make your taco soup delicious every time.


Step 1: Prepare Your Ingredients

Before diving into the cooking process, it’s important to have everything ready. Start by chopping your vegetables, draining your cans of beans and tomatoes, and having your broth, seasonings, and Fritos at hand. This will make the cooking process smooth and quick, especially when you’re multitasking in the kitchen.

  • Chop: Dice one onion and mince your garlic.
  • Drain: Empty the cans of beans (black beans, kidney beans, and pinto beans are ideal) and canned diced tomatoes.
  • Gather spices: Ensure your taco seasoning, cumin, paprika, and other spices are at hand for quick addition.

Step 2: Brown the Ground Beef

Start by heating a large pot or Dutch oven over medium heat. Add the ground beef and break it up with a spatula or spoon as it cooks. Stir occasionally until the beef is browned and cooked through. This step ensures you develop a rich, meaty base for your soup. Once the beef is cooked, drain excess fat, if necessary, to keep the soup from becoming greasy.


Step 3: Add Aromatics (Onion and Garlic)

Once the beef is cooked and drained, toss in the diced onion and minced garlic. Let them sauté for about 3-4 minutes until the onion becomes soft and translucent. The garlic should become fragrant. This step will deepen the flavor of the soup and serve as a base for the spices.


Step 4: Add the Tomato Base and Broth

To build the rich, flavorful broth, pour in the diced tomatoes, tomato sauce, and your broth of choice (beef, chicken, or vegetable). Stir well to combine and bring everything together. As the liquid simmers, the tomatoes and broth form a comforting base that’ll soak up the spices you’ll add next.


Step 5: Season the Soup

Now it’s time to infuse the soup with flavor! Add your taco seasoning, chili powder, cumin, paprika, and a pinch of salt and pepper. Stir everything thoroughly to ensure the spices are evenly distributed. Adjust the seasoning to your preference—add extra chili powder or cayenne pepper if you like more heat. Simmer the mixture for 15-20 minutes, allowing the flavors to meld together.


Step 6: Stir in the Beans

Once the soup is well-seasoned, it’s time to add your beans. Drain and rinse your canned beans (black beans, kidney beans, or pinto beans) and stir them into the soup. This will not only make the soup more filling, but the beans will absorb the flavors from the broth, creating an even tastier result. Let the soup continue simmering for another 5-10 minutes, until the beans are heated through.


Step 7: Adjust the Consistency (Optional)

At this point, check the consistency of your soup. If you like a thicker soup, let it cook uncovered for a few extra minutes to allow the broth to reduce. If the soup is too thick for your liking, add a little more broth or water until it reaches your desired consistency.


Step 8: Prepare Toppings

While the soup simmers, get your toppings ready! Shredded cheddar cheese, sour cream, chopped fresh cilantro, and avocado slices are perfect for adding rich creaminess, crunch, and freshness. Be sure to also have Fritos (or other corn chips) handy for the signature crunch. Place these toppings in bowls or on a platter for easy access when serving the soup.


Step 9: Serve and Enjoy

Once the soup is perfectly seasoned and the beans are cooked through, it’s time to serve! Ladle the soup into bowls and top with your choice of shredded cheese, a dollop of sour cream, a few slices of avocado, and a generous portion of Fritos. You can even squeeze a lime wedge over the top for a burst of citrus. Serve the soup immediately while hot, and enjoy the comforting flavors of this delicious taco soup.


Tips for Success

  • Customize the spices: Feel free to adjust the seasoning according to your tastes. You can make it spicier by adding diced jalapeños or hot sauce, or mellow it out with less chili powder.
  • Add more veggies: Want to make the soup healthier? Toss in some diced bell peppers, corn, or spinach in the last 10 minutes of cooking.
  • Leftovers: Taco soup stores great in the fridge for up to 3 days, and it also freezes well. If you have leftovers, allow them to cool to room temperature before storing them in an airtight container in the fridge or freezer.

By following these simple steps, you’ll have a warm and savory taco soup in no time. The rich flavor, comforting textures, and the satisfying crunch of Fritos will make this soup a new favorite for any occasion

Pro Tips for the Perfect Taco Soup Every Time

Bowl of Taco Soup Topped with Fritos and Fresh Garnishes
Savor the richness of taco soup topped with crunchy Fritos, shredded cheese, and a dollop of sour cream—perfect for any gathering or family meal.

Making the perfect taco soup can be easy, but the key to a flawless version lies in the details. Whether you are a beginner in the kitchen or a seasoned cook, following a few professional tips can help take your taco soup to the next level. Here’s how to ensure your soup is always a hit with family and friends:


1. Brown the Meat Thoroughly

For a rich, meaty flavor base, make sure to brown your ground beef (or any other meat you are using) thoroughly. Don’t rush this step. Cooking the meat for several minutes will allow it to develop a nice caramelization on the surface, which adds depth to the flavor. After browning the meat, don’t forget to drain off any excess fat, especially if you are using fattier cuts like ground beef with higher fat content. Too much grease can make the soup greasy and affect its taste.


2. Layer Your Seasoning

Rather than simply adding all your taco seasoning at once, try adding it in stages. Begin by sprinkling some seasoning over the meat as it browns—this allows the spices to infuse into the meat. After that, once you add the broth and tomatoes, sprinkle in some more seasoning. You can also adjust the seasonings throughout the cooking process if the flavors need more depth or heat. This layering effect helps your taco soup develop a more complex, balanced flavor profile.


3. Use High-Quality Broth

The base liquid in any soup is a critical component of flavor, and taco soup is no exception. Opt for high-quality broth to avoid bland or overly salty results. Homemade broth is always best, but if you’re using store-bought, choose a low-sodium option to better control the salt levels. A beef broth or chicken broth with a rich flavor base will enhance the overall depth and complement the spices.


4. Customize the Heat Level

Not all tacos (or taco soup!) are made the same when it comes to spice. To tailor the heat to your liking, start with milder seasoning and increase the heat incrementally. Fresh jalapeños, hot sauce, or cayenne pepper can elevate the soup’s spiciness. To make the soup milder, you can leave out the jalapeños or use only a small amount of hot sauce. For a little sweetness without compromising heat, adding a touch of honey or sugar can balance the heat from the peppers.


5. Incorporate Fresh Herbs for Extra Flavor

Fresh herbs like cilantro can enhance the flavor of your taco soup without overpowering it. Stir chopped cilantro into the soup just before serving to preserve its fresh, zesty notes. For an extra layer of flavor, garnish with cilantro on top along with lime wedges, which can provide a burst of citrus to contrast with the richness of the broth.


6. Make It a One-Pot Wonder

To simplify cleanup and create a rich, infused flavor, use just one pot to make your taco soup. By simmering everything in the same pot, the flavors meld and intensify, especially the meat and beans. In addition, cooking everything in one pot allows the spices, tomatoes, and broth to blend together seamlessly, creating a cohesive, delicious soup.


7. Add Extra Veggies

While taco soup is typically hearty, you can elevate the dish by adding extra vegetables for more texture and nutrition. Add diced bell peppers, zucchini, spinach, or corn during the simmering stage for added flavor and a color boost. These veggies will soak up the spices and broth, absorbing flavor as the soup cooks. Not only does this add a nutritious boost, but it also gives the soup a more interesting texture.


8. Adjust the Consistency to Your Liking

Everyone has a preference when it comes to the texture of their soup. If you prefer a thicker soup, you can puree a portion of the soup (beans, tomatoes, and broth) with an immersion blender. If you want a thinner, brothy soup, simply add more broth or water as needed. If you like a hearty, chunky soup, let it simmer without blending or thinning the liquid, so the soup retains its robust texture.


9. Top It Right

The toppings are one of the best parts of taco soup, and to elevate your dish, don’t be afraid to go a little extra with your garnishes. Fritos are a classic crunchy topping, but consider adding a variety of garnishes like chopped onions, shredded lettuce, salsa, chopped green onions, diced avocado, shredded cheese, or a dollop of sour cream. Toppings add flavor, texture, and color, making the dish even more satisfying and visually appealing.


10. Let It Sit

If you have the time, let your taco soup rest for about 10-15 minutes after cooking. This helps the flavors marry and intensifies the overall taste. Often, letting soup sit overnight can make the flavor even better, as the spices and ingredients have time to meld.


11. Double the Recipe for Future Meals

Taco soup is the kind of dish that tastes even better the next day, so doubling the recipe will not only save you time in the future, but also ensure you have a quick and delicious meal ready for another day. Store leftovers in an airtight container in the fridge for up to 3 days or freeze them for up to 3 months.

Why This Taco Soup Recipe Will Become Your Favorite

Bowl of Taco Soup with Fritos and Fresh Toppings
A bowl of flavorful taco soup topped with crunchy Fritos, cheese, sour cream, and fresh cilantro—a meal that’s both comforting and irresistible.

When it comes to comfort food, a hearty taco soup topped with crunchy Fritos is hard to beat. This recipe is more than just a meal—it’s a go-to dish for anyone seeking flavor, convenience, and satisfaction. Here’s why this taco soup recipe will likely earn a permanent spot on your menu rotation:


1. Simple and Quick to Make

With this recipe, preparing a delicious and filling meal becomes a breeze. Using pantry staples like canned beans, tomatoes, and basic spices, you can have this taco soup simmering in under 15 minutes. It’s perfect for busy weeknights when you need something quick yet wholesome for your family. Plus, the one-pot approach makes cleanup just as easy as cooking.


2. Loaded with Flavor

This recipe masterfully combines savory ground beef, hearty beans, tangy tomatoes, and a blend of Tex-Mex spices for a taste explosion in every bite. The addition of crunchy Fritos adds a satisfying contrast that elevates the dish to a whole new level. Top it with shredded cheese, sour cream, or avocado slices, and you’ve got a bowl packed with bold and balanced flavors.


3. Highly Versatile

One of the best things about this taco soup recipe is its versatility. Whether you’re feeding a crowd, catering to dietary preferences, or looking to use up leftover ingredients, this soup adapts easily:

  • Vegetarian-friendly: Swap the meat for extra beans or lentils.
  • Health-conscious: Use low-sodium or reduced-fat ingredients for a lighter option.
  • Customizable toppings: From green onions to jalapeños, the possibilities are endless.

4. Great for Meal Prepping

This recipe tastes even better the next day, as the flavors have more time to meld together. It’s perfect for meal prepping—just prepare a big batch, refrigerate it in airtight containers, and reheat portions whenever needed. Whether you want a quick lunch or an easy dinner solution, this taco soup has you covered.


5. Crowd-Pleasing and Family-Friendly

This recipe is universally loved by kids and adults alike. The playful crunch of Fritos entices little ones, while the robust and hearty flavors satisfy adult palates. Serve it at family gatherings, potlucks, or game nights, and watch it disappear from the table. It’s guaranteed to be a hit!


6. Budget-Friendly Without Compromising Taste

If you’re looking for a delicious meal that doesn’t break the bank, this taco soup is the answer. Most ingredients are pantry staples, and the recipe is designed to maximize flavor with minimal expense. It’s a perfect example of how simple ingredients can create a gourmet-tasting dish.


This taco soup recipe combines convenience, versatility, and rich flavors, making it a top contender for your favorite homemade dish. Whether it’s a cozy winter evening or a quick weekday meal, this recipe delivers warmth and satisfaction every time.

Conclusion

Taco soup with Fritos is the ultimate comfort food that brings the bold, savory flavors of Mexican cuisine into a bowl. This recipe not only satisfies the taste buds with its perfect balance of spices, hearty beans, and tender meat, but also delivers on texture with crunchy Fritos and creamy toppings. Whether you’re making it for a weeknight dinner, a casual family gathering, or a special occasion, this dish is sure to impress everyone at the table.

The beauty of taco soup lies in its versatility—it can easily be customized to suit different dietary preferences, such as adding more veggies, adjusting the spiciness level, or opting for alternative proteins. By following the simple steps in this recipe and using a few expert tips, you can create a soup that’s rich, flavorful, and enjoyable every time you make it.

Don’t be afraid to get creative with your toppings—add your favorite garnishes like fresh cilantro, diced avocado, or a squeeze of lime for an extra punch of freshness. With its bold flavors and hearty ingredients, taco soup with Fritos is more than just a meal; it’s an experience you’ll want to repeat again and again.

So the next time you’re planning a meal, make this taco soup your go-to recipe. You’ll enjoy a deliciously satisfying dish that’s easy to make, feeds a crowd, and is guaranteed to become a staple in your recipe book. Whether you’re enjoying a cozy night in or preparing food for a larger gathering, this taco soup is the perfect comfort food solution.