

Have you ever dreamed of bringing the flavors of a Swiss bakery into your own kitchen? Meet Gipfeli, Switzerland’s beloved answer to the classic croissant. With its flaky, buttery layers and irresistible aroma, Gipfeli is a staple of Swiss breakfast tables and coffee breaks. Whether you’re a seasoned baker or a beginner, this easy Gipfeli recipe will guide you step-by-step to create these delightful pastries at home.
Gipfeli (pronounced gip-feh-lee) is more than just a pastry—it’s a taste of Swiss tradition. While it shares similarities with the French croissant, Gipfeli has its own unique charm, often slightly sweeter and denser. Making Gipfeli from scratch might seem intimidating, but with a few simple ingredients and a little patience, you’ll be rewarded with golden, flaky pastries that are perfect for breakfast, brunch, or an afternoon treat.
In this blog post, we’ll walk you through everything you need to know to master the art of Gipfeli-making. From preparing the dough to shaping and baking, you’ll learn how to create authentic Swiss Gipfeli that will impress your family and friends. So, roll up your sleeves, preheat your oven, and let’s dive into this delicious homemade Gipfeli recipe
What is Gipfeli? Understanding This Swiss Pastry
Gipfeli (pronounced gip-feh-lee) is Switzerland’s answer to the classic croissant. This flaky, buttery pastry is a staple in Swiss bakeries and breakfast tables. Locals often enjoy it with a cup of coffee or hot chocolate. But what makes Gipfeli unique, and why do people love it so much? Let’s explore the story behind this delightful treat.
Gipfeli, the beloved Swiss pastry, is a crescent-shaped delight that is often enjoyed during breakfast or as an afternoon snack. Known for its flaky, buttery layers, it is similar to the French croissant but with a distinctive Swiss twist. These pastries are made with high-quality ingredients such as butter, flour, yeast, and sugar, giving them their signature taste and texture.
The history of Gipfeli dates back centuries and has evolved into a staple of Swiss culinary culture. It is often served alongside coffee or hot chocolate, making it a perfect treat for any time of day. For more information about Swiss culture and food, explore the Swiss Tohttps://www.myswitzerland.com/ urism website.
If you’re looking to explore healthier or alternative baking options, check out Forks Over Knives, a great resource for healthier cooking alternatives, including plant-based recipes
Gipfeli is a beloved Swiss pastry that resembles the French croissant but has distinct characteristics. This crescent-shaped delight is a staple in Swiss bakeries, known for its rich, buttery flavor and delicate, flaky texture. Whether enjoyed as a morning treat or an afternoon snack, Gipfeli is deeply rooted in Swiss culinary culture.
How Gipfeli Differs from a Croissant
Unlike croissants, Gipfeli has a slightly denser texture and is often less buttery. The dough is typically made with flour, butter, yeast, milk, sugar, and salt, creating a pastry that is both flaky and slightly firm. Some variations use margarine instead of butter, making Gipfeli less greasy than its French counterpart.
Popular Variations and Fillings
While traditional Gipfeli remains plain, many variations cater to different tastes. Some versions incorporate whole wheat flour for a healthier twist, while others are filled with chocolate, nuts, or fruit preserves. Savory Gipfeli options also exist, featuring cheese or ham for a heartier bite.
Cultural Significance in Switzerland
Gipfeli is an essential part of Swiss breakfasts, often paired with coffee, hot chocolate, or Swiss cheese. It’s a common sight in bakeries across Switzerland, where locals grab a fresh, warm Gipfeli on their way to work or school. Beyond its delicious taste, this pastry represents the country’s rich baking traditions.
The Difference Between Gipfeli and a Croissant
At first glance, Gipfeli and croissants may look nearly identical, as both share a crescent shape and a flaky, golden-brown crust. However, these two pastries have distinct differences in texture, ingredients, and taste that set them apart. While croissants are a well-known French specialty, Gipfeli is a uniquely Swiss variation with its own characteristics.
1. Butter Content and Fat Composition
One of the most noticeable differences between Gipfeli and croissants is the amount of butter used in the dough. Croissants are famous for their high butter content, which contributes to their rich, airy, and melt-in-your-mouth texture. The dough undergoes an intensive lamination process, creating hundreds of delicate layers that puff up during baking.
In contrast, traditional Gipfeli contains less butter, resulting in a slightly denser and firmer texture. Some Swiss bakeries even use margarine instead of butter, making Gipfeli less greasy but also less rich in flavor compared to croissants.
2. Flakiness and Texture
Croissants are known for their extreme flakiness and crispiness, achieved through multiple layers of butter and dough being folded repeatedly. When you bite into a croissant, the outer layers shatter into crisp flakes, revealing a soft, airy interior.
Gipfeli, while still light and flaky, has a slightly more compact and structured crumb. The texture is less airy than a croissant, making it easier to handle without excessive crumbling. This difference makes Gipfeli a more practical on-the-go breakfast option for Swiss locals.
3. Ingredients and Dough Preparation
The classic croissant dough requires high-fat butter, milk, flour, yeast, sugar, and salt, with a careful lamination process to create its iconic flaky structure. Gipfeli dough uses a similar base but often includes less butter and may incorporate other ingredients such as eggs or milk for a slightly different consistency.
Additionally, some Gipfeli recipes use margarine instead of butter, making them slightly less indulgent than traditional croissants. This change in ingredients alters both the flavor and the final texture of the pastry.
4. Taste and Flavor Profile
Croissants have a rich, buttery flavor with a delicate sweetness, making them perfect for pairing with jams, chocolate, or savory fillings like ham and cheese. Their high butter content gives them a luxurious mouthfeel that melts as you eat.
Gipfeli, on the other hand, has a more neutral flavor, making it versatile for both sweet and savory pairings. It lacks the strong butter-forward taste of a croissant but still provides a delightful, slightly chewy bite with a hint of sweetness.
5. Baking Process and Final Appearance
Both pastries go through a proofing stage before baking, but croissants typically require a longer resting time to allow the butter to fully integrate into the dough. Gipfeli can sometimes be made with a shorter proofing time, leading to its firmer texture.
Visually, croissants often have a more pronounced puffiness and separation between layers, whereas Gipfeli has a smoother, slightly tighter structure. Some versions of Gipfeli are even made with a brioche-style dough, further differentiating them from croissants.
A Brief History of Swiss Gipfeli
Gipfeli, Switzerland’s take on the crescent-shaped pastry, has a rich history that intertwines with the evolution of European baked goods. While it shares similarities with the French croissant, Gipfeli has developed its own distinct identity, reflecting Swiss baking traditions and preferences.
Origins of the Crescent-Shaped Pastry
The history of crescent-shaped pastries dates back several centuries. Some historians trace their origins to the Austrian Kipferl, a pastry that existed as early as the 13th century. Kipferl, a predecessor to both the croissant and Gipfeli, was often made with a denser, less flaky dough, and it came in both sweet and savory variations.
The crescent-shaped pastry gained wider recognition when Viennese bakers introduced it to France in the late 17th century. This was after the Battle of Vienna (1683), where Austria successfully defended itself against the Ottoman Empire. According to legend, bakers created the Kipferl in the shape of a crescent—a symbol from the Ottoman flag—to celebrate the victory. Over time, the French refined the recipe into what we now know as the croissant.
Introduction of Gipfeli to Switzerland
Switzerland, with its diverse cultural influences from France, Germany, and Austria, naturally adopted and adapted the crescent-shaped pastry. The Swiss version, Gipfeli, was influenced by both the Austrian Kipferl and the French croissant but developed its own unique characteristics. Unlike the heavily laminated French croissant, Gipfeli typically contains less butter, making it slightly denser and more practical for everyday consumption.
Swiss bakeries began producing Gipfeli as a breakfast staple, and it quickly became a popular choice alongside coffee, hot chocolate, or cheese. Unlike croissants, which are often associated with indulgence, Gipfeli has been positioned as a more accessible, everyday pastry in Swiss households.
Why Gipfeli is a Staple in Swiss Breakfast
Gipfeli holds a special place in Swiss breakfast culture, enjoyed by people across the country as part of a traditional, comforting morning meal. This crescent-shaped pastry has become a staple in Swiss households, cafés, and bakeries, offering a delicious and convenient way to start the day. Its popularity stems from a combination of taste, tradition, and practicality, making it a beloved choice for both casual and formal breakfast settings.
A Perfect Balance of Taste and Texture
One of the key reasons Gipfeli is a staple in Swiss breakfasts is its perfect balance of crispiness and softness. Unlike its French counterpart, the croissant, Gipfeli is slightly less buttery and has a firmer texture, making it more versatile. The light, airy layers of the pastry provide a satisfying crunch on the outside while remaining tender and slightly chewy on the inside.
For those who prefer a sweet start to the day, Gipfeli can be paired with jam, honey, or chocolate spread. Others enjoy it plain or with butter, letting the rich, subtly sweet flavors of the pastry shine. There are also savory versions, such as cheese or ham-filled Gipfeli, which add a more substantial and hearty touch to breakfast.
A Convenient and Portable Breakfast Option
In Switzerland, where people often have busy morning schedules, Gipfeli serves as a quick and convenient breakfast choice. Many Swiss enjoy it as part of a grab-and-go breakfast, picking one up from a bakery or supermarket on their way to work or school. The pastry’s size and shape make it easy to eat on the move, making it a practical option for those who don’t have time for a sit-down meal.
Additionally, Gipfeli is commonly found in Swiss train stations, coffee shops, and bakeries, ensuring that people can enjoy a fresh pastry no matter where they are. Many workplaces and offices also offer Gipfeli as a morning snack, reinforcing its role in Swiss breakfast culture.
A Symbol of Swiss Morning Tradition
Beyond convenience, Gipfeli is deeply tied to Swiss breakfast traditions. On weekends or special occasions, families often gather around the breakfast table with a basket of fresh Gipfeli, accompanied by coffee, tea, or hot chocolate. In hotels and guesthouses, Swiss breakfasts almost always include a selection of freshly baked Gipfeli, reflecting their cultural significance.
In many regions of Switzerland, Gipfeli is enjoyed alongside muesli, yogurt, and fresh fruit, creating a balanced breakfast that combines flavors, textures, and nutrients. While muesli represents the healthy side of Swiss breakfasts, Gipfeli brings a touch of indulgence, making it a well-rounded meal.
Gipfeli and Swiss Coffee Culture
Another reason Gipfeli is an essential part of Swiss breakfasts is its perfect pairing with coffee. Switzerland has a strong coffee culture, with locals enjoying espresso, café crème, or cappuccino in the morning. The flaky, slightly sweet Gipfeli complements the rich, bitter notes of coffee, making it a natural breakfast choice for those who love a warm, comforting beverage to start the day.
Many Swiss enjoy dipping their Gipfeli into their coffee for a delightful mix of textures and flavors. This tradition, similar to how the French dip croissants into café au lait, adds an extra element of enjoyment to breakfast time.
Ingredients You Need for a Perfect Gipfeli Recipe
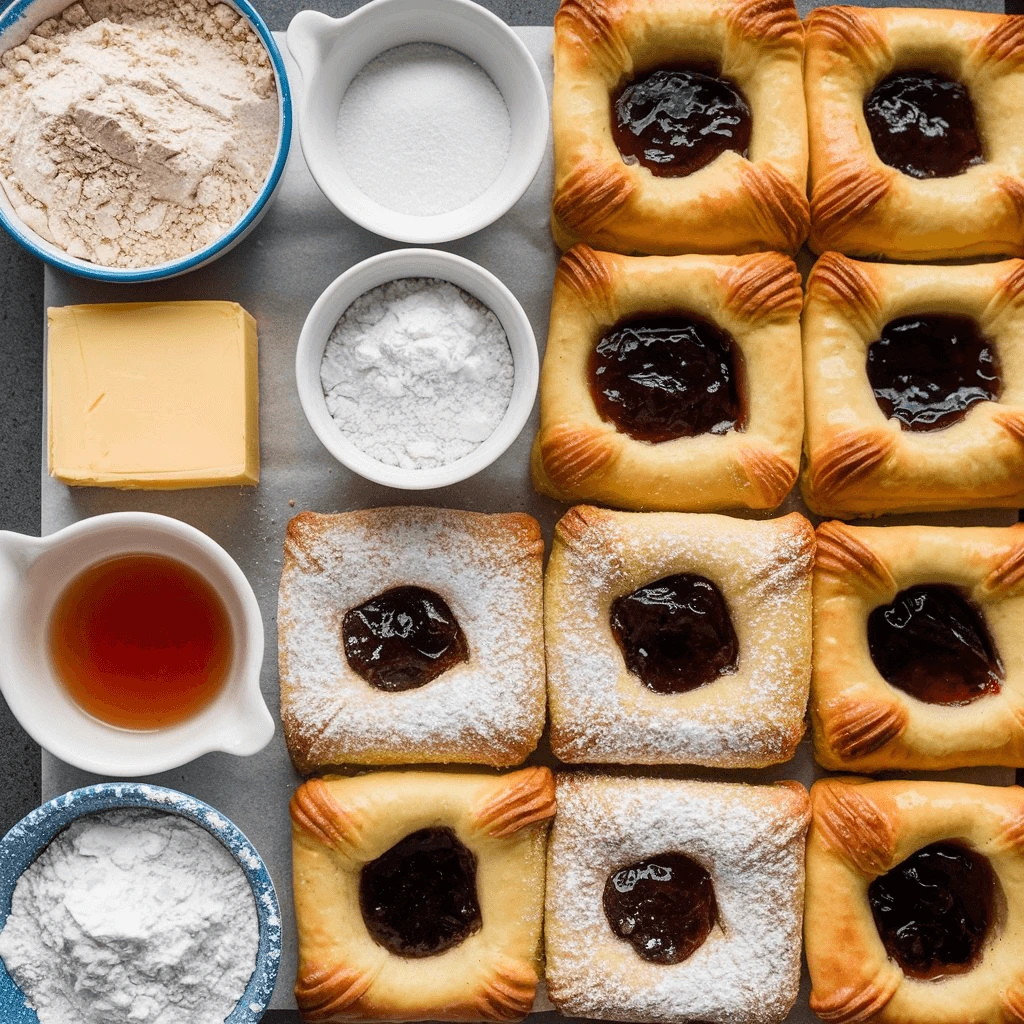
Making authentic Swiss Gipfeli requires a few key ingredients that contribute to its soft, flaky, and buttery texture. Choosing high-quality ingredients will make a big difference in the final result. Below is a breakdown of each essential ingredient and its role in the recipe.
To create a truly authentic Gipfeli, the right ingredients are essential. These simple yet high-quality ingredients come together to form the light, flaky, and flavorful pastry that makes Swiss breakfasts so memorable. Below is a breakdown of each key ingredient and its role in making a perfect Gipfeli.
1. Butter – The Heart of Flakiness
Butter plays a crucial role in creating the rich, flaky texture of Gipfeli. The layers of dough and butter that are folded together during the laminating process help create the pastry’s signature flakiness. Using unsalted butter allows you to control the amount of salt in the recipe while also enhancing the natural flavor of the pastry. Make sure the butter is cold when incorporated into the dough for the best results. This ensures that the layers don’t melt prematurely during the folding process, leading to a beautifully layered, crisp texture.
2. Flour – The Foundation of the Dough
Flour provides structure and stability to the dough. All-purpose flour is commonly used in Gipfeli recipes because it strikes the perfect balance between tenderness and strength. Too much gluten can lead to a tough pastry, so it’s essential to use the right flour type. You can also experiment with using a mixture of white and whole wheat flour if you prefer a heartier texture, although traditional Gipfeli leans towards white flour. High-quality, finely milled flour will produce a smoother, softer dough that is easier to work with, giving your Gipfeli its signature lightness.
3. Yeast – The Key to Rising
Yeast is the magic ingredient that makes the dough rise and gives the Gipfeli its light, airy texture. Active dry yeast is commonly used in this recipe, as it’s easily available and reliable. Make sure to activate the yeast properly by dissolving it in warm (not hot) water or milk with a pinch of sugar to help it bloom. This process ensures that your dough will rise beautifully and achieve the correct texture. The yeast needs to be fresh and viable to achieve the best results, so always check the expiration date.
4. Milk – Adding Moisture and Softness
Milk contributes to the dough’s moisture, helping to create a softer, more tender crumb inside the pastry. Whole milk is preferred as it adds richness, but you can substitute it with plant-based milk (like almond or oat milk) for a vegan version. Milk also adds a subtle sweetness to the dough, which pairs well with the buttery layers. If you want to create a slightly richer taste, you could even use a combination of milk and cream for a more indulgent Gipfeli.
5. Sugar – A Touch of Sweetness
A small amount of sugar is added to the dough to give the Gipfeli its slight sweetness, balancing the richness of the butter. While Gipfeli is not overly sweet like many pastries, the sugar helps to enhance the flavor and browns the pastry slightly during baking, creating that beautiful golden crust. You can experiment with alternative sweeteners such as honey, maple syrup, or coconut sugar if you want to add a unique flavor or make the recipe slightly healthier.
6. Salt – For Flavor Balance
A pinch of salt is essential in every pastry recipe. It helps to balance the sweetness, elevate the flavors, and bring out the richness of the butter. Salt also helps in the activation of yeast and controls its fermentation, contributing to the perfect rise. It’s important to add the salt to the dry ingredients before combining them with the wet ingredients to ensure even distribution throughout the dough.
Essential Ingredients (Butter, Flour, Yeast, Milk, Sugar, Salt)
Each ingredient in Swiss Gipfeli plays a crucial role in achieving the perfect flaky, golden, and buttery texture. Understanding their functions and selecting the right quality will ensure a successful result.
Flour: The Foundation of Gipfeli Dough
Flour is the base of any pastry, providing the structure and texture.
- Best Type: Use all-purpose flour or bread flour with a medium-to-high protein content (10-12%). This helps form the gluten necessary for light and airy layers.
- Why It’s Important: The gluten network traps air bubbles during fermentation, making the pastry fluffy.
- Alternatives:
- For a softer texture, mix all-purpose flour with a bit of cake flour.
- For a gluten-free version, use a gluten-free flour blend with xanthan gum, but the texture will be slightly different.
- Pro Tip: Sifting the flour before mixing helps prevent lumps and ensures even hydration.
Butter: The Secret to Flaky Layers
Butter is the key to Gipfeli’s rich flavor and delicate layers.
- Best Type: Use European-style butter (82% fat or higher), as it contains less water and more fat, giving a flakier texture. Swiss butter is ideal!
- Why It’s Important: Butter creates thin, flaky layers when folded into the dough, just like croissants.
- Alternatives:
- Vegan butter with high fat content can be used, but the results may vary.
- Margarine is an option but can make the pastry greasy.
- Pro Tip: Always use cold butter when laminating the dough to prevent it from melting into the layers.
Yeast: Helping the Dough Rise
Yeast is responsible for making Gipfeli light and airy.
- Best Type:
- Instant yeast: Can be mixed directly into the flour.
- Active dry yeast: Needs to be dissolved in warm milk before adding.
- Why It’s Important: Yeast produces carbon dioxide gas during fermentation, which expands the dough and gives it volume.
- Alternatives: If yeast is unavailable, you can use baking powder, but the texture will be more biscuit-like.
- Pro Tip: If using active dry yeast, always proof it first by mixing it with warm milk and a teaspoon of sugar. Let it sit for 5-10 minutes until foamy. If no bubbles form, your yeast is dead!
Milk: Enhancing Flavor and Texture
Milk adds moisture, tenderness, and a mild sweetness to the dough.
- Best Type: Whole milk is recommended for a richer taste.
- Why It’s Important: Milk proteins improve browning, while lactose adds slight sweetness.
- Alternatives:
- Plant-based milk (almond, oat, soy) works for a lactose-free version.
- Water can be used, but the texture will be less rich.
- Pro Tip: Always warm the milk slightly (37°C / 98°F) before mixing it with yeast to help fermentation.
Sugar: Adding Sweetness and Browning
Although Gipfeli is not overly sweet, a small amount of sugar is needed.
- Best Type: White granulated sugar is ideal for even sweetness.
- Why It’s Important: Sugar feeds the yeast, helping the dough rise faster, and improves the golden-brown color during baking.
- Alternatives:
- Coconut sugar or honey can be used but may slightly alter the taste.
- For a sugar-free version, use a sugar substitute like erythritol.
- Pro Tip: Adding too much sugar can slow yeast activity and make the dough too soft.
Salt: Balancing Flavors and Strengthening Dough
Salt is an essential ingredient that enhances flavor and controls yeast activity.
- Best Type: Fine sea salt or kosher salt works best.
- Why It’s Important: Salt regulates gluten formation, preventing the dough from becoming too sticky.
- Alternatives: Low-sodium salt can be used, but it might affect flavor slightly.
- Pro Tip: Never add salt directly to yeast! It can kill the yeast and prevent the dough from rising. Instead, mix salt with the flour first.
Final Ingredient Tips for the Perfect Gipfeli:
Use high-quality butter and flour for better taste and texture.
Keep butter and dough cold while working to create flaky layers.
Allow the dough to rest properly for better flavor development.
Use whole milk and yeast correctly to achieve a fluffy, airy texture.
Would you like me to expand on ingredient substitutions for dietary needs (e.g., vegan or gluten-free alternatives)? 😊
Choosing the Right Type of Butter for Authentic Flavor
Butter plays a crucial role in giving Gipfeli its signature rich taste, delicate layers, and golden crispiness. Selecting high-quality butter ensures the best texture and flavor, making a significant difference in the final result. This section explores the best butter options, how different types affect the dough, and essential handling techniques to achieve flaky perfection.
1. Why Butter Quality Matters in Gipfeli
Achieving the perfect Gipfeli depends on the lamination process, where butter is layered into the dough to create its distinct flakiness. The fat content directly impacts texture, flavor, and aroma, making it a key ingredient in this Swiss pastry. A higher-fat butter creates crisper layers, while lower-quality alternatives may result in a denser, less airy texture.
2. Best Butter for Making Authentic Swiss Gipfeli
The ideal butter should contain at least 82% butterfat to ensure richness and structure. Below are the most suitable options:
European-Style Butter (Best Choice)
- Fat Content: 82% or higher
- Why It’s Ideal:
- Lower water content ensures flakier layers.
- Creamier and richer taste enhances overall flavor.
- More pliable, making it easier to laminate into the dough.
- Examples: Brands like Kerrygold, Plugrá, Président, and Lurpak work well.
- Authentic Swiss Option: Look for Swiss Alpine butter (Sennenbutter) for a traditional flavor.
Standard Butter (Acceptable Alternative)
- Fat Content: 80% (common in the US).
- Potential Issues:
- Slightly higher water content reduces flakiness.
- Can create steam pockets, leading to uneven layers.
- Best Practice: If European butter isn’t available, choose a high-quality unsalted butter.
Cultured Butter (For a Stronger Flavor)
- Fat Content: 82%-86%.
- What Makes It Special?
- Naturally fermented, adding a mild tangy depth to the flavor.
- Lower water content improves texture.
- When to Use: If you prefer a deeper, more complex taste, this is an excellent alternative.
3. Salted vs. Unsalted Butter – Which One to Use?
Unsalted butter is highly recommended for Gipfeli because it allows full control over the salt level in the recipe. Salted varieties can interfere with fermentation and introduce inconsistencies due to varying salt concentrations among different brands. If using salted butter, reduce the added salt in the dough to balance the flavors.
4. How to Handle Butter for the Perfect Flaky Texture
Choosing high-quality butter is just the first step. Proper handling ensures the dough remains light, crisp, and airy.
🔹 Keep Butter Cold at All Times
Cold butter prevents premature melting, which is essential for maintaining well-defined layers. Before incorporation, refrigerate or freeze butter for at least 10 minutes.
🔹 The Right Thickness for Laminating
Butter should remain pliable but firm when layering into the dough. If too hard, it may crack; if too soft, it will absorb into the dough and compromise the layering effect.
🔹 Avoid Overworking the Dough
Excessive handling warms the butter, reducing its ability to create distinct layers. Working quickly and chilling the dough between folds helps maintain structure.
🔹 Freezing for a Flakier Dough
For superior texture, consider freezing the butter block before grating or rolling it into the dough. This ensures it stays firm during lamination, resulting in crispier, more delicate layers.
5. Can You Use Margarine or Vegan Butter?
For those avoiding dairy, butter alternatives are available. However, the results may vary in terms of texture and taste.
🔹 Vegan Butter (Best Alternative)
- Choose a high-fat, dairy-free butter with at least 75% fat content.
- Brands like Miyoko’s, Violife, or Naturli provide the closest texture to real butter.
- While the results may not be identical, they will still produce a flaky pastry.
🔹 Margarine (Not Recommended)
- Contains too much water, leading to greasy dough.
- Lacks the rich, buttery taste that defines authentic Gipfeli.
- Melts too quickly, preventing proper layering.
Final Butter Tips for Perfect Gipfeli
- Choose high-fat butter (82%+) for superior flakiness.
- Keep butter cold to preserve distinct layers.
- Opt for unsalted butter for better flavor control.
- For a more complex taste, try cultured butter.
- If using dairy-free alternatives, pick high-fat vegan butter.
By selecting the right butter and handling it correctly, you can achieve the golden, flaky, and buttery perfection of authentic Swiss Gipfeli.
Alternative Ingredients for a Healthier or Vegan Version
If you’re looking to enjoy Gipfeli with a healthier twist or need a vegan-friendly option, several ingredient swaps can help maintain the delicious texture and flavor while aligning with dietary preferences. Whether you’re aiming to reduce saturated fats, avoid dairy, or use less refined ingredients, these alternatives will allow you to create a more nutritious version of this classic Swiss pastry.
1. Dairy-Free and Vegan Butter Alternatives
Traditional Gipfeli relies on butter for its rich taste and flaky layers, but there are excellent plant-based substitutes available.
Vegan Butter (Best Substitute):
Choose a high-fat, dairy-free butter alternative with at least 75% fat content to ensure flakiness. Brands like Miyoko’s, Naturli, Earth Balance, and Violife mimic real butter well. Vegan butter maintains the lamination structure, offering a crispy and buttery texture.
Coconut Oil (A Natural Option):
Use refined coconut oil to avoid a strong coconut taste. Chilling the coconut oil before use will help prevent greasiness. When using coconut oil, you can replace butter 1:1, but be sure to reduce the liquid slightly in the dough.
Avocado or Nut-Based Butter (For a Healthier Twist):
While not ideal for flaky layers, avocado, almond, or cashew butter can be blended into the dough for a softer, enriched pastry. This option is best for creating a denser but nutrient-rich alternative.
2. Healthier Flour Alternatives
White flour is traditionally used for its elasticity, but there are alternatives that can offer more nutrients without sacrificing texture.
Whole Wheat Flour (For More Fiber & Nutrients):
Replace 25% to 50% of the all-purpose flour with whole wheat flour. This adds fiber, vitamins, and a nutty flavor but may result in a slightly denser pastry. To keep the dough light, be sure to sift the whole wheat flour before use.
Spelt Flour (An Ancient Grain Option):
Spelt flour is lighter than whole wheat, with a mildly sweet, nutty taste. It works well in a 50/50 mix with all-purpose flour for better texture and flavor.
Gluten-Free Flour (For a GF Version):
For a gluten-free version, use a gluten-free all-purpose blend with xanthan gum to retain elasticity. Recommended brands include King Arthur, Bob’s Red Mill, and Cup4Cup. When using gluten-free flour, you may need to increase hydration slightly, as these flours absorb more liquid.
3. Healthier Sweeteners
Sugar helps with fermentation and browning, but you can replace refined white sugar with healthier options that have more nutrients.
Coconut Sugar (Low Glycemic Option):
Coconut sugar is less processed, has a lower glycemic index, and contains minerals. You can replace white sugar 1:1 with coconut sugar. This will add a rich, caramel-like flavor.
Maple Syrup or Honey (Natural Sweeteners):
You can use maple syrup or honey as a natural sweetener. When using liquid sweeteners, reduce the amount of liquid in the recipe slightly. These options will add depth of flavor but may create a softer texture in the dough.
Date Sugar (Whole-Food Option):
Date sugar, made from dried dates, is rich in fiber and antioxidants. It’s best used in combination with other sugars to maintain the desired sweetness and consistency in the dough.
4. Egg Replacements for a Vegan Version
Eggs contribute to the structure and richness of the dough, but there are plant-based alternatives you can use.
Flax or Chia Egg (Best Plant-Based Substitute):
To replace one egg, mix 1 tablespoon of ground flaxseed or chia seeds with 3 tablespoons of water. Let the mixture sit for 5 to 10 minutes until it becomes gel-like. This will act as a binder and add omega-3s and fiber to the recipe.
Applesauce or Mashed Banana (For Softness & Sweetness):
You can use ¼ cup of unsweetened applesauce or mashed banana per egg. This will create a softer dough with a subtle fruit flavor and extra nutrients.
Aquafaba (For a Light & Fluffy Effect):
Aquafaba is the liquid from a can of chickpeas and can be whipped to mimic egg whites. Use 3 tablespoons of aquafaba to replace one egg. It helps create a light and fluffy texture.
5. Healthier Yeast & Dairy-Free Milk Options
Yeast Choices:
For a healthier version, you can use instant yeast for quicker rising or sourdough starter for a slow-fermented, gut-friendly alternative. Sourdough starter adds natural probiotics and a distinct tangy flavor.
Plant-Based Milk:
You can replace dairy milk with plant-based milk such as almond, oat, soy, or coconut milk. Soy milk is ideal for structure due to its higher protein content, while oat milk is naturally creamy and has a neutral taste.
Final Tips for Healthier & Vegan Gipfeli
- Use vegan butter with at least 75% fat content to achieve a flaky texture.
- Combine whole wheat or spelt flour with all-purpose flour for better nutrition without compromising the pastry’s texture.
- Opt for coconut sugar or maple syrup instead of refined sugar for a more natural sweetness.
- Replace eggs with flax eggs or aquafaba for a vegan version.
- Choose soy or oat milk for a dairy-free but creamy texture.
By using these healthier and plant-based ingredients, you can enjoy delicious, flaky, and buttery Gipfeli while keeping it suitable for your dietary needs!
Step-by-Step Guide: How to Make Gipfeli at Home
Making Gipfeli (Swiss croissants) at home might seem intimidating at first, but with the right guidance and ingredients, it becomes a rewarding and fun process. From preparing the dough to baking these delicious pastries, this step-by-step guide will walk you through everything you need to know. By following these simple instructions, you can enjoy fresh, warm Gipfeli right from your oven, with a perfect balance of crispiness and tenderness.
1. Prepare the Dough
The first step in making Gipfeli is to prepare the dough, which involves mixing the ingredients together, kneading them, and allowing the dough to rise.
Ingredients Needed:
- All-purpose flour
- Yeast
- Milk
- Sugar
- Salt
- Butter
Instructions:
- Activate the Yeast: Start by activating the yeast in warm milk with a bit of sugar. Allow it to sit for about 5-10 minutes until it becomes frothy. This step ensures that the yeast is alive and ready to make the dough rise.
- Mix Dry Ingredients: In a large bowl, combine the flour and salt. Create a well in the center for the wet ingredients.
- Add Wet Ingredients: Pour the activated yeast mixture into the well along with melted butter and any remaining milk. Stir to combine until a rough dough forms.
- Knead the Dough: Transfer the dough to a floured surface and knead it for about 8-10 minutes, until it becomes smooth and elastic. If the dough is too sticky, add a little more flour as needed.
- Let the Dough Rise: Once the dough is kneaded, place it in a lightly greased bowl, cover it with a clean cloth, and let it rise for about an hour or until it doubles in size.
2. Prepare the Butter Block
The butter block is crucial for the flaky layers of your Gipfeli. This step involves laminating the dough by folding the butter into it multiple times.
Ingredients Needed:
- Cold butter (unsalted)
Instructions:
- Chill the Butter: Make sure your butter is cold and firm before using it. If it’s too soft, it will melt during the folding process, making the dough greasy instead of flaky.
- Shape the Butter Block: Place the cold butter between two sheets of parchment paper or plastic wrap and use a rolling pin to flatten it into a square or rectangular shape. The butter block should be about 1/4 inch thick and slightly smaller than the dough rectangle.
3. Laminate the Dough
This technique is key to getting those signature flaky layers in your Gipfeli.
Instructions:
- Roll Out the Dough: After the dough has risen, gently punch it down and transfer it to a floured surface. Roll the dough into a large rectangle, about twice the size of the butter block.
- Place the Butter Block: Position the cold butter block in the center of the dough. Fold the dough over the butter, encasing it completely.
- First Fold: Roll the dough into a long rectangle again, and fold it into thirds, like a letter. This is your first “turn.”
- Rest the Dough: Wrap the dough in plastic wrap and refrigerate it for 30 minutes to an hour. Chilling helps the dough firm up and prevents the butter from melting into the dough.
- Repeat the Folds: After the dough has chilled, repeat the rolling and folding process (2 more times), resting the dough in between each fold. These folds create the delicate, buttery layers that make Gipfeli so delicious.
4. Shape the Gipfeli
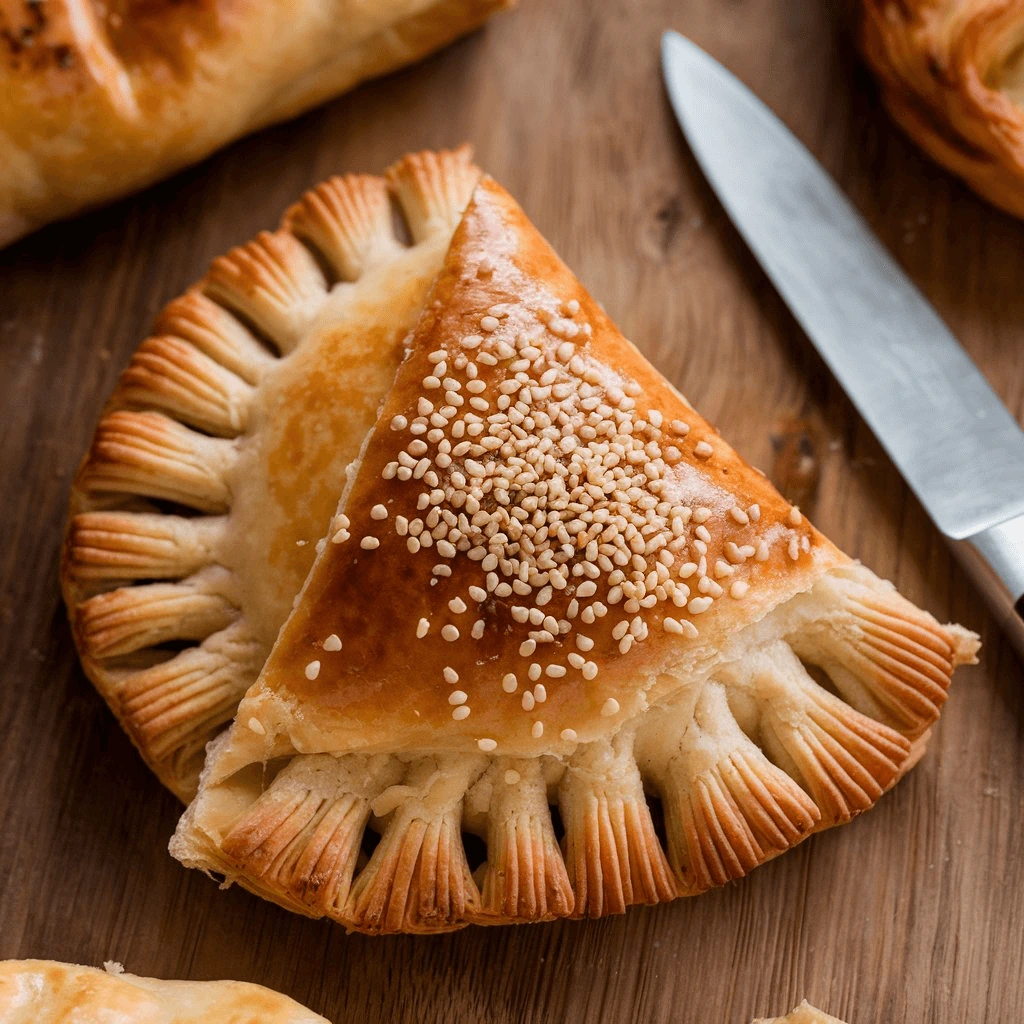
Once the dough is properly laminated, it’s time to shape it into the familiar crescent form of Gipfeli.
Instructions:
- Roll the Dough: Roll the dough out into a large rectangle, about 1/8-inch thick.
- Cut the Dough: Use a sharp knife or pizza cutter to cut the dough into triangles. Make sure the triangles are about 4 inches wide at the base, and about 8 inches tall. The size of the triangles will determine how big your Gipfeli are.
- Shape the Pastries: Starting from the wide base, roll each triangle up tightly to form the crescent shape. Make sure the tip of the triangle is tucked underneath the roll to prevent it from unraveling during baking.
- Place on Baking Sheet: Arrange the rolled-up dough on a lined baking sheet, leaving some space between each pastry.
5. Let the Dough Rise Again
After shaping the Gipfeli, they will need one final rise to become fluffy and light.
Instructions:
- Second Rise: Cover the shaped Gipfeli with a clean cloth and allow them to rise for about 45 minutes to 1 hour, or until they have doubled in size. The dough should be soft and puffy to the touch.
6. Brush with Egg Wash & Bake
The final step is to bake the Gipfeli to golden perfection.
Ingredients Needed:
- 1 egg (for egg wash)
- A pinch of salt (optional)
Instructions:
- Prepare Egg Wash: Beat the egg with a pinch of salt to create an egg wash. Gently brush the egg wash over the tops of the Gipfeli to give them a shiny, golden finish.
- Bake the Pastries: Preheat your oven to 375°F (190°C) and bake the Gipfeli for 15-20 minutes, or until they are golden brown and puffed up. The pastries should sound hollow when tapped on the bottom.
- Cool & Enjoy: Once baked, remove the Gipfeli from the oven and allow them to cool slightly before enjoying.
Final Thoughts
Making Gipfeli at home may take some time, but the results are definitely worth the effort. With crispy, flaky layers and a rich buttery flavor, homemade Gipfeli will always beat store-bought ones. Whether you’re serving them for breakfast, brunch, or as an afternoon snack, these Swiss pastries will become a favorite in your household. Enjoy!
Preparing the Dough: Mixing and Kneading Techniques
Preparing the dough for Gipfeli is one of the most crucial steps in ensuring that the pastries turn out light, flaky, and flavorful. The process of mixing the ingredients and kneading the dough will affect its texture and rise, so it’s important to approach these stages with care. Here’s a detailed look at how to mix and knead the dough to get the best results.
1. Mixing the Ingredients
The key to a smooth dough starts with combining the ingredients correctly.
Step-by-Step Instructions:
- Activate the Yeast:
Begin by activating the yeast. Combine warm milk (around 100°F or 38°C) and sugar in a bowl, and then sprinkle the yeast on top. Let it sit for 5 to 10 minutes until it becomes frothy. If you’re using dry yeast, it’s essential to ensure that the liquid is warm enough to activate the yeast but not too hot, or it might kill it. This step ensures that your dough rises properly. - Combine the Dry Ingredients:
In a large bowl, mix your flour and salt. Flour forms the base of the dough, and salt is essential for flavor, but too much can hinder the yeast’s growth. Mixing the dry ingredients first ensures even distribution of the salt before the wet ingredients are added. Make a small well in the center of the dry ingredients for the wet mixture. - Add Wet Ingredients:
Once your yeast mixture is frothy, add it to the well in the flour mixture. Also, add melted butter (cooled to room temperature) and any additional milk needed. Butter is crucial for the rich, flaky texture of Gipfeli, so make sure it’s fully incorporated into the dough. - Stir and Combine:
Use a spoon or spatula to mix the dough until the ingredients are mostly combined. The dough will initially be sticky, but this is normal. Continue mixing until no dry flour remains, and the dough begins to come together.
2. Kneading the Dough
Kneading is a physical process that strengthens the dough’s gluten, allowing it to rise properly and hold its shape. It also helps to create the soft, tender texture typical of Gipfeli. Here’s how to knead dough effectively:
Step-by-Step Instructions:
- Flour Your Surface:
Once you have a shaggy dough that has come together, turn it out onto a clean, lightly floured surface. Be mindful not to add too much flour, as you don’t want to dry out the dough. Only add as needed to prevent sticking. - Knead the Dough:
Begin kneading by pushing the dough away from you with the palms of your hands. Then fold the dough back over itself and turn it slightly. Repeat this process, pushing and folding, for about 8 to 10 minutes. The goal is to develop the dough’s gluten, which will give it strength and structure. As you knead, you should notice the dough becoming smoother and more elastic. - Testing the Dough:
After 8-10 minutes of kneading, test the dough by performing the “windowpane test.” Take a small piece of dough and gently stretch it with your fingers. If it forms a thin, translucent window without tearing, the dough is ready. If it tears, continue kneading for a few more minutes until it reaches the right consistency. - Consistency of the Dough:
The dough should feel soft but not sticky, with a slight elasticity. If it’s too sticky, dust it with a small amount of flour, but avoid adding too much, as it could alter the dough’s texture. If the dough feels dry or crumbly, add a little more milk or water, one tablespoon at a time.
3. Resting the Dough
After kneading, it’s important to give the dough time to rest and rise. This allows the yeast to work, giving the dough a light texture and flavor.
Step-by-Step Instructions:
- First Rise:
Once the dough is kneaded to perfection, form it into a ball and place it in a large, lightly greased bowl. Turn the dough once in the bowl to coat it with a thin layer of oil or butter. This prevents the dough from drying out during the rise. Cover the bowl with a clean cloth or plastic wrap and let it rise in a warm place for about 1 hour, or until it doubles in size. The yeast will work during this time, creating air pockets that contribute to the fluffiness of the pastry. - Why Rising Matters:
During the rising process, the dough undergoes fermentation, where the yeast feeds on the sugars in the dough and produces gas. This gas causes the dough to expand, creating the air pockets that make your Gipfeli soft and fluffy. Don’t skip this step—allowing the dough to rise is crucial for texture and flavor.
4. Handling the Dough After the Rise
After the dough has risen, it’s time to punch it down and prepare it for the next steps, such as laminating (folding in butter).
Step-by-Step Instructions:
- Punching Down the Dough:
Once the dough has doubled in size, gently punch it down to release the air. This deflates the dough, preventing large bubbles from forming and ensuring an even texture throughout. - Shape and Chill:
After punching down, roll the dough out to the desired thickness, and then follow your recipe instructions for laminating with butter. Remember, resting the dough in the refrigerator after each fold is key to maintaining the cold temperature of the butter and ensuring the layers develop correctly.
Tips for Perfect Dough:
- Temperature Matters: Always ensure that your ingredients are at the right temperature. Warm (but not hot) milk is ideal for activating yeast, and melted butter should be allowed to cool before mixing.
- Be Patient with Rising Times: Don’t rush the dough’s rise—allowing it to rest and rise slowly is crucial for flavor development. Cold temperatures slow down the fermentation, while warmer temperatures speed it up.
- Avoid Overworking: Don’t knead the dough excessively. Over-kneading can make the dough tough, which will affect the final texture of your Gipfeli
Laminating the Dough for a Flaky Texture
Laminating the dough is a crucial step in the process of making Gipfeli, as it creates the light and flaky layers that are so characteristic of these Swiss pastries. This technique involves folding butter into the dough through a series of precise steps. As a result, the butter and dough layers puff up when baked, creating the deliciously tender texture. Moreover, understanding how to laminate the dough properly is essential for achieving the ideal flakiness. Below, we will take a closer look at how to execute this step with care and attention to detail.
1. Understanding the Process of Laminating
First and foremost, laminating the dough is all about incorporating fat (typically butter) into the dough by folding it multiple times. With each fold, you create thin layers of dough and butter. When these layers are baked, the steam produced by the butter and moisture within the dough causes the layers to separate and puff up. Thus, the key to a successful Gipfeli lies in how effectively the dough is laminated.
For best results, it is important to keep the dough and butter at the right temperatures. If the butter is too soft or the dough too tough, the layers may not form properly. This can affect the overall texture and cause the Gipfeli to lack the desired flakiness. To avoid this, ensure the butter is cold but pliable, and the dough is soft yet elastic.
2. Preparing the Butter for Laminating
Before starting the lamination process, you must prepare the butter. The consistency of the butter is extremely important in achieving a perfect laminated dough. If the butter is too soft, it can blend too much with the dough, while if it’s too hard, it won’t distribute properly. Thus, ensuring that the butter is at the correct consistency is essential.
Begin by cutting the butter into small cubes and refrigerating them for a while. This step helps maintain the butter’s coldness, which is vital for the lamination process. After the butter has chilled sufficiently, wrap it in plastic wrap or parchment paper and pound it into a flat, even rectangle. The butter should be about half an inch thick—thin enough to spread across the dough but not too soft to melt quickly.
3. The First Fold: Incorporating the Butter
Once your dough has risen and been punched down, it’s time to incorporate the butter into the dough. To begin the lamination, roll the dough out on a lightly floured surface to create a large rectangle. Be careful not to apply too much pressure, as this can cause the dough to lose its elasticity.
Next, place the chilled butter rectangle in the center of the dough. Fold the dough over the butter so that it is fully enclosed. This is your first “envelope” fold, ensuring the butter stays inside as you proceed. Once the butter is securely wrapped in dough, pinch the edges to seal it properly.
4. Rolling and Folding: Creating Layers
At this stage, the dough is ready to be rolled and folded to create multiple layers. Each fold adds a layer of butter between the dough, which will later create the flakiness you desire. When rolling and folding, it is essential to maintain a gentle touch to avoid deflating the dough and ruining the layers.
Roll the dough out into a long rectangle, being careful not to apply too much pressure. Once you have the dough at the desired size, fold it into thirds, as you would fold a letter. This is the first fold, and it’s important to keep the edges tightly sealed to prevent the butter from leaking out.
After completing the first fold, wrap the dough in plastic wrap and refrigerate it for at least 30 minutes. This resting period allows the dough to relax and the butter to cool, ensuring the dough remains pliable and the butter stays cold.
After the resting period, repeat the rolling and folding process, rolling the dough out again and folding it into thirds. Be sure to rest the dough again between each fold to maintain the proper temperature and texture. This process should be repeated at least three times, with each fold adding more layers and increasing the flakiness of the dough.
5. The Final Shaping and Resting
Once you’ve completed the lamination process, the dough is ready to be shaped into Gipfeli. Begin by rolling the dough out into a large rectangle or circle, depending on the shape you prefer. Cut the dough into triangles, as this is the traditional form for Gipfeli.
After shaping the dough, let it rest one last time. This final rise helps the dough expand and become light and airy during baking. Allow the dough to rest for about 30 to 45 minutes before baking.
6. Why Laminating is Crucial for Flaky Pastry
Laminating the dough is essential to creating the signature flaky layers in Gipfeli. Each fold forms distinct layers of dough and butter. When baked, the butter melts and creates steam, which causes the dough layers to puff up and separate. This process results in a light, flaky texture that is the hallmark of a perfectly made Gipfeli.
Skipping or rushing through the lamination process can lead to dough that lacks structure and texture. By following each step carefully and allowing sufficient resting time between folds, you will ensure that your Gipfeli turns out flaky and delicious every time.
Tips for Successful Laminating
To ensure a successful lamination process, here are some additional tips to keep in mind:
- Keep the Butter Cold: Ensure that the butter remains chilled throughout the process. If it becomes too soft, it will mix with the dough, and you will lose the distinct layers.
- Roll and Fold Gently: It’s important not to overwork the dough. Rolling and folding too aggressively can result in tough pastries instead of flaky ones.
- Allow for Resting Time: Resting the dough between folds is essential for maintaining its elasticity. This also helps the butter remain cold and firm, which is key to achieving the desired texture.
By following these steps, you’ll master the art of laminating dough for Gipfeli, resulting in perfectly flaky pastries. The layers of butter and dough formed during lamination are what give Gipfeli their light, airy texture. With practice, you’ll be able to create these delicious Swiss treats at home, impressing friends and family with your baking skills.
Shaping and Rolling the Perfect Gipfeli
Shaping and rolling Gipfeli is a delicate yet vital step in the pastry-making process. The way you shape the dough directly impacts the final result, from the texture of the layers to the finished look of the pastry. The process itself requires patience and precision to ensure your Gipfeli is as flaky, light, and perfectly rolled as possible. In this section, we’ll break down the steps for shaping and rolling Gipfeli, from dividing the dough to the final touch before baking.
1. Rolling Out the Dough
Once your dough has completed the lamination process and has rested sufficiently, it’s time to roll it out. Start by placing the dough on a clean, lightly floured surface. Gently roll it out with a rolling pin, applying even pressure. The goal is to create a large, thin rectangle or circle—whichever you prefer, depending on your personal preference or recipe.
Make sure the dough remains even in thickness as you roll. If the dough sticks to the surface or rolling pin, lightly dust it with flour. However, avoid using too much flour, as it can affect the dough’s texture and cause it to dry out. Rolling evenly is essential to ensure the layers remain intact and create the flaky texture you’re aiming for.
2. Cutting the Dough into Triangles
After rolling the dough into the desired shape, the next step is to cut it into triangles. To achieve this, use a sharp knife or pizza cutter to slice the dough into equal triangles. Start by cutting the dough in half lengthwise, and then divide each half into smaller triangles. The size of the triangles will affect the final size of your Gipfeli; for larger pastries, cut fewer triangles, and for smaller ones, cut more.
Ensure that the triangles are of a uniform size. If you cut uneven pieces, the Gipfeli will bake unevenly, with some being overcooked and others undercooked. Additionally, the dough’s flakiness might be inconsistent if the pieces are not the same size.
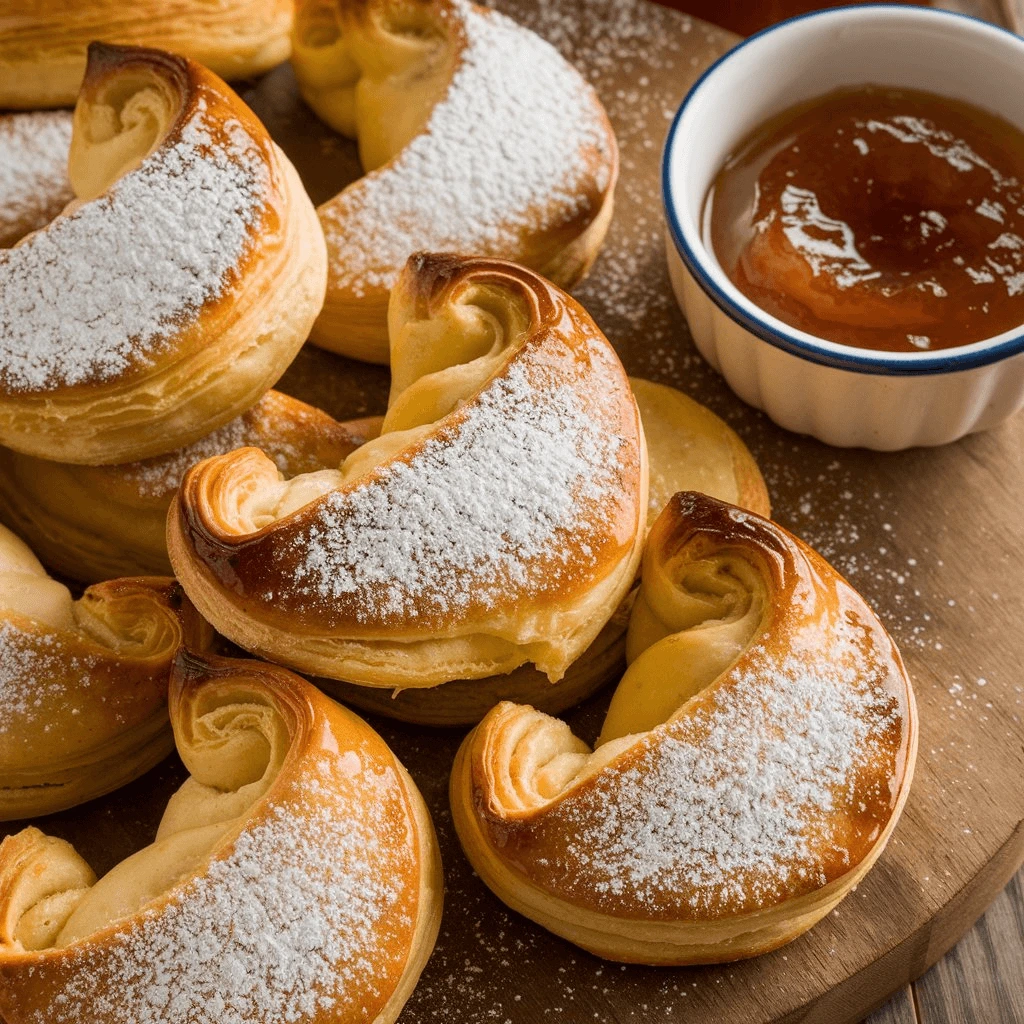
3. Rolling the Triangles into Crescents
Once you’ve cut the dough into triangles, it’s time to roll each piece into a crescent shape. Take one triangle, and gently stretch the base of the triangle slightly to give it more room to roll. Start at the wide end of the triangle and carefully roll it toward the pointy tip, keeping the layers intact.
While rolling, be gentle yet firm enough to ensure the dough doesn’t unravel or break. If you roll too tightly, the dough might become compressed and lose its flaky texture. On the other hand, if you roll too loosely, the layers might not stay together during baking, and the pastry could fall apart.
Once each triangle is rolled into a crescent shape, place it on a baking sheet lined with parchment paper, ensuring there’s enough space between each one. The pastries should not touch, as they need room to expand and puff up during baking.
4. Shaping the Ends of the Crescents
For a polished and neat look, you can gently curve the ends of each rolled Gipfeli inward, forming a traditional crescent shape. This step isn’t strictly necessary, but it adds a touch of authenticity and makes the pastries more visually appealing.
To shape the ends, simply use your fingers to carefully bend each end toward the center of the roll. This should be done gently to avoid losing the dough’s structure. The ends should meet slightly in the middle, forming a semi-circle, but don’t press too hard—maintaining the light, airy texture is the goal.
5. Allowing the Dough to Rest Again
After shaping and rolling your Gipfeli, it’s essential to allow the dough to rest once more. This step helps the dough rise and expand during baking, contributing to its lightness and fluffiness. Place the shaped Gipfeli on your baking sheet and cover them with a clean kitchen towel or lightly greased plastic wrap. Let them rest for about 30 to 45 minutes at room temperature.
During this resting period, the dough will puff up and settle into its final shape. This additional rise helps to develop the dough’s structure and ensures the layers separate beautifully during baking. It also helps to activate the yeast, which gives the pastry its airy texture.
6. Brushing with Egg Wash
Before baking, you can brush the shaped Gipfeli with an egg wash to give them a beautiful golden-brown finish once baked. An egg wash is made by whisking together one egg and a tablespoon of water or milk. Using a pastry brush, gently apply the egg wash over the top of each Gipfeli. This will not only give your Gipfeli a shiny, golden color but also enhance the flavor.
If you want a slightly different finish, you can also sprinkle some sugar on top of the egg wash for a sweet, slightly crunchy texture. Some bakers opt for a bit of sea salt for a savory touch, but traditionally, the Gipfeli is brushed with egg wash alone.
7. The Importance of Uniformity
When shaping and rolling Gipfeli, maintaining uniformity is crucial for consistent results. The more uniform your rolls are, the more evenly they will bake, ensuring that each Gipfeli is cooked to perfection. Whether you’re aiming for a traditional crescent shape or experimenting with different variations, it’s important to keep the shape and size consistent throughout the batch.
By paying attention to uniformity, you ensure that every bite of your Gipfeli is as flaky and tender as the last, creating a delightful pastry experience from start to finish.
Baking Tips for Golden, Buttery Pastries
Achieving perfectly golden, buttery Gipfeli involves more than just following the steps for preparing the dough and shaping the pastries. The baking process plays a crucial role in achieving the desired texture, color, and flavor of your Gipfeli. Here are some baking tips that will ensure your pastries come out golden, flaky, and irresistibly buttery.
1. Preheat Your Oven Properly
One of the most important steps to successful baking is preheating your oven to the right temperature. Preheating ensures that your Gipfeli bake evenly from the moment they hit the oven. For Gipfeli, you’ll typically want your oven set at a temperature between 375°F (190°C) and 400°F (200°C).
If your oven doesn’t have an even heat distribution, it’s a good idea to rotate your baking sheet halfway through the baking process to prevent uneven cooking. If you’re using a convection oven, you can reduce the temperature by about 10–20°F (5–10°C) since the fan circulates the heat more efficiently.
2. Baking on the Right Surface
Choosing the right baking surface can have a significant impact on the texture and crispness of your Gipfeli. For the best results, line your baking sheet with parchment paper or a silicone baking mat. These surfaces prevent sticking, help distribute heat evenly, and promote a crispy bottom for your pastries.
Avoid using dark-colored baking sheets, as they can absorb more heat and may cause the bottom of your Gipfeli to over-brown. Instead, opt for light-colored or shiny baking sheets, which reflect heat more evenly, ensuring a perfectly baked pastry.
3. Don’t Overcrowd the Baking Sheet
When placing your Gipfeli on the baking sheet, make sure there is enough space between each one. Overcrowding the sheet can prevent the Gipfeli from expanding properly as they bake, leading to soggy or uneven results. Aim for about 1 to 2 inches (2.5–5 cm) of space between each pastry.
This space not only allows the pastries to expand as they rise, but it also ensures that heat circulates evenly around each Gipfeli, allowing for the perfect golden color and flaky texture.
4. Use an Egg Wash for a Glossy Finish
Before placing your shaped Gipfeli into the oven, it’s crucial to brush them with an egg wash to achieve a golden, glossy finish. An egg wash is typically made by whisking together an egg with a tablespoon of water or milk. Brush the wash evenly over the tops of each pastry just before baking.
The egg wash helps the Gipfeli to brown beautifully in the oven, giving them that signature golden color. It also adds a subtle richness and enhances the flavor, making the pastries more appetizing. Some bakers like to add a bit of sugar or salt on top of the egg wash for extra texture or a slightly sweet contrast.
5. Monitor the Baking Time
While Gipfeli require about 15–20 minutes in the oven, baking times may vary depending on your oven’s heat and the size of your pastries. It’s essential to monitor the Gipfeli closely during the last few minutes of baking to prevent overcooking or burning. The pastries should be golden brown and slightly puffed up when they’re done.
Check the bottoms of the Gipfeli to ensure they are crispy and not undercooked. If the tops are golden but the bottoms remain pale, you can move the baking sheet to a lower rack in the oven for the last few minutes to help crisp the bottom.
6. Let the Pastries Cool
Once your Gipfeli are baked to perfection, remove them from the oven and let them cool slightly on the baking sheet. After about 5 minutes, transfer them to a wire rack to cool completely. Allowing the pastries to cool ensures they don’t become soggy, as any residual moisture will evaporate.
While it’s tempting to dive in immediately, giving your Gipfeli a few minutes to rest will also help maintain their flaky texture. Warm Gipfeli are delightful, but overly hot pastries might not give you the best experience, as the butter and layers need to set for that perfect bite.
7. Experiment with Different Baking Times for Desired Crispiness
Everyone has their own preference when it comes to the level of crispiness in a pastry. If you like your Gipfeli extra crispy and crunchy, you can extend the baking time by 2–5 minutes, depending on how your oven performs. On the other hand, if you prefer a softer, more tender pastry, reduce the baking time slightly.
It’s important to test a few batches to determine the ideal baking time for your preferred texture. Keep in mind that the final baking result is a balance between temperature, time, and the consistency of the dough.
8. Use Steam for Extra Flakiness
To get the ultimate flaky texture in your Gipfeli, consider using steam while baking. This is an advanced technique used by professional bakers to create extra layers and a light, airy texture. To generate steam in your oven, place a small pan of water on the bottom rack while the Gipfeli bake.
The steam will help keep the pastries moist on the outside while allowing them to puff up beautifully. However, this step is optional and may require a bit of trial and error to get it just right. For those seeking a perfectly flaky and airy pastry, this method can elevate your Gipfeli to new heights.
Serving and Enjoying Your Homemade Gipfeli
After all the hard work of preparing, laminating, shaping, and baking your Gipfeli, it’s finally time to enjoy these flaky, buttery delights. But the enjoyment doesn’t just stop at the moment of baking; how you serve and savor your Gipfeli can elevate the experience. Here’s a guide on how to serve your homemade Gipfeli in the best way possible.
1. Serve Fresh for the Best Flavor
The best way to enjoy Gipfeli is when they’re fresh from the oven. Their outer layers will be crispy and golden, while the inner layers remain soft and buttery. If you can, time your baking so that the Gipfeli are served immediately after baking. Freshly baked Gipfeli will have the best texture, fragrance, and flavor. If you can’t serve them immediately, they can be reheated in the oven for a few minutes to restore some of that freshness.
2. Pair with Hot Beverages
Gipfeli are commonly enjoyed with a hot beverage, and pairing them with coffee or tea is a great way to enhance the experience. The buttery layers of the pastry complement the warmth and richness of coffee, while the flakiness of the dough provides a contrast to the smoothness of a cup of tea. In Switzerland, it’s not uncommon to enjoy Gipfeli during breakfast or afternoon tea.
For a traditional Swiss experience, serve your Gipfeli with a cup of freshly brewed coffee, or for a lighter pairing, opt for a mild herbal tea like chamomile or mint. Hot chocolate is another delightful pairing, especially during colder months when you need something comforting.
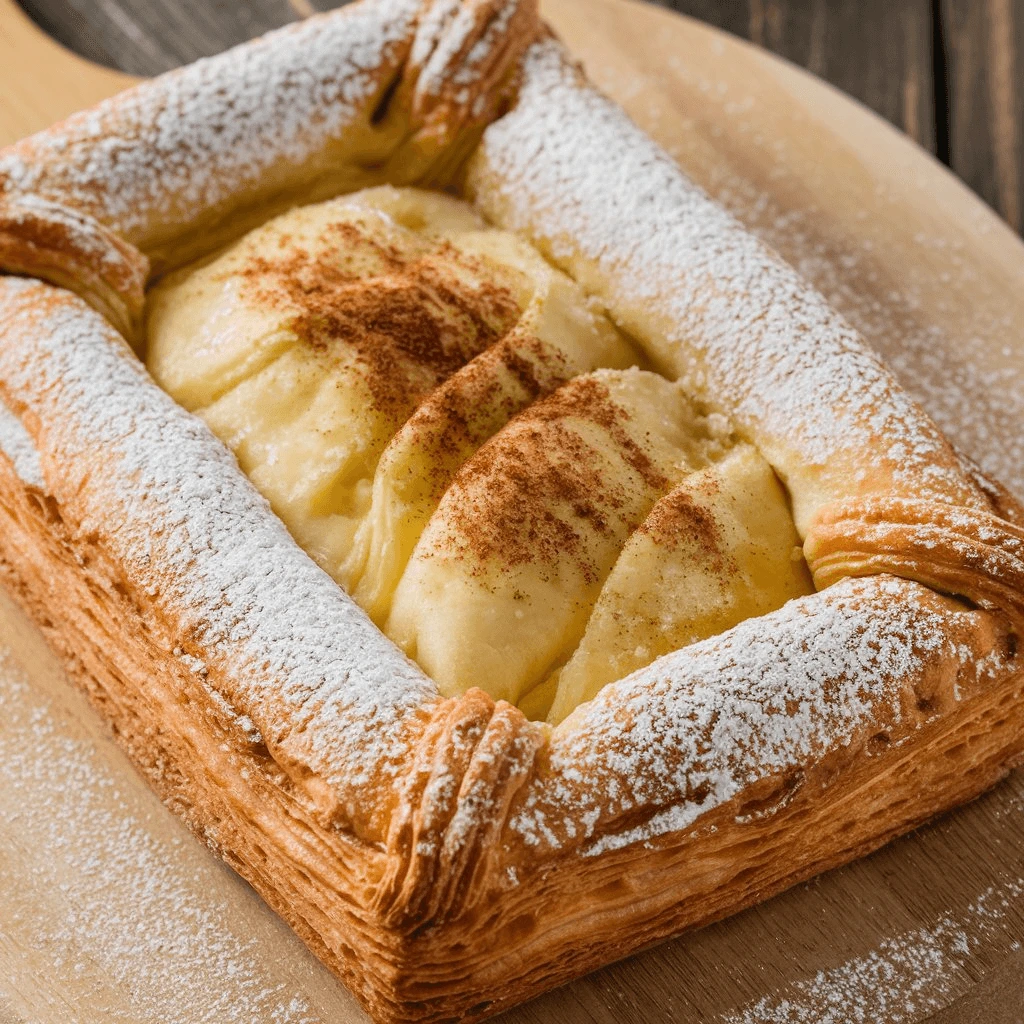
3. Add Toppings for Extra Flavor
While Gipfeli are delicious on their own, you can take them to the next level by adding toppings or fillings. The beauty of Gipfeli lies in its versatility. You can fill or top them with sweet or savory options, depending on your preferences.
For sweet Gipfeli, consider spreading a thin layer of fruit jam, such as apricot, raspberry, or strawberry, inside the pastry before baking. Once they’re out of the oven, drizzle a bit of honey or dust with powdered sugar for an extra touch of sweetness. If you prefer savory options, you could fill them with cheese, ham, or even a touch of mustard for a more savory breakfast or snack.
4. Enjoy as Part of a Larger Meal
Gipfeli can be enjoyed as part of a larger meal, particularly as part of a breakfast or brunch spread. These pastries are an excellent addition to a continental breakfast, where they can be served alongside fresh fruit, cheeses, cold cuts, and yogurt.
You could also pair them with scrambled eggs or smoked salmon for a more substantial meal. The richness of the Gipfeli balances well with lighter, more savory elements, creating a satisfying yet not overwhelming breakfast or brunch plate.
5. Serve with a Side of Fresh Fruit or Yogurt
For a well-rounded, light meal, serve your Gipfeli with a side of fresh fruit or yogurt. The fruit provides a natural sweetness that complements the rich and buttery flavor of the Gipfeli without overpowering it. You could go for a classic pairing of sliced strawberries, raspberries, or even citrus fruits like orange slices.
Greek yogurt or a creamy vanilla yogurt also pairs wonderfully with Gipfeli, offering a creamy contrast to the crispy texture of the pastry. Add a drizzle of honey or a sprinkle of granola to the yogurt for added texture and flavor.
6. Store Leftovers for Later Enjoyment
If you happen to have leftover Gipfeli, don’t worry—they can still be enjoyed later. To keep them fresh for a few days, store them in an airtight container at room temperature. For longer storage, you can freeze them. To reheat, simply pop them back in the oven for a few minutes at a low temperature, and they’ll regain their flakiness and golden color.
While freshly baked Gipfeli are the best, reheated pastries can still be delicious and enjoyable. Just be sure not to microwave them, as that can lead to a soggy texture. The oven is the best way to maintain their crispy texture.
7. Customize for Special Occasions
Gipfeli are not only great for everyday enjoyment but also make a wonderful treat for special occasions. Whether it’s a birthday, holiday, or family gathering, Gipfeli can be customized to suit the occasion. For festive events, you could shape them into holiday-themed designs, like crescent moons for New Year’s Eve or a heart shape for Valentine’s Day.
To make them even more festive, consider adding colorful sprinkles, edible glitter, or a fun glaze. These visual enhancements can make your Gipfeli stand out and add an extra touch of elegance to your celebration.
8. Share with Loved Ones
Finally, one of the best ways to enjoy Gipfeli is by sharing them with family, friends, or loved ones. The experience of enjoying homemade pastries together is one of life’s simple pleasures. Whether it’s a cozy breakfast at home or an afternoon gathering with friends, Gipfeli bring people together. Share them with loved ones, and the joy of enjoying these delicious pastries will be multiplied.
Traditional Swiss Ways to Enjoy Gipfeli
In Switzerland, Gipfeli are more than just pastries; they’re an integral part of the culture, often enjoyed in specific ways that highlight their delicious, buttery flavor. The Swiss take their Gipfeli seriously, making them a staple of many daily rituals. Here’s a deeper look at some traditional Swiss ways to enjoy Gipfeli, ensuring you experience them as the Swiss do.
1. Classic Swiss Breakfast
One of the most common and traditional ways to enjoy Gipfeli is as part of a Swiss breakfast. Swiss breakfasts are typically simple yet satisfying, focusing on fresh, wholesome ingredients. Gipfeli are often served alongside other typical breakfast items such as cheeses, cold cuts, butter, and marmalade.
The Gipfeli is usually eaten with a cup of coffee or hot chocolate. The Swiss love to dip their Gipfeli into their coffee, allowing the warm, rich drink to complement the flaky, buttery pastry. This practice of dipping is especially popular in Swiss cafés, where Gipfeli are served fresh every morning.
In many Swiss homes, Gipfeli are often accompanied by a selection of spreads like honey, jam, or nut butter, which add a sweet or savory touch to the pastry. A light Swiss breakfast with Gipfeli is both nourishing and comforting, providing a perfect start to the day.
2. Paired with Swiss Coffee (Kaffee)
A cup of coffee is perhaps the most classic Swiss pairing for Gipfeli. Switzerland has a rich coffee culture, and drinking coffee with Gipfeli is a cherished tradition. The Swiss are known for their love of strong coffee, typically served as an espresso or in a larger cup as Kaffee (which is similar to a drip coffee).
Gipfeli are commonly eaten in the morning, alongside a Kaffee or Café Crème, which is a milder version of an espresso with steamed milk. The combination of the slightly bitter coffee and the rich, buttery pastry creates a delightful balance of flavors. In fact, in Swiss cafés, you will often see locals dipping their Gipfeli into their coffee, savoring the texture and flavor combination with every bite.
In the winter months, some Swiss prefer to enjoy their Gipfeli with a warm Caffè Latte or hot chocolate, especially on chilly mornings. The smoothness of these drinks pairs well with the crisp texture of the pastry, making for a cozy, comforting breakfast or snack.
3. Afternoon Snack with Tea
Although Gipfeli are often associated with breakfast, they are also a popular choice for an afternoon snack, especially in Swiss homes or cafés. In Switzerland, the tradition of having an afternoon snack, called Nachmittagkaffee (afternoon coffee), is quite common. This usually occurs between 3:00 and 4:00 PM and involves a light refreshment, often paired with tea or coffee.
During this time, Gipfeli are often served alongside a hot cup of tea. The Swiss have a fondness for black teas, such as Earl Grey or Darjeeling, but herbal teas like chamomile or mint are also popular choices. The light, flaky texture of Gipfeli contrasts nicely with the warmth and earthiness of the tea, making it a perfect afternoon pick-me-up. Many Swiss also enjoy their Gipfeli with a dollop of jam or a smear of butter for extra flavor.
4. As Part of a Swiss Buffet or Brunch
In Swiss culture, Gipfeli are commonly served as part of a larger buffet, particularly during family gatherings, celebrations, or brunches. A traditional Swiss brunch spread is a smorgasbord of breads, cheeses, meats, and fresh fruits, with Gipfeli playing a key role in the spread.
At these occasions, the Gipfeli are often served alongside various cheeses, such as Gruyère or Emmental, and cold cuts like Swiss ham or salami. This combination of sweet and savory elements reflects the balance that is central to Swiss cuisine. The addition of a hot beverage, typically coffee or tea, makes this a hearty and satisfying meal.
At these events, it’s common for guests to enjoy their Gipfeli with a variety of spreads and toppings. These can include fruit preserves, honey, or even Swiss chocolate spreads. This variety adds an extra layer of enjoyment to the pastry, allowing individuals to personalize their meal according to their tastes.
5. As a Swiss Treat for Guests
When Swiss families have guests over, Gipfeli are often served as a special treat. Whether it’s for a morning visit, an afternoon tea, or a casual get-together, offering freshly baked Gipfeli is a gesture of hospitality. It’s a way of welcoming guests into the home and treating them to a taste of Swiss culture.
Typically, these pastries are presented on a platter, often arranged in a way that makes them easy for guests to grab and enjoy. Swiss hosts may also serve the Gipfeli with an assortment of local cheeses or a selection of homemade jams, further enhancing the experience. The warm, inviting aroma of freshly baked Gipfeli can be the perfect way to make guests feel at home.
6. Savoring the Simplicity of Swiss Pastry Tradition
While Gipfeli are delicious on their own, their role in Swiss culture goes beyond just being a tasty treat. They are part of the Swiss way of life, from starting the day with a comforting breakfast to sharing a moment with family and friends. The Swiss approach to food is rooted in simplicity, quality, and an appreciation for the finer things in life, and Gipfeli embody these values perfectly.
Whether eaten with a strong cup of coffee in the morning or as part of a larger spread, Gipfeli offer a small but meaningful way to connect with Swiss traditions. By enjoying them the way the Swiss do, you not only savor their flavor but also partake in a long-standing cultural practice that highlights the warmth of Swiss hospitality and the joy of simple pleasures.
Best Pairings: Coffee, Hot Chocolate, or Swiss Cheese
The right pairing can elevate the experience of eating Gipfeli, bringing out the rich, buttery flavor and enhancing the flaky texture. In Switzerland, certain beverages and foods are traditionally paired with Gipfeli to make the most of the pastry’s delightful taste. Here’s a closer look at the best pairings that will complement your Gipfeli and allow you to enjoy them the Swiss way.
1. Coffee: A Swiss Classic
Switzerland has a strong coffee culture, and Gipfeli are often paired with a cup of hot, freshly brewed coffee. The contrast between the slightly bitter taste of coffee and the rich, buttery flavor of the Gipfeli creates a perfect balance that many Swiss love.
In Swiss cafés, the most common coffee pairing with Gipfeli is Kaffee (drip coffee) or Café Crème (a milder version of an espresso with steamed milk). The warm, rich coffee helps to enhance the flaky texture of the pastry, while its bitter notes provide a perfect contrast to the sweetness of the Gipfeli.
For those who enjoy a stronger taste, Espresso is a popular choice in Switzerland, as its robust flavor complements the buttery pastry, making it an ideal pairing for a mid-morning snack. The Swiss also enjoy their Gipfeli with Cappuccino or Latte, especially if they prefer a creamy texture to balance the pastry’s richness.
Additionally, many Swiss enjoy dipping their Gipfeli into their coffee. This practice not only makes for a delightful experience but also softens the pastry just enough for a perfect bite. The coffee adds a depth of flavor that enhances the enjoyment of the pastry’s delicate layers.
2. Hot Chocolate: Comforting and Sweet
While coffee is the most traditional pairing, hot chocolate is another beloved drink in Switzerland, particularly during colder months. Swiss hot chocolate is famously rich, creamy, and made from high-quality cocoa beans. When paired with Gipfeli, it creates a comforting, indulgent experience that is both sweet and satisfying.
The smooth, velvety texture of Swiss hot chocolate balances out the crispness of the Gipfeli, making this combination an ideal choice for those with a sweet tooth. Many Swiss enjoy this pairing in the afternoon or during cold winter mornings, where the warmth of the hot chocolate combined with the buttery pastry offers a sense of comfort and luxury.
To add a bit of flair, you can even sprinkle a bit of cinnamon or cocoa powder on top of your hot chocolate before enjoying it with your Gipfeli. This simple touch enhances the flavor profile of both the hot chocolate and the Gipfeli, creating a more complex and satisfying treat.
3. Swiss Cheese: A Savory Option
While Gipfeli are traditionally sweet, they can also be paired with savory options, such as Swiss cheese, for a unique and flavorful experience. Switzerland is renowned for its cheeses, and pairing a Gipfeli with a slice of Swiss cheese is a traditional way to enjoy this pastry. The combination of sweet and savory elements reflects the Swiss preference for balanced flavors.
Gruyère, Emmental, and Appenzeller are some of the most famous Swiss cheeses that pair wonderfully with Gipfeli. The nutty and slightly salty flavors of these cheeses contrast nicely with the sweet, buttery pastry. The Gipfeli acts as a delicate vessel, allowing the rich, creamy texture of the cheese to shine through without overwhelming the palate.
For a lighter, more delicate pairing, you could opt for Fribourg cheese, which has a mild, slightly tangy flavor. This cheese complements the soft texture of the Gipfeli without overpowering its sweetness. Some Swiss people enjoy serving Gipfeli with cheese for a savory breakfast or as part of a brunch spread, allowing for a unique twist on this beloved pastry.
To elevate the experience, you can also add some freshly sliced fruits, such as apples or grapes, to the cheese and Gipfeli pairing. The sweetness of the fruit enhances the richness of the cheese and the Gipfeli, creating a balanced and delicious bite.
4. Combining Pairings for a Well-Rounded Experience
For an even more enjoyable experience, you can mix and match these pairings to create a well-rounded Swiss treat. A cup of coffee or hot chocolate along with a slice of Swiss cheese can offer a mix of sweet and savory elements that satisfy different taste preferences. This combination is perfect for a brunch or an afternoon snack with friends or family.
Another popular way to enjoy Gipfeli is to start with a cup of coffee or hot chocolate and then follow it with a piece of cheese. The coffee or chocolate provides the sweet foundation, while the cheese adds a savory contrast that refreshes the palate and complements the rich flavors of the pastry. This combination offers a more complex tasting experience, with each bite bringing a new layer of flavor to the table.
If you’re hosting a Swiss-inspired breakfast or brunch, consider serving both coffee and hot chocolate alongside a selection of cheeses. This variety allows your guests to choose their preferred pairing and enjoy Gipfeli in the way they find most satisfying.
5. The Perfect Timing for Pairings
In Swiss culture, the timing of these pairings is just as important as the pairing itself. For instance, Gipfeli with coffee or hot chocolate is a common morning ritual, while cheese and Gipfeli are often enjoyed later in the day, especially during afternoon snacks or as part of a leisurely brunch.
If you’re enjoying Gipfeli as part of a breakfast, pairing it with coffee or hot chocolate is a great choice to kick-start your day. For a more relaxed, savory experience, serve Gipfeli with cheese at lunchtime or as a satisfying afternoon treat. The Swiss know that food is not just about the ingredients—it’s about the timing and the experience of sharing good food with others.
How to Store and Reheat Gipfeli for Freshness
Gipfeli, like any freshly baked pastry, is best enjoyed when it’s still warm and crisp. However, if you have leftover Gipfeli or want to prepare some in advance, it’s important to store and reheat them properly to preserve their freshness, flavor, and flaky texture. Here’s how you can store and reheat your Gipfeli to keep them as delicious as the moment they were first baked.
1. Storing Gipfeli: Keep Them Fresh
The key to keeping your Gipfeli fresh is ensuring they are stored in an airtight container to prevent them from becoming stale. Follow these storage tips to extend the shelf life of your Gipfeli:
- Room Temperature: If you plan to consume your Gipfeli within a couple of days, you can store them at room temperature. Simply place the pastries in an airtight container or wrap them tightly in plastic wrap. Avoid leaving them uncovered, as this will cause them to lose moisture and become dry.
- Refrigeration: If you need to store Gipfeli for a longer period, refrigeration is a better option. Place the Gipfeli in an airtight container or zip-lock bag, ensuring they are well-sealed to prevent any moisture from getting inside. This will help preserve their freshness for up to 3-4 days. However, it’s important to note that refrigeration can cause the pastries to lose some of their crispness.
- Freezing: For long-term storage, freezing is the best option. Gipfeli freeze well, and this allows you to enjoy them at a later time without compromising their flavor or texture. First, allow the Gipfeli to cool completely, then wrap each one individually in plastic wrap or aluminum foil. Place them in a freezer-safe bag or airtight container, and store them in the freezer for up to one month.
2. Reheating Gipfeli: Restoring the Flakiness
When it comes to reheating Gipfeli, the goal is to restore their crispy, flaky texture while ensuring they remain soft and moist on the inside. Here are the best methods for reheating your Gipfeli:
- Oven Method (Best for Freshness): The oven is the most effective way to reheat Gipfeli and maintain their flaky texture. Preheat your oven to 350°F (175°C). Place the Gipfeli on a baking sheet lined with parchment paper, and cover them loosely with aluminum foil to prevent them from drying out. Heat them for about 5-7 minutes, or until they are warmed through. For a crispier texture, remove the foil during the last 2-3 minutes of heating. This method is ideal for Gipfeli stored in the refrigerator or freezer.
- Reheating from Frozen: If you’ve frozen your Gipfeli, there’s no need to thaw them before reheating. Simply follow the same oven method as above, but increase the reheating time by 3-5 minutes to ensure the pastries are fully heated through. You can also brush the Gipfeli with a bit of melted butter before reheating to restore the richness of the flavor.
- Microwave Method (Quick but Less Crisp): If you’re in a hurry and don’t mind sacrificing some crispiness, you can microwave your Gipfeli. Place the pastry on a microwave-safe plate and cover it with a damp paper towel to prevent it from drying out. Microwave for 20-30 seconds, or until heated through. While this method is quick, it won’t restore the crispiness of the pastry, so it’s best for when you’re short on time.
3. Tips for Storing and Reheating Perfectly
- Avoid Overheating: Overheating can cause your Gipfeli to become dry and hard. Always check the pastries while reheating to ensure they are not left in the oven or microwave for too long.
- Maintain Flaky Layers: If you’re reheating a Gipfeli that’s been refrigerated or frozen, consider gently separating the layers of the pastry before reheating. This helps to ensure the layers remain distinct and flaky after reheating, as the butter inside the layers may harden during storage.
- Do Not Store in Plastic Bags Immediately After Baking: After baking, it’s important to let your Gipfeli cool down before storing them. If you store them too soon in plastic bags, condensation will form, making the pastry soggy. Allow them to cool completely at room temperature before storing them to maintain their crispness.
- Consider Refreshing with Butter or Jam: If your Gipfeli seems to have lost some of its richness after reheating, you can refresh the flavor by spreading a little butter or your favorite jam on top before serving. This will restore some of the moisture and flavor, and make the Gipfeli taste fresh again.
4. Can You Store and Reheat Filled Gipfeli?
If your Gipfeli is filled with chocolate, cream, or fruit, the storage and reheating process should be handled carefully to prevent the filling from becoming soggy or spilling out. Here are some tips for storing and reheating filled Gipfeli:
- Storage: Fillings such as chocolate or custard may cause the pastry to soften more quickly, so it’s best to consume these types of Gipfeli within 1-2 days. Store them in an airtight container to preserve freshness.
- Reheating: When reheating filled Gipfeli, use the oven method and be cautious not to overheat them, as this can cause the filling to become too runny or burn. You may want to cover the pastries with aluminum foil to help retain moisture and prevent over-baking.
Common Mistakes and Expert Tips for Perfect Gipfeli
Making the perfect Gipfeli requires careful attention to detail and a bit of practice. While the process may seem simple, there are a few common mistakes that even experienced bakers can make when preparing this Swiss pastry. To help you avoid these pitfalls and ensure that your Gipfeli turn out perfectly every time, here are some expert tips and insights.
1. Overworking the Dough
One of the most common mistakes when making Gipfeli is overworking the dough during the mixing and kneading stages. While it’s important to develop the gluten to give the pastry structure, excessive kneading can lead to tough, dense Gipfeli instead of light, flaky layers.
Expert Tip: To avoid overworking the dough, mix the ingredients until just combined and knead gently for a short time. When working with the dough, handle it as little as possible. Over-kneading can also lead to uneven butter layers, which are essential for the perfect flakiness.
2. Using Cold or Warm Butter for Laminating
Laminating the dough, which involves layering butter between folds of dough, is what gives Gipfeli its characteristic flaky texture. However, using butter that is too cold or too warm can disrupt this process. If the butter is too hard, it will be difficult to spread and could break through the dough. On the other hand, if the butter is too soft, it will melt into the dough rather than forming separate layers.
Expert Tip: The key to successful lamination is to use cold, firm butter. The butter should be slightly softened but still firm enough to maintain its shape when rolled out. A good way to achieve this is to use cold butter straight from the fridge, cut it into small pieces, and then chill it in the dough for a brief period before laminating.
3. Skipping the Resting Time
Resting the dough between steps is essential for creating the layers in Gipfeli. Skipping this resting time or rushing through the process can result in a dense texture and uneven layers. This resting period allows the dough to relax, making it easier to roll out and shape.
Expert Tip: After mixing and kneading the dough, let it rest for at least an hour in the refrigerator to allow the gluten to relax. This is especially important between the folding and rolling steps during lamination. You can even rest the dough overnight to allow it to rise slowly and develop a deeper flavor.
4. Inconsistent Rolling and Shaping
When shaping and rolling the Gipfeli, it’s important to ensure that the dough is evenly rolled out, and the shapes are uniform. Uneven rolling can lead to uneven baking and inconsistent results. The same applies to the shaping process—if the Gipfeli are not shaped properly, they may not bake evenly or may lose their attractive crescent shape.
Expert Tip: Roll the dough out evenly, ensuring it is of a consistent thickness. Use a sharp knife or pizza cutter to make clean, even cuts when dividing the dough into triangles. When shaping the Gipfeli, be gentle and make sure the edges are tucked in tightly to maintain the shape during baking. If necessary, use a bit of egg wash to secure the edges and prevent them from unraveling.
5. Not Using the Right Oven Temperature
Oven temperature plays a crucial role in baking Gipfeli. Baking at too high a temperature can cause the pastries to brown too quickly on the outside while leaving the inside undercooked. On the other hand, baking at too low a temperature can result in a soggy texture.
Expert Tip: Preheat your oven thoroughly to around 350°F (175°C) before placing the Gipfeli inside. It’s essential to bake at a moderate temperature to ensure even cooking. If you notice that your Gipfeli are browning too quickly, reduce the temperature slightly and rotate them halfway through baking to ensure uniform results.
6. Forgetting to Use Egg Wash for a Golden Finish
An egg wash (a mixture of egg and water or milk) is often used to give Gipfeli their beautiful golden color and glossy finish. Skipping this step can result in pastries that look pale and unappetizing, even if they taste great.
Expert Tip: Before baking, brush the Gipfeli with an egg wash to achieve that golden-brown sheen. For an extra touch, you can sprinkle some coarse sugar on top to add a little sweetness and texture. Make sure to apply the egg wash gently and evenly using a pastry brush to avoid leaving streaks on the dough.
7. Using Too Much Flour While Rolling
While it’s necessary to dust your work surface with flour to prevent sticking, using too much flour can dry out the dough and affect its texture. Excess flour can interfere with the dough’s ability to form proper layers and may result in a dry, crumbly Gipfeli.
Expert Tip: Use just a small amount of flour when rolling out the dough. If needed, you can use a silicone baking mat or parchment paper to prevent sticking without adding excessive flour. If you notice that the dough is becoming too dry, lightly brush it with water or a bit of melted butter to help it become more pliable.
8. Not Allowing the Gipfeli to Cool Properly
After baking your Gipfeli, it’s tempting to dig in right away, but it’s important to allow them to cool slightly before enjoying. Cutting into a hot pastry can cause the layers to collapse, resulting in a less-than-perfect texture.
Expert Tip: Allow your Gipfeli to cool for a few minutes on a wire rack before serving. This will give the layers time to set, preserving the flaky texture. While cooling, be sure to keep the pastries in a well-ventilated space to prevent them from becoming soggy due to trapped steam.
Why Your Gipfeli Isn’t Flaky Enough (Common Baking Mistakes)
One of the most distinguishing characteristics of Gipfeli is their delicate, flaky texture. Achieving that perfect flakiness can sometimes be tricky, and if your Gipfeli are coming out dense or lacking that light, crispy crunch, there may be a few key mistakes you’re making along the way. Understanding these common pitfalls can help you troubleshoot and refine your technique for the ideal Gipfeli every time.
1. Overworking the Dough
Overworking the dough is one of the most common reasons why Gipfeli fail to achieve the desired flakiness. Kneading too much or working the dough too aggressively can activate too much gluten, resulting in a chewy, dense pastry instead of the flaky layers we expect.
Why this affects flakiness: Gluten development is necessary for structure, but too much will lead to a tough texture. The key to Gipfeli is achieving the right balance between developing gluten and maintaining a delicate structure.
Solution: Handle the dough gently. Mix the ingredients just until combined and knead only for a short time. Once you start rolling and laminating, avoid overworking the dough and let it rest between folds to relax the gluten.
2. Incorrect Butter Temperature
Butter plays a central role in creating those delicious, flaky layers in Gipfeli. If your butter is either too cold or too soft, it can cause problems during the lamination process, leading to uneven layers and a less-than-perfect flaky texture.
Why this affects flakiness: When butter is too hard, it will break through the dough during rolling, disrupting the layers. If the butter is too soft, it will melt into the dough rather than forming distinct layers, leading to a less flaky result.
Solution: Use cold butter that’s firm but pliable, ideally at refrigerator temperature. If the butter is too soft or too hard, refrigerate it for a short while until it reaches the ideal consistency. The butter should be able to form thin, consistent layers between the dough without melting into it.
3. Insufficient Resting Time
Resting the dough between each stage of preparation is crucial for Gipfeli to achieve their signature flakiness. When you skip or rush through the resting stages, the dough doesn’t have enough time to relax, and the layers can become uneven.
Why this affects flakiness: Resting the dough allows the gluten to relax, making it easier to roll out and fold. It also helps the butter remain solid and distinct within the dough, which is key for lamination. Without sufficient rest, the dough may become tough and difficult to shape.
Solution: Let the dough rest for at least 30 minutes to an hour in the refrigerator after the initial mixing and kneading. When you’re laminating, take care to rest the dough in between folds, especially if the dough starts to feel too warm or soft.
4. Skipping the Lamination Process
Lamination is what gives Gipfeli their signature flaky layers. This process involves folding butter into the dough to create thin layers that will puff up during baking. Skipping or rushing through this step can lead to flat, dense Gipfeli instead of the light and airy texture you’re aiming for.
Why this affects flakiness: Without proper lamination, the dough lacks the multiple layers needed to create the puffed, flaky texture. This will result in Gipfeli that are heavier and denser, without the crisp texture you desire.
Solution: Follow the lamination process carefully, folding the dough and butter at least 3-4 times, allowing each fold to rest in between. Make sure each layer of butter is evenly distributed and visible, and that the dough remains chilled during the entire process to maintain distinct layers.
5. Not Rolling the Dough Thin Enough
Another mistake that can lead to less flaky Gipfeli is not rolling the dough thin enough before folding and shaping. The thickness of the dough impacts how many layers will form during the baking process.
Why this affects flakiness: The thinner you roll the dough, the more layers you can create. If the dough is too thick, the layers will not have enough space to puff up properly, resulting in a denser, less flaky texture.
Solution: Roll the dough as thin as possible without tearing it, aiming for a thickness of around 1/8 inch (3mm). This will allow the butter and dough layers to separate and expand during baking, resulting in a light and flaky texture.
6. Using Too Much Flour During Rolling
Using too much flour while rolling out the dough can make it dry and difficult to work with. Excess flour can also affect the dough’s ability to achieve the desired texture, making the Gipfeli less flaky and more crumbly.
Why this affects flakiness: When too much flour is incorporated into the dough, it can create a dry texture that prevents the dough from puffing up properly during baking. This can also interfere with the lamination process, preventing the butter from forming distinct layers.
Solution: Use only a light dusting of flour on your work surface when rolling out the dough. If the dough sticks, use just a small amount of flour to prevent it from becoming too dry. You can also use parchment paper or a silicone baking mat to reduce the need for extra flour.
7. Baking at the Wrong Temperature
The oven temperature plays a significant role in how the dough rises and achieves a flaky texture. Baking at too high or too low a temperature can cause the Gipfeli to lose their light, airy structure.
Why this affects flakiness: If the oven is too hot, the Gipfeli may brown too quickly on the outside, causing the inside to remain undercooked and dense. If the oven is too cool, the dough won’t rise as much, and the layers may not form properly.
Solution: Preheat your oven to a moderate temperature (about 350°F or 175°C). This allows the dough to bake evenly and achieve that desired puffed, golden exterior. If you notice that your Gipfeli are browning too quickly, reduce the temperature slightly or cover them with foil to prevent burning.
8. Not Using the Right Amount of Butter
Butter is the secret ingredient that gives Gipfeli their rich, flaky texture. Using too little butter can result in a dry, dense pastry, while using too much can cause the dough to become greasy and fail to puff properly.
Why this affects flakiness: The right amount of butter is essential for creating the thin layers of dough that puff up during baking. Too little butter means fewer layers, and too much butter can cause the layers to collapse.
Solution: Stick to the recipe’s recommended butter measurements to ensure a balanced ratio of dough and fat. If you’re experimenting with different types of butter or margarine, be mindful of the fat content to achieve the desired texture.
Avoiding Soggy or Dry Gipfeli
One of the key indicators of a perfectly baked Gipfeli is a balanced texture that is neither soggy nor dry. Achieving this balance can be tricky, especially if you’re new to baking or experimenting with different variations of this Swiss pastry. Understanding the root causes of soggy or dry Gipfeli and how to avoid them will ensure that your pastries turn out just right—flaky, golden, and with the perfect crumb.
1. The Right Butter-to-Dough Ratio
One of the main factors in preventing sogginess or dryness is the butter-to-dough ratio. Too much butter can lead to soggy pastries, while too little butter can result in a dry, crumbly texture.
Why this affects the texture: Butter provides the rich flavor and the moisture needed to create a flaky texture. If there is too much butter, it may seep into the dough during the baking process, making the pastry greasy and soggy. On the other hand, insufficient butter can lead to dry dough that doesn’t have enough moisture to form the delicate, flaky layers.
Solution: Follow your recipe’s butter measurements closely to maintain the right balance. Using cold butter in the lamination process ensures the layers remain distinct and intact without excess butter leaking into the dough.
2. Proper Dough Hydration
The moisture level in your dough is crucial for ensuring that your Gipfeli are neither dry nor soggy. If there isn’t enough liquid, the dough can turn out too dry, leading to a crumbly texture. On the other hand, if the dough is too wet or if the liquid is not incorporated properly, the pastries can become soggy after baking.
Why this affects the texture: Too little liquid causes the dough to be stiff and dry, which prevents it from puffing up during baking. Too much liquid results in a sticky dough that can cause sogginess as the Gipfeli bake, making it difficult for the dough to rise properly.
Solution: Carefully measure the liquid ingredients, especially when using different types of flour. If you live in a humid climate, you might need to reduce the liquid slightly. Allow the dough to come together without being overly wet, and if it feels sticky, you can lightly flour your work surface or dough but avoid over-flouring, as it can result in a dry pastry.
3. Avoid Overproofing the Dough
Proofing is an important step in the baking process, as it allows the yeast to work and the dough to rise. However, overproofing can lead to soggy Gipfeli, as the dough can become too soft and lose its structure.
Why this affects the texture: When the dough is overproofed, the yeast continues to ferment, which can cause the dough to become overly airy and fragile. During baking, this weak structure might collapse or become too soft, leading to sogginess.
Solution: Proof the dough according to your recipe’s recommended times and conditions. Typically, a single proofing period of 1-2 hours is enough for the dough to rise properly. If you feel that the dough has proofed too much, you can refrigerate it for a short time to stop the fermentation process and stabilize the texture.
4. Correct Oven Temperature and Baking Time
Baking your Gipfeli at the wrong temperature can also affect their texture, leading to either dryness or sogginess. If the oven is too hot, the Gipfeli might brown too quickly, causing the interior to remain undercooked or too dry. On the other hand, if the oven is too cool, the pastries may take too long to bake, resulting in excess moisture and a soggy pastry.
Why this affects the texture: The proper oven temperature ensures that the butter layers are able to rise and create the desired flaky texture. If the temperature is too high, the outer layers of the dough will cook too fast, leaving the interior soggy. If the temperature is too low, the pastry may take too long to bake, causing the moisture to remain trapped in the dough and leading to a soggy result.
Solution: Preheat your oven to a moderate temperature (around 350°F or 175°C). If you notice that the pastries are browning too quickly, reduce the temperature slightly. It’s also important to use a baking sheet that is not too crowded to allow even heat distribution.
5. Use Parchment Paper or a Silicone Mat
The surface you bake on can influence the outcome of your Gipfeli. If the baking sheet is ungreased or you don’t use parchment paper or a silicone mat, the pastries may stick to the pan, which can cause uneven baking and potentially result in a soggy bottom.
Why this affects the texture: Without proper non-stick lining, the heat distribution might not be as even, and the pastries may bake unevenly. This can lead to certain parts of the Gipfeli becoming too soft or wet, while others dry out and become overcooked.
Solution: Always use parchment paper or a silicone mat to line your baking sheet. This ensures that heat is evenly distributed and prevents the Gipfeli from sticking to the pan, helping to maintain a balanced texture during baking.
6. Don’t Skip the Cooling Process
After baking your Gipfeli, it’s important to let them cool on a wire rack. While it may be tempting to bite into them right away, allowing them to cool properly ensures that the moisture inside the pastries can stabilize, avoiding sogginess.
Why this affects the texture: If you let the Gipfeli cool on a flat surface or in a closed container, the moisture can become trapped inside, creating sogginess. A wire rack allows air to circulate around the pastries, ensuring they cool evenly without becoming soggy.
Solution: After removing your Gipfeli from the oven, transfer them to a wire rack to cool. This will help the steam escape and allow the pastries to remain crisp and flaky.
Pro Baker Tips for Achieving Swiss Bakery-Quality Results
Achieving Swiss bakery-quality Gipfeli at home is a challenge that requires precision, patience, and a few insider tricks that professionals use. Whether you’re aiming for that perfect flaky texture, golden crust, or an irresistible aroma, there are several pro baker tips that can elevate your pastry-making skills and bring your Gipfeli closer to the standards of Swiss bakeries. These tips focus on the dough, technique, and small details that can make a big difference.
1. Use High-Quality Ingredients
Professional bakers know that quality ingredients are the foundation of any great pastry. When making Gipfeli, using the best possible butter, flour, yeast, and other essential ingredients will directly impact the flavor and texture of your pastries.
Why this makes a difference: High-quality ingredients, especially butter, impart a richer flavor and better texture. Opt for European-style butter, which has a higher fat content than regular butter, creating a more luxurious, flaky result. Choosing a strong bread flour with a high protein content can also improve the dough’s structure, leading to better rise and texture.
Tip: Invest in high-quality butter and flour, and if possible, try using Swiss flour to maintain authenticity in flavor and texture.
2. Keep Ingredients Cold
One of the secrets to getting that signature flaky texture in your Gipfeli is keeping your ingredients, especially the butter, as cold as possible throughout the process. Cold butter forms small pockets in the dough during the lamination process, creating layers that puff up as they bake.
Why this makes a difference: If your butter is too warm, it will melt too quickly and seep into the dough, resulting in a soggy or dense pastry. Cold butter ensures that it stays solid and can create the perfect flaky layers.
Tip: Before you start, chill your butter, mixing bowl, and rolling pin in the fridge for 15–20 minutes. When laminating the dough, make sure to work quickly and return the dough to the fridge if it becomes too soft.
3. Master the Lamination Technique
The lamination process is crucial to achieving the flaky, melt-in-your-mouth texture that Gipfeli are known for. Pro bakers rely on the technique of folding and rolling the dough several times to create thin, buttery layers that will puff up beautifully when baked.
Why this makes a difference: Proper lamination creates the distinct layers in the dough that lead to a flaky, airy texture. Without enough folds, you won’t get the same level of flakiness, and your Gipfeli will be more dense.
Tip: Aim for at least 3-4 folds (or “turns”) during the lamination process. Be sure to chill the dough between each fold to keep the butter cold and prevent it from melting into the dough. If the dough becomes sticky, dust lightly with flour to keep it manageable.
4. Don’t Skip the Resting Time
In many recipes, resting the dough during different stages of the process is a crucial step. While it may feel tempting to skip resting or proofing times to speed up the process, resting the dough helps improve both texture and flavor.
Why this makes a difference: Resting allows the dough to relax, making it easier to roll out without shrinking. It also gives the yeast time to work, improving the rise and flavor. The dough should be rested after mixing and between each fold during lamination.
Tip: Always allow the dough to rest for at least 30 minutes after mixing, and refrigerate it for 15–20 minutes between each lamination fold. Be patient—this will ensure better results in the end.
5. Perfect the Rolling Technique
Rolling out the dough correctly is vital for achieving the ideal thickness and shape for your Gipfeli. Professional bakers are skilled at rolling dough evenly, which ensures that all the layers are uniform and that the pastry bakes evenly.
Why this makes a difference: Uneven rolling can result in thick spots that may not bake as well, leading to inconsistent texture. It can also affect the shape of the Gipfeli, making them less visually appealing.
Tip: When rolling out the dough, use a light hand to avoid pressing out the layers. Work gently from the center outward, rotating the dough as you go to keep it even. If the dough resists rolling, let it rest for a few minutes before continuing.
6. Use a Convection Oven for Even Baking
A convection oven is a secret weapon for many professional bakers, as it circulates air evenly around the pastries, ensuring a consistent and golden result. Using this type of oven can help you achieve the perfect crisp crust and even bake throughout.
Why this makes a difference: In a conventional oven, hot spots may cause uneven baking, leading to undercooked spots or over-browned areas. Convection ovens help distribute heat more evenly, leading to more consistent results.
Tip: If you’re using a conventional oven, consider rotating your Gipfeli halfway through baking to ensure even cooking. For best results, bake at around 375°F (190°C) in a convection oven, and adjust the temperature slightly if you’re using a standard oven.
7. Brush with Egg Wash for a Golden Finish
A shiny, golden finish is one of the hallmarks of professionally baked Gipfeli. This can be achieved by brushing the pastries with an egg wash before baking.
Why this makes a difference: The egg wash creates a beautifully glossy, golden exterior and helps to further develop the flaky layers inside. Without an egg wash, the Gipfeli might look pale or unevenly baked.
Tip: For a perfect egg wash, lightly beat an egg with a tablespoon of water, and use a pastry brush to gently coat the surface of the Gipfeli before baking. Be careful not to oversaturate the dough, as this can result in uneven coloring.
8. Bake in Small Batches for Optimal Crispiness
Baking Gipfeli in small batches ensures that each pastry has enough space to expand properly and develop a crisp, flaky texture. Overcrowding the pan can prevent proper heat circulation, leading to uneven results.
Why this makes a difference: When pastries are too close together, the heat doesn’t circulate as freely, which can result in soggy or unevenly baked Gipfeli.
Tip: Arrange your Gipfeli on the baking sheet with plenty of space between each one. If you’re baking multiple batches, allow the oven to return to the correct temperature before placing the next tray in.
9. Focus on the Cooling Process
While it might be tempting to dive into the Gipfeli as soon as they come out of the oven, letting them cool properly is an essential step. Professional bakers know that cooling on a wire rack allows the steam to escape, which prevents the pastries from becoming soggy.
Why this makes a difference: If the Gipfeli cool on a solid surface or in a closed container, the trapped moisture can make the pastry soggy. A wire rack lets the air circulate freely, helping the Gipfeli maintain their crisp, flaky texture.
Tip: Let your Gipfeli cool for at least 10 minutes on a wire rack before serving. This ensures that they firm up and set, making them easier to handle and enjoy.
onclusion
Creating the perfect Gipfeli at home is a rewarding experience that brings a taste of Swiss tradition right to your kitchen. While the process might seem intricate at first glance, with the right techniques and a few professional tips, it’s entirely within your reach. The beauty of Gipfeli lies in their delicate balance of flavors and textures—soft, buttery dough with flaky layers that melt in your mouth.
Mastering Key Techniques for Perfect Results
By focusing on the essentials—using high-quality ingredients like European-style butter, taking the time to laminate the dough properly, and incorporating cooling and resting periods for optimal texture—you can elevate your Gipfeli to the level of those served in the finest Swiss bakeries. These small, yet crucial steps make all the difference in achieving that signature crispness and buttery flavor.
Avoiding Common Mistakes
In addition, understanding how to avoid common mistakes, such as overworking the dough or skipping essential steps like chilling between folds, will help ensure that your Gipfeli turn out perfect every time. Professional bakers swear by these methods because they are tried and tested, and with patience, you can master them as well.
Serving and Enjoying Your Gipfeli
Once you’ve achieved the perfect Gipfeli, the next step is enjoying them! Whether served with a traditional Swiss breakfast or alongside a warm cup of coffee or hot chocolate, the enjoyment of these pastries is the reward for your hard work. Plus, knowing how to store and reheat your Gipfeli will ensure they stay fresh for days, ready for you to enjoy whenever the craving strikes.
The Art of Baking Gipfeli at Home
In the end, baking Gipfeli is not just about following a recipe—it’s about taking the time to refine your skills, learn from your mistakes, and appreciate the artistry of Swiss baking. Every batch brings you closer to perfection, and with practice, you’ll be able to replicate that bakery-quality result right in your home kitchen. So, roll up your sleeves, gather your ingredients, and embark on a delightful journey of creating these buttery, flaky pastries that are sure to impress everyone you share them with.