If you’re planning a fun and memorable celebration, a Bluey-themed birthday cake is the perfect centerpiece for any kids’ party. This whimsical cake, inspired by the beloved animated TV show Bluey, brings the characters to life and adds a splash of color and excitement to the event. In this guide, we’ll walk you through the steps to create the ultimate Bluey-themed birthday cake, from gathering ingredients to decorating with fondant and edible markers.
Introduction to Bluey Cake
https://www.wilton.com/Wilton Cake Decorating – httphttps://www.wilton.com/s://www.wilton.com/
Bluey has become a household favorite, delighting children and parents alike with its heartwarming stories and playful characters. The show’s colorful animation and engaging adventures make it an ideal theme for birthday parties and special celebrations. One of the best ways to bring Bluey to life at your event is with a themed cake. A Bluey cake not only adds a fun and exciting touch to the party but also serves as a delicious treat that guests of all ages will enjoy.
Whether you are hosting a birthday party, a Bluey-themed playdate, or a special gathering for a young fan, a Bluey cake is a fantastic choice. Its bright blue hues, playful designs, and creative decorations make it stand out as a show-stopping centerpiece. The cake can be customized to feature Bluey, Bingo, or even their entire family, giving you endless possibilities to match the personality of the child being celebrated.
Some may think that making a Bluey cake requires professional baking skills, but that’s not the case. With the right guidance, ingredients, and tools, anyone can create a cake that looks amazing and tastes just as good. From simple buttercream frosting designs to intricate fondant decorations, there are plenty of ways to achieve a Bluey-inspired look without stress.
Introduce the Concept of a Bluey-Themed Cake
A Bluey-themed cake is more than just dessert. It brings the magic of the popular children’s show to life. Inspired by the hit Australian series Bluey, this cake captures the bright colors, playful spirit, and lovable characters kids adore. Whether it’s a simple round cake with Bluey’s face or a detailed 3D model, this themed cake makes any celebration special.
The best part about a Bluey cake is its flexibility. Bakers can choose a classic design or go for something more detailed. A round cake with Bluey’s face is great for beginners. More advanced bakers might prefer a multi-tiered cake featuring Bluey, Bingo, and their family. Cupcakes with Bluey toppers or a cake shaped like Bluey’s head also make fun options. No matter the style, this cake will impress both children and guests.
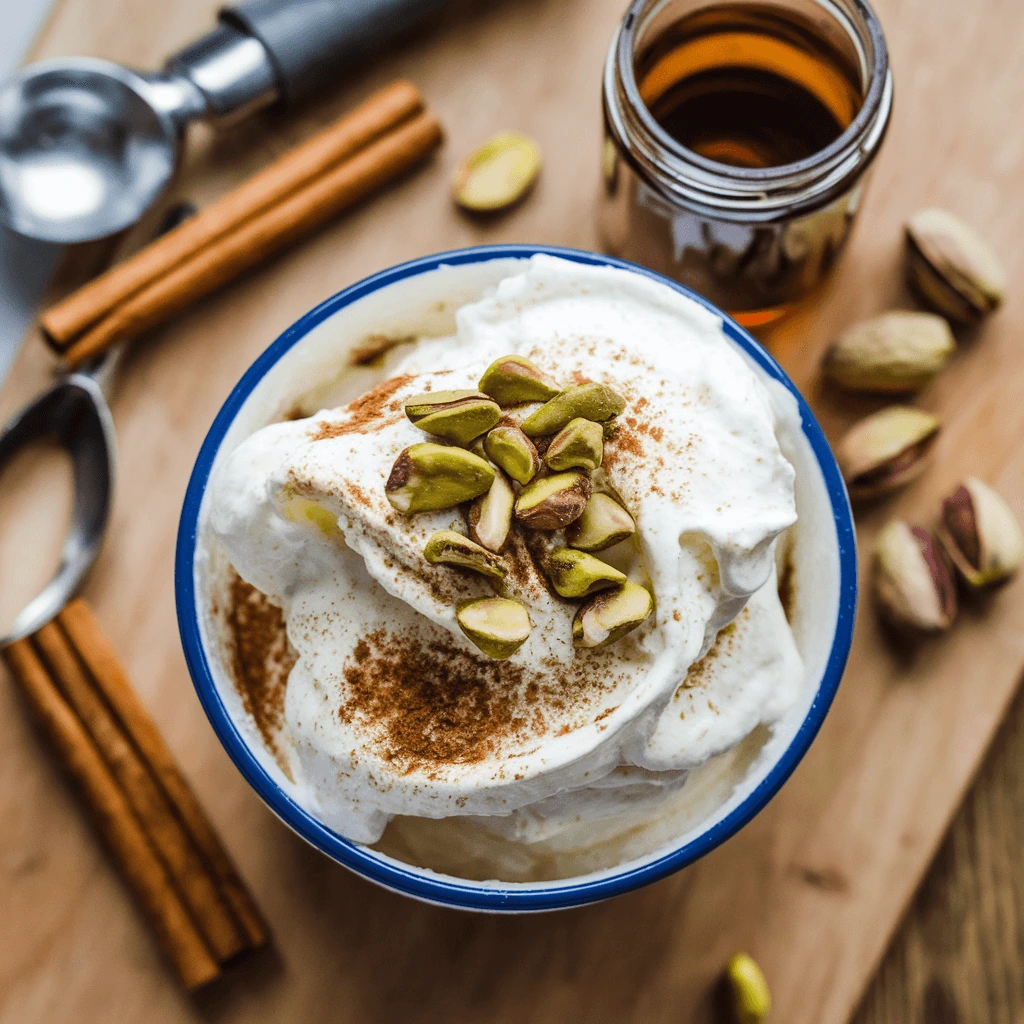
A Bluey cake should taste as good as it looks. Popular flavors include vanilla, chocolate, funfetti, and red velvet. Decorations can be made with buttercream frosting, fondant, edible prints, or a mix of these for a polished finish.
Why Bluey Cakes Are Perfect for Kids’ Birthdays or Fan Celebrations
A Bluey-themed cake is the ultimate treat for any child who loves the show. Bluey is one of the most popular kids’ TV series, known for its heartwarming stories and lovable characters. Its bright colors, fun adventures, and family-friendly messages make it a favorite among young viewers. A cake inspired by Bluey brings that same joy and excitement to a party, making it the perfect choice for birthdays, themed gatherings, or any special event for a Bluey fan.
One reason Bluey cakes are ideal for kids’ birthdays is that they instantly create a fun and engaging atmosphere. The cake becomes more than just a dessert—it’s a statement piece that ties the entire celebration together. Whether the party decorations feature Bluey and Bingo or simply include the show’s signature blue and orange color scheme, the cake completes the theme beautifully. Guests will be delighted to see their favorite character come to life in cake form.
Another advantage of a Bluey cake is its flexibility in design and size. Parents can choose a simple single-layer cake decorated with Bluey’s face or go all out with a multi-tiered cake featuring Bluey, Bingo, and their friends. Cupcakes with Bluey-themed toppers are also a great option, especially for younger kids who may find them easier to handle. These different cake styles make it possible to match the dessert to the size and scale of the celebration.
Beyond appearance, a Bluey cake also adds excitement to the party. Kids love seeing their favorite characters in edible form, and a themed cake makes the celebration feel extra special. The moment the cake is revealed often becomes a highlight of the event, creating excitement and lasting memories for both the birthday child and guests.
How Bluey’s Popularity as a TV Show Can Inspire Cake Designs
Bluey has won the hearts of children and parents worldwide with its charming storytelling and relatable family moments. Moreover, the show’s bright colors and playful animation make it a fantastic source of cake design inspiration. From character-themed cakes to scene-based creations, the possibilities are endless.
Character-Inspired Cake Designs
Since Bluey is full of lovable characters, a cake featuring Bluey or Bingo instantly excites fans. Many bakers prefer a round cake with Bluey’s face, using fondant or edible prints. This simple yet effective design works well for beginners.
For a grander look, tiered cakes offer more space to showcase multiple characters. The bottom layer can highlight Bluey, the middle can feature Bingo, and the top can include Bandit and Chilli. Additionally, using bright blue and orange frosting enhances the cake’s authenticity. Skilled bakers can even create a 3D sculpted cake of Bluey in a playful pose, making the design even more impressive.
Scene-Themed Cakes
Beyond characters, many Bluey episodes feature exciting locations that translate well into cake designs. For example, a cake shaped like the Heeler family’s home makes a fun and recognizable centerpiece. Adding edible figures of Bluey, Bingo, and their parents brings it to life.
Similarly, other memorable scenes work beautifully as cake themes. A beach day, a camping trip, or a backyard adventure can be recreated with fondant trees, waves, or toy-inspired decorations. These small details make the cake more immersive and unique.
Color and Pattern Inspiration
If creating character-based designs feels too complex, the show’s colors provide an easy alternative. Bluey’s signature blue, orange, and yellow offer a simple yet effective way to create a themed cake. Additionally, techniques like ombre frosting, watercolor buttercream, or fondant stripes can add a modern touch.
Furthermore, incorporating themed elements enhances the design without extra effort. Paw prints, dog bones, or stars can be piped onto the cake for extra detail. These subtle touches ensure a visually appealing cake while maintaining simplicity.
Customizable Cakes for Different Skill Levels
One of the best things about Bluey cakes is their flexibility. Whether you’re a beginner or an experienced baker, there’s a design that suits your skill level. For instance, a simple sheet cake with Bluey-colored frosting and store-bought toppers is perfect for beginners. Meanwhile, intermediate bakers can try fondant cutouts of Bluey and Bingo. On the other hand, experts may craft detailed 3D cakes or hand-painted designs.
Here’s a refined version of the section with active voice and more subheadings to ensure readability and flow:
Essential Ingredients for Your Bluey Cake
Creating the perfect Bluey-themed cake begins with selecting the right ingredients. Quality ingredients play a crucial role in ensuring both the appearance and taste of the cake meet your expectations. Whether you’re a beginner or an experienced baker, the choice of ingredients will help elevate the overall result. Below, we break down the essential components you need to create a Bluey cake that will delight both eyes and taste buds.
Basic Cake Ingredients
To build the foundation of your Bluey cake, you’ll need these essential ingredients:
- Flour
Flour is the main structure of any cake. For a classic, soft texture, all-purpose flour works well. If you want a lighter cake, cake flour is a good option. If you need a gluten-free cake, you can easily substitute gluten-free flour blends, which offer great results without compromising taste. - Sugar
Sugar adds sweetness and helps with the cake’s texture. It is essential for a soft crumb, and for added flavor depth, you might consider using alternatives like honey or coconut sugar. - Eggs
Eggs are the binding agents that hold everything together. They also add moisture and help the cake rise. For those following a vegan or egg-free diet, flax eggs or aquafaba can be used as replacements. - Butter or Oil
Butter gives your cake a rich, delicious flavor, while oil helps the cake stay moist. If you want to create a dairy-free version of your cake, vegan butter is an excellent substitute. - Baking Powder or Baking Soda
These leavening agents ensure your cake rises and becomes light and fluffy. You can opt for baking powder for a smoother texture, but baking soda can be used in recipes where acidity is present, such as lemon or buttermilk cakes.
Frosting and Decoration Ingredients
The fun part of the cake-making process is decorating. Here are the key ingredients needed to create a beautifully themed Bluey cake:
- Buttercream
Buttercream is the most popular choice for cake decoration. It provides a smooth, creamy texture that is easy to spread and pipe. To match Bluey’s vibrant colors, you can easily tint your buttercream with food coloring. Gel food colors are best because they provide vibrant hues without altering the texture of the frosting. - Fondant
Fondant is perfect for creating smooth, clean finishes on cakes. It’s ideal if you want to craft detailed character designs, like Bluey’s face or her house. Fondant can also be used to create 3D shapes, such as Bluey’s ears or paws. - Food Coloring
To get the perfect shades for your Bluey-themed cake, use food coloring. Gel-based food coloring works better than liquid versions because it delivers bold, vibrant colors without thinning your frosting or fondant. For Bluey’s blue, use a rich navy blue, and for Bingo, a bright orange hue is perfect. - Edible Decorations
Edible decorations like colored sprinkles, edible glitter, or sugar pearls can add a touch of whimsy to your cake. You can also find edible images that feature Bluey characters and simply place them on your cake to give it a professional look. - Royal Icing or Piping Gel
Royal icing works wonders for detailed decorations. It dries hard, making it ideal for piping intricate designs like Bluey’s facial features. Piping gel, on the other hand, provides a glossy finish that can be used to create shiny elements or water effects.
Flavor Variations to Complement the Theme
While vanilla cake is always a favorite, Bluey cakes can be made with various flavor profiles to excite your guests. Here are a few options:
- Chocolate Cake
If you’re a fan of rich, indulgent flavors, a chocolate cake is a great choice. Pair it with vanilla or chocolate buttercream for a delicious combination that will keep everyone coming back for more. - Lemon Cake
Lemon cake offers a refreshing twist with its light and zesty flavor. It contrasts nicely with sweet frosting, and a lemon buttercream will complement this flavor perfectly. - Funfetti Cake
For an extra touch of fun, you can create a funfetti cake. Adding colorful sprinkles to the batter will give the cake a delightful surprise when it’s cut, perfect for a Bluey-themed celebration. - Carrot Cake
For a healthier option, carrot cake brings a cozy, spiced flavor. Pair it with cream cheese frosting, which will add tanginess and depth, making it an excellent choice for anyone who prefers a lighter, more complex flavor.
Toppings and Garnishes for Extra Flair
To give your Bluey cake a final touch, consider adding some fun and creative toppings:
- Edible Flowers
Bright, colorful edible flowers such as pansies or violets can add a fresh, natural element to your cake. They bring a pop of color and elegance, making your Bluey cake look even more festive. - Chocolate Shavings
For added texture, sprinkle chocolate shavings around the edges of the cake. They provide a crunchy contrast to the smooth frosting and add an extra layer of sweetness. - Fresh Fruit
Fresh fruit like berries, slices of citrus, or even dried fruits can be placed on top of the cake for a burst of natural color and flavor. This also enhances the visual appeal without overwhelming the cake’s overall theme. - Character Figures
Plastic or edible figures of Bluey and her family are a fun way to finish off your cake design. Place them strategically on the cake, whether on top or along the sides, to create an exciting scene from the show.
By selecting the right ingredients and paying attention to details, your Bluey cake will not only look stunning but also taste incredible. From the cake base to the frosting and decorations, every step ensures that your creation reflects the playful and vibrant spirit of Bluey.
List the Key Ingredients Needed for a Bluey-Themed Cake
Creating the perfect Bluey-themed cake requires a few essential ingredients that form the foundation of any cake. These key ingredients are vital for a successful result and will help you achieve the texture, flavor, and appearance you desire for your themed creation. Here’s a detailed breakdown of the most important ingredients you’ll need to create a Bluey cake that’s both delicious and visually appealing:
1. Flour
Flour is the backbone of any cake recipe. It provides structure and helps the cake rise when combined with other ingredients. The most commonly used flour for cakes is all-purpose flour, which strikes a balance between texture and stability. However, for a lighter and softer cake, you can use cake flour, which has a finer texture and less protein content. If you’re baking for those with gluten sensitivities, there are plenty of gluten-free flour options available, such as rice flour or a pre-mixed gluten-free flour blend, which work well without compromising flavor or texture.
For a Bluey cake, your choice of flour will impact the overall texture. Whether you use all-purpose flour or cake flour, make sure to sift the flour before use to avoid lumps and ensure a smooth batter.
2. Sugar
Sugar adds sweetness to the cake and also helps in the aeration process during mixing. For the best texture and flavor, granulated white sugar is the go-to choice. You can also experiment with alternatives like brown sugar or coconut sugar for a deeper, more complex flavor. Brown sugar, in particular, adds moisture and a subtle molasses flavor that can enhance your cake’s richness.
In some cases, you might want to incorporate a little powdered sugar into the frosting for smoother consistency and sweetness. Since Bluey-themed cakes are often decorated with vibrant colors, sugar also helps your frosting hold its shape during the piping process.
3. Eggs
Eggs are essential for binding the ingredients together, providing structure, and helping the cake rise. They also add moisture and contribute to the overall richness of the cake. Eggs are one of the most important ingredients for a successful cake, as they give it its final texture.
If you’re making a vegan or egg-free cake, you can use egg alternatives such as flax eggs, which are made by combining ground flaxseeds with water, or aquafaba (the liquid from canned chickpeas). These substitutes work surprisingly well in cakes, maintaining structure and texture without compromising flavor.
4. Butter
Butter is key for creating a rich, flavorful cake. It helps create a tender, soft crumb and enhances the flavor with its creamy texture. When choosing butter, opt for unsalted butter to better control the sweetness of your cake and frosting. For a slightly lighter version, you can substitute butter with vegetable oil, but be mindful that it will change the texture.
If you’re following a dairy-free or vegan diet, consider using vegan butter or margarine instead of regular butter. These options provide similar consistency and taste but are made with plant-based oils and fats.
5. Baking Powder or Baking Soda
Leavening agents like baking powder and baking soda are essential for making the cake rise. They help give the cake a light, airy texture by releasing carbon dioxide when mixed into the batter. Baking powder is typically used in recipes with acidic ingredients (like buttermilk), as it reacts to help the batter rise. Baking soda, on the other hand, is often paired with acidic ingredients like lemon juice or vinegar, as it activates and releases gas, making the cake rise.
For a Bluey cake, the choice of leavening agent can affect the cake’s texture. If you want a more delicate and fluffy crumb, baking powder is the best option.
6. Milk or Dairy-Free Alternatives
Milk adds moisture and richness to your cake batter. Whether you choose whole milk or a plant-based alternative (such as almond, soy, or oat milk), the liquid helps bring all the ingredients together and contributes to a smooth batter. If you’re making a Bluey-themed cake, consider using coconut milk or almond milk for a subtle flavor twist that complements the sweetness of the cake.
For a dairy-free version, opt for dairy-free milk and make sure to use dairy-free butter to keep the cake light and fluffy without compromising taste.
7. Vanilla Extract
Vanilla extract is a simple but essential ingredient that enhances the flavor of your cake. It adds depth and complexity, balancing the sweetness of the sugar. Pure vanilla extract is preferred over artificial vanilla flavoring, as it provides a more robust and natural taste.
If you’re looking to experiment with flavors, almond extract can also be a fun addition. It pairs well with the vanilla and adds a subtle, nutty flavor to the cake.
8. Food Coloring
For a Bluey-themed cake, food coloring is crucial to creating the vibrant hues that are characteristic of Bluey’s world. To get the perfect blue for Bluey, use a gel-based food color, which provides rich and consistent coloring without changing the consistency of your frosting or batter.
Gel food colors are much stronger than liquid food colors, so a little goes a long way. Choose gel-based colors in shades like navy blue for Bluey and bright orange for Bingo, as these will help bring the characters to life in your cake design. You can also use food coloring to dye your fondant and buttercream for added flair.
9. Fondant or Modeling Chocolate
Fondant is often used to cover cakes and give them a smooth, professional finish. It can also be used to craft detailed elements of your Bluey design, such as the characters’ faces or accessories. You can either purchase ready-made fondant or make your own at home.
Modeling chocolate is another option to create detailed decorations like Bluey’s face or ears. It’s made by melting chocolate and combining it with corn syrup, resulting in a pliable dough that is easy to mold. It’s an excellent alternative to fondant for those who prefer a sweeter, richer taste.
10. Piping Gel or Royal Icing
Piping gel is a clear, gel-like substance that works well for creating glossy effects on cakes. It’s particularly useful for adding shiny finishes to your Bluey cake decorations, such as Bluey’s eyes or the water in a scene. Royal icing, which hardens as it dries, is perfect for creating fine, detailed designs on your cake. You can use royal icing to pipe intricate decorations and ensure that your Bluey cake looks neat and professional.
11. Edible Decorations
Finally, the little details that make your Bluey cake stand out are the edible decorations. These can include sugar flowers, edible glitter, sprinkles, and character figures like Bluey and Bingo. Edible glitter can add sparkle to the cake, while sugar flowers or fresh fruit can brighten the design. You can also purchase edible images of the Bluey characters and use them to decorate the surface of your cake.
Specialized Ingredients for Your Bluey Cake
Food Coloring: Achieving the Perfect Colors
Food coloring is essential when creating a Bluey-themed cake, as it allows you to replicate the iconic colors of Bluey and her family. From Bluey’s bright blue fur to Bingo’s orange color, food coloring brings these characters to life. Gel food coloring is ideal because it provides intense color without altering the texture of your cake. Start with a small amount and gradually add more until you achieve the perfect shades.
For Bluey’s Fur: Use blue gel food coloring to create Bluey’s bright blue fur. Mix different shades of blue to match her lighter and darker tones.
For Other Characters: You’ll need red, orange, and brown food coloring to recreate Bingo’s fur and other family members. Gel coloring helps to maintain vibrant shades without thinning out the icing or fondant.
For Icing and Fondant: Add food coloring to your icing or fondant to achieve the desired look. Gel coloring is the best choice here, as it doesn’t affect the texture. If you’re aiming for accurate character colors, make sure to color your fondant in advance.
Cake Molds: Creating Fun Bluey Shapes
Cake molds are an excellent way to shape your cake into Bluey-themed designs. Silicone molds designed for characters like Bluey can help you achieve accurate, clean shapes for your cake.
Character Faces: Use silicone molds to create detailed faces of Bluey, Bingo, or other characters. These molds capture intricate features such as eyes, ears, and snouts. Once your molded pieces are ready, you can decorate them using fondant, icing, and edible markers.
3D Cake Molds: These molds allow you to bake Bluey in 3D form, which you can decorate further with icing and fondant to resemble the character. This adds an extra layer of fun and creativity to your cake.
Mini Molds for Accessories: Use mini molds to create small details such as Bluey’s collar or tiny paw prints. These pieces can be scattered over the cake for added decoration.
Cake Stamps and Cutters: Precision in Design
For a flawless and intricate design, consider using custom cake stamps and cutters. These tools help you create consistent shapes, like Bluey’s face, paws, and other character features.
Custom Stamps and Cutters: Use custom cutters or stamps to cut out shapes from fondant. You can create Bluey’s face, her paws, or other accessories from the show. Press them gently into rolled fondant to transfer the design.
Pattern Stamps: Cake stamps can also create texture or patterns on your fondant. Whether you’re designing Bluey’s fur or the background elements of your cake, cake stamps add depth and dimension.
Miniature Shapes: Cake stamps and cutters come in various sizes, so you can make small details such as toys, paw prints, or other accessories that add charm to the cake’s design.
Step-by-Step Guide to Making the Perfect Bluey Cake

Creating the perfect Bluey cake involves several fun steps, from baking the cake to decorating it with the iconic Bluey design. With some patience and creativity, you’ll be able to craft a cake that will not only delight your little one but also be a showstopper at any Bluey-themed celebration. Follow this step-by-step guide to make a Bluey cake that will impress!
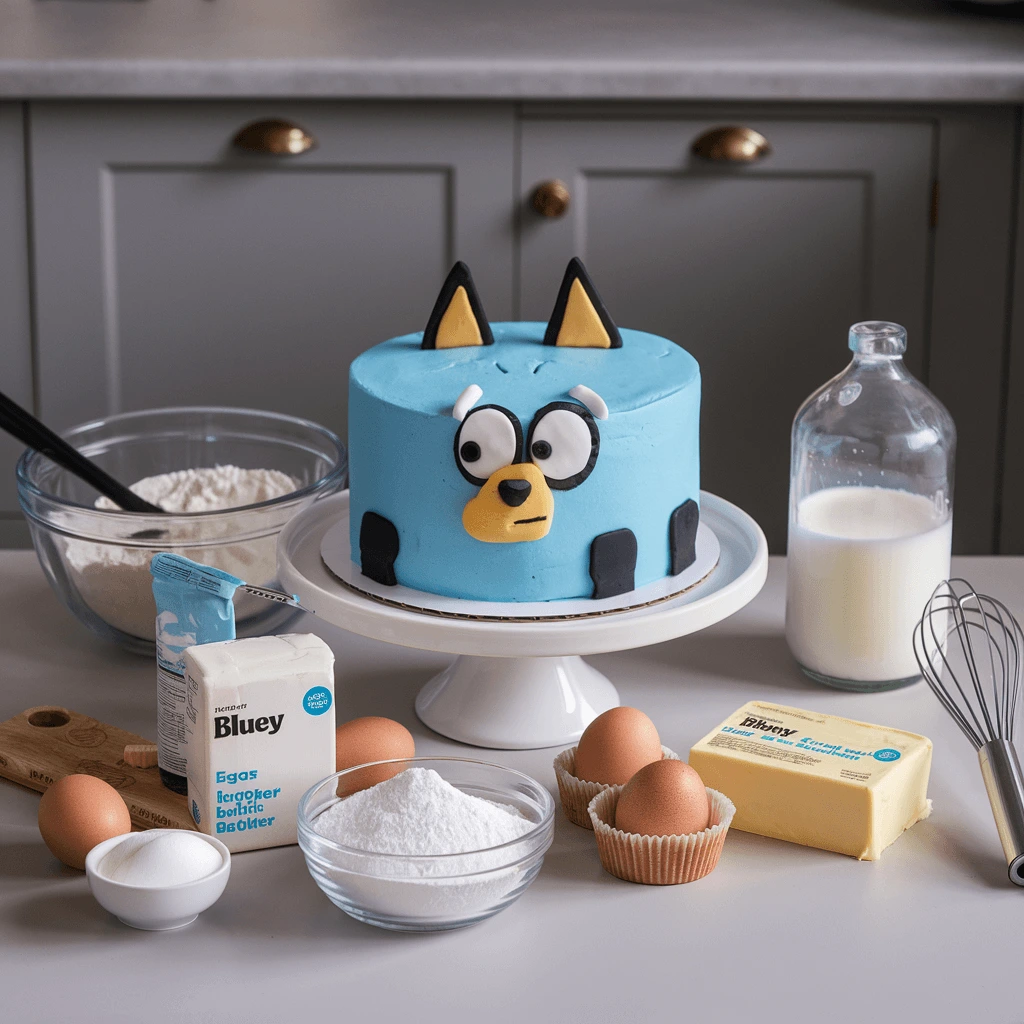
Step 1: Gather All the Ingredients
Before you start baking, ensure that you have all the necessary ingredients on hand. These include basic cake ingredients like flour, sugar, eggs, and butter, along with specialized ingredients like food coloring, fondant, and cake molds. Here’s a quick list:
- For the Cake: Flour, sugar, eggs, butter, baking powder, milk, vanilla extract.
- For the Bluey Design: Fondant (in blue, orange, brown, and white), edible markers, colored icing, gel food coloring, cake molds.
Having everything ready will make the process smoother and more enjoyable, especially when you begin decorating!
Step 2: Bake the Cake Layers
Now that you have all your ingredients, it’s time to bake the cake. You can choose from a variety of cake recipes, but a simple butter cake or sponge cake works best for Bluey cakes because they have a light, fluffy texture and provide a stable base for decoration. Here’s how to bake your cake layers:
- Prepare the pans: Grease and flour your cake pans or line them with parchment paper.
- Mix the ingredients: In a large bowl, cream the butter and sugar until fluffy, then add eggs one at a time. Gradually add the flour and baking powder. Mix in milk and vanilla extract until smooth.
- Bake the cake: Pour the batter into the prepared cake pans, filling them about halfway. Bake according to the recipe instructions, usually at 350°F (175°C) for 25-30 minutes, or until a toothpick inserted in the center comes out clean.
- Cool the cakes: Allow the cakes to cool in the pans for 10 minutes before transferring them to a wire rack to cool completely.
Step 3: Level and Stack the Cake Layers
Once your cakes have cooled completely, it’s time to level and stack them to create a sturdy base for your Bluey design.
- Level the cake: Use a serrated knife to trim the tops of the cake layers, ensuring they are flat and even. This step is crucial for a smooth, professional-looking cake.
- Stack the layers: Place the first layer on a cake board or serving platter. Apply a layer of frosting or buttercream to the top. Then, add the second cake layer. Repeat the process if you have more layers.
At this point, you’ll have a smooth, even cake base ready for decorating. You can also carve the cake into a specific shape if you’re making a 3D Bluey character cake.
Step 4: Apply the Crumb Coat
A crumb coat is a thin layer of frosting applied to the cake to seal in any crumbs before applying the final layer of icing. This step is important to create a smooth surface for your Bluey decorations.
- Apply a thin layer of frosting: Using a spatula, spread a thin, even layer of frosting over the entire cake. Don’t worry about perfection—this layer is just to lock in crumbs.
- Chill the cake: After applying the crumb coat, refrigerate the cake for at least 30 minutes. This will help the frosting firm up, making it easier to apply the final layer of icing.
Step 5: Color and Roll Out the Fondant
Fondant is a great way to add smooth, colorful decoration to your Bluey cake. You’ll need to color your fondant and roll it out for the design.
- Color the fondant: Use food coloring to tint the fondant in the colors you need for Bluey and other characters. You’ll need blue for Bluey’s fur, orange for Bingo, and white and brown for the details.
- Roll the fondant: Dust your countertop with powdered sugar or cornstarch to prevent the fondant from sticking. Roll out the fondant to about 1/8-inch thickness, then carefully drape it over the cake. Smooth it out with your hands or a fondant smoother to remove any wrinkles or air bubbles.
- Trim excess fondant: Use a sharp knife or pizza cutter to trim the excess fondant around the base of the cake.
Step 6: Decorate the Cake with Bluey’s Features
Now for the fun part—decorating the cake with Bluey’s iconic features! This is where your creativity comes into play. You can use fondant, edible markers, and colored icing to create Bluey’s face, paws, and other details.
- Create Bluey’s face: Roll out white fondant for the eyes and snout. Use black fondant or edible markers to draw the pupils and nose. For Bluey’s blue fur, roll out blue fondant and shape it into a headband-like band to place at the top of the face.
- Add the ears: Roll out and shape pieces of brown fondant to create Bluey’s distinctive floppy ears. Attach them to the top of the cake with edible glue or a small amount of water.
- Details and finishing touches: Use edible markers to add intricate details, such as Bluey’s smile and other facial features. You can also add paws, collar details, and any additional accessories that help personalize the cake.
Step 7: Final Decoration and Presentation
Once you’ve applied the basic decoration, it’s time to add finishing touches to make the Bluey cake truly stand out. Here are a few ideas:
- Piping with colored icing: Use a piping bag to add small decorative details, such as Bluey’s collar, fur texture, or even flowers or stars around the edges of the cake.
- Additional characters: If you have time and the skills, consider making fondant figures of Bluey’s family or friends, such as Bingo or Bandit, and place them on the cake for added depth and creativity.
- Use cake toppers: You can also use themed Bluey cake toppers available in stores to add a fun and easy finishing touch.
Step 8: Serve and Enjoy
Your Bluey cake is now ready to be served! Whether you’re celebrating a birthday or hosting a Bluey-themed party, your cake will surely be a hit with everyone. Remember to capture some photos before serving so you can share your masterpiece with friends and family.
Outline the Cake-Making Process from Mixing Ingredients to Baking
Making the perfect Bluey cake starts with the right preparation and an organized approach. From mixing the ingredients to the actual baking, each step requires attention to detail to ensure a moist and delicious cake that will hold up well for decoration. Below, we’ve outlined the entire cake-making process from start to finish, so you can achieve the best results with ease.
1. Prepare Your Ingredients and Equipment
Before diving into the mixing process, gather all the ingredients and equipment you’ll need. This ensures that you don’t have to scramble during the preparation stage, and it helps everything go smoothly.
Ingredients Needed:
- Dry Ingredients: Flour, sugar, baking powder, salt
- Wet Ingredients: Eggs, milk, butter, vanilla extract
- Optional: Sour cream or buttermilk for added moisture, food coloring for color effects
Equipment:
- Mixing bowls (preferably one for dry ingredients and one for wet ingredients)
- A hand mixer or stand mixer for ease, though a whisk can also work
- A sifter to remove any lumps from the flour
- Measuring cups and spoons
- Cake pans (round or square, depending on the desired cake shape)
- A cooling rack
- Parchment paper or cooking spray for lining the pans
Tip: It’s important to measure out your ingredients before you start, as it saves time when you’re in the middle of the process.
2. Sift and Mix Dry Ingredients
Begin by sifting your dry ingredients to ensure that everything is well incorporated and free from lumps. In a large mixing bowl, combine the flour, baking powder, and salt. Sifting these ingredients together helps to create a smoother batter, which is especially important when making a fondant-covered cake, as you want a flawless surface.
Why Sifting? Sifting helps break up clumps in the flour and other dry ingredients, ensuring even distribution of the leavening agents (like baking powder) throughout the batter. This contributes to a lighter, fluffier texture in the cake.
3. Cream Butter and Sugar
In a separate bowl, start by creaming the butter and sugar together. This is an essential step that will contribute to the cake’s light texture. Use a hand mixer or stand mixer to beat the butter and sugar on medium speed for about 3-5 minutes, or until the mixture is light and fluffy.
Why Creaming? Creaming the butter and sugar helps to incorporate air into the batter, which will help the cake rise and achieve a soft, moist texture. The process also ensures that the sugar is evenly distributed throughout the cake, leading to consistent sweetness in each bite.
4. Add Eggs and Wet Ingredients
Once the butter and sugar are well creamed, it’s time to add the eggs. Add the eggs one at a time, ensuring each is fully incorporated before adding the next. This prevents the mixture from separating or curdling.
After the eggs, add the vanilla extract, followed by any other wet ingredients you may be using, such as milk or sour cream. If you’re adding food coloring to the cake to give it a vibrant, Bluey-inspired hue, this is the point where you should mix it in.
Tip: If you’re using sour cream or buttermilk, they will add extra moisture to the cake, giving it a tender crumb. Be sure to mix well to ensure that everything is evenly incorporated.
5. Combine Wet and Dry Ingredients
Now it’s time to combine the wet and dry ingredients. To prevent overmixing, which can lead to a dense cake, alternate adding the dry ingredients and the wet ingredients to the butter mixture.
- Start by adding a portion of the dry ingredients and mix until just combined.
- Add a portion of the wet ingredients and mix again.
- Repeat until all ingredients are incorporated into the batter.
Tip: Use a spatula to scrape down the sides of the bowl as you go to ensure all ingredients are thoroughly mixed.
6. Prepare the Cake Pans
While the batter is being mixed, prepare the cake pans. Grease the pans with butter or cooking spray, then lightly dust them with flour. Alternatively, you can line the bottom of the pans with parchment paper to prevent the cake from sticking.
Tip: If you’re baking multiple layers, be sure to divide the batter evenly between the pans. This will ensure that each layer bakes at the same time and cooks evenly.
7. Bake the Cake Layers
With the batter and pans prepared, it’s time to bake the cake layers. Preheat your oven to 350°F (175°C). Then, pour the batter into the prepared pans, filling them about halfway to allow space for the cakes to rise as they bake.
Place the pans in the oven and bake according to the recipe instructions, typically for 25-30 minutes. However, baking time can vary depending on the size of the pans and the specific cake recipe. To check if the cake is done, insert a toothpick or cake tester into the center of the cake. If it comes out clean, the cakes are ready to be removed from the oven.
Tip: If you’re baking a multi-layered cake, rotate the pans halfway through baking to ensure even cooking. Oven hot spots can cause uneven baking, so this extra step ensures the best results.
8. Cool the Cake Layers
Once the cakes are out of the oven, allow them to cool in the pans for about 10 minutes. Then, carefully remove the cakes from the pans and transfer them to a cooling rack. It’s essential to let the cakes cool completely before decorating, as warm cakes can cause the frosting to melt or become uneven.
Tip: If you’re making a multi-layer cake, it’s a good idea to level the cake layers while they’re cooling. Once the cakes are fully cooled, use a serrated knife to level the tops if they’ve risen unevenly.
Provide Tips for Making the Cake Moist and Flavorful
Achieving a moist and flavorful Bluey cake is essential for a delightful dessert experience. A dry, bland cake can easily ruin an otherwise fun and creative theme, so paying attention to the moisture and taste of your cake is key. Below are several tips to ensure your Bluey cake is not only moist but also packed with flavor, making it a treat everyone will enjoy.
1. Use the Right Fat: Butter vs. Oil
The type of fat you use in your cake recipe can significantly impact its texture. Butter is a classic choice, adding a rich flavor and creating a fluffy texture when creamed with sugar. However, oil can also play a crucial role in keeping your cake moist. Vegetable oil, for example, helps produce a moist crumb that doesn’t dry out as quickly as butter-based cakes.
If you want the best of both worlds, consider using a combination of butter and oil. The butter will contribute to flavor and texture, while the oil will help maintain moisture. You can also use alternatives like sour cream or yogurt to enhance both flavor and moisture.
Tip: If you’re looking to make a cake that holds up well for several days, opt for oil in your recipe, as it helps retain moisture longer than butter alone.
2. Incorporate Wet Ingredients for Extra Moisture
Ingredients such as sour cream, buttermilk, and yogurt are excellent additions to your cake batter. These ingredients not only add moisture but also contribute to a tender crumb. Buttermilk, for example, reacts with the baking powder to make the cake rise and become lighter, while sour cream adds a rich, velvety texture. Yogurt can also make the cake moist while adding a slight tang that complements the sweetness of the cake.
Tip: Use about half a cup of sour cream or buttermilk for every two cups of flour in your recipe to achieve a moist, flavorful cake.
3. Don’t Overmix the Batter
While it’s tempting to keep mixing the batter until everything looks perfectly smooth, overmixing can lead to a dense, dry cake. The more you mix the ingredients, the more gluten develops, which can make the cake heavy. Instead, mix the wet and dry ingredients just until they are incorporated.
When you add the flour to the wet ingredients, fold it in gently with a spatula or mix on low speed for a short time. This will help retain the cake’s light texture and prevent it from becoming tough.
Tip: Once the batter is combined, stop mixing as soon as there are no visible flour streaks. A few lumps are okay!
4. Ensure Proper Ingredient Temperature
The temperature of your ingredients can also affect the final result. For example, using cold butter straight from the fridge may cause the batter to become lumpy or not cream properly. Allow your butter, eggs, and dairy products to come to room temperature before you begin baking. This helps to create a smooth batter and results in a more even bake.
Tip: Set your butter and eggs out at least 30 minutes before you start baking to allow them to come to room temperature.
5. Use Brown Sugar for Extra Moisture and Flavor
Many cake recipes call for granulated sugar, but using brown sugar instead of white can add moisture and a richer flavor. Brown sugar contains molasses, which naturally retains moisture, making the cake extra soft. It also imparts a subtle caramel-like flavor that complements the sweetness of the cake.
Tip: Replace about half of the granulated sugar with brown sugar for a moister, more flavorful cake.
6. Consider Adding a Simple Syrup
For an extra burst of moisture, especially if your cake layers have cooled too much or you’re making a multi-layered cake, consider brushing a simple syrup onto the layers before frosting them. Simple syrup is made by dissolving equal parts water and sugar over heat, and it can be flavored with extracts like vanilla, almond, or even fruit syrups. This trick helps to keep your cake moist, particularly in warmer climates or if the cake will be sitting out for a while.
Tip: To make your simple syrup, dissolve one cup of sugar into one cup of water over medium heat, then let it cool before applying it to the cake layers.
7. Add Moisture-Retaining Ingredients like Applesauce or Pumpkin Puree
Incorporating pureed fruits or vegetables into your cake batter not only adds moisture but also a bit of extra flavor. Applesauce and pumpkin puree are popular options, as they naturally contain a high amount of water and give the cake a slight sweetness. Applesauce also enhances the texture, creating a lighter crumb.
Tip: For every cup of flour, you can add about half a cup of applesauce or pumpkin puree to maintain moisture and improve the flavor profile.
8. Bake at the Right Temperature
It may sound simple, but baking your Bluey cake at the correct temperature is vital for ensuring a moist result. If your oven is too hot, the cake can dry out before it has had time to rise properly. On the other hand, a too-cool oven can make the cake dense and undercooked.
Preheat your oven to the correct temperature, typically around 350°F (175°C), and make sure your oven is fully heated before placing the cake inside. An oven thermometer can help you avoid issues with inconsistent temperature.
Tip: Bake cakes in the center of the oven to ensure even heat distribution.
9. Cool the Cake Properly
After baking, avoid cutting into your cake immediately. Allow it to cool in the pan for about 10 minutes before transferring it to a wire rack to cool completely. Cutting into the cake too early can cause it to become soggy or crumbly. Cooling properly also helps the structure set so that it doesn’t collapse.
Tip: Never frost a warm cake, as the frosting may melt and slide off, ruining your decorations and making the cake less appealing.
Share Advice on Creating the Perfect Cake Layers and Ensuring Even Baking
Creating the perfect cake layers is essential for achieving a balanced and visually appealing Bluey cake. Properly made cake layers ensure not only a stable structure but also a uniform appearance that will hold up well during decoration. Whether you’re making a single-layer cake or multiple tiers, achieving even baking and smooth layers can elevate the overall look and taste of your cake. Below are some practical tips for creating perfect cake layers and ensuring even baking.
1. Choose the Right Cake Pan Size
Choosing the appropriate size for your cake pans is the first step in ensuring even layers. If your pan is too large, the batter may spread out too thinly, resulting in a dry cake. If the pan is too small, the batter may rise unevenly or overflow, making the cake difficult to frost and decorate.
For a standard 9-inch round cake, which is perfect for most Bluey cake designs, make sure you have two pans to bake the layers simultaneously. This will allow you to create even layers for stacking. If you’re making a larger cake with multiple tiers, you may want to use 8-inch or 10-inch pans depending on the size of your layers.
Tip: Measure your cake pans with a ruler to ensure they’re uniform in size, especially if you’re baking multiple layers in different pans.
2. Prepare the Cake Pans Properly
Before adding the cake batter, it’s essential to prepare your cake pans to prevent the layers from sticking. This step helps ensure that your layers come out smooth and without damage, making it easier to frost and decorate.
Start by greasing the pans with butter or vegetable oil. Then, lightly dust them with flour, tapping out the excess. Alternatively, you can line the bottom of each pan with parchment paper. This method provides a non-stick surface and ensures easy removal of the cake once it’s baked.
Tip: If you’re baking a cake with intricate shapes or fondant, consider using a non-stick spray with flour, which is designed for cake pans and creates a flawless finish.
3. Evenly Distribute the Cake Batter
When you pour the batter into the pans, aim to distribute it as evenly as possible. This ensures that the cake layers will rise uniformly. You can use a spatula or spoon to level out the batter in the pans, smoothing the surface to achieve an even distribution. If you’re using multiple pans, ensure you divide the batter equally among them.
For extra precision, you can weigh the batter before pouring it into the pans to ensure each layer has the same amount. This method is especially useful if you’re baking a multi-layered cake and want the layers to be as even as possible.
Tip: If you don’t have a kitchen scale, try using an ice cream scoop to measure out the batter evenly across the pans.
4. Tap the Pans to Remove Air Bubbles
Once the batter is in the pans, gently tap them on the counter a few times. This action helps eliminate any air bubbles trapped in the batter, which can cause uneven baking. Air bubbles can create holes and pockets in the cake, which may affect the texture and the final appearance. Tapping the pans also helps the batter settle into the edges of the pans, leading to more uniform layers.
Tip: Gently shake the pans back and forth after tapping to help the batter spread out evenly.
5. Ensure Even Oven Temperature
An uneven oven temperature can result in cakes that rise unevenly, creating one side that is higher or more domed than the other. To prevent this, always preheat your oven to the desired temperature before placing the cakes inside. An oven thermometer can be an invaluable tool for ensuring that your oven is consistently at the right temperature, especially if your oven’s temperature settings are inaccurate.
Avoid opening the oven door while the cake is baking, as this can cause the temperature to fluctuate, leading to uneven baking. If you need to check on the cakes, do so through the oven window without opening the door.
Tip: Rotate the cake pans halfway through baking to ensure that both sides of the cake bake evenly. If you’re using more than one pan, consider switching their positions on the oven racks.
6. Use a Cake Heating Core for Larger Cakes
If you’re baking a larger cake or multiple layers, you might find that the outer edges of the cake bake faster than the center. To prevent this from happening, consider using a cake heating core or flower nail. These tools help distribute heat more evenly throughout the cake, ensuring that the center bakes at the same rate as the edges.
Place the heating core or flower nail in the center of the pan before pouring in the batter. This will allow the cake to rise evenly and prevent the middle from sinking or remaining underbaked. Once the cake is fully baked, remove the core or nail and allow the cake to cool.
Tip: Flower nails are especially helpful for large cakes and multi-tier cakes. They can also be used as guides to ensure a flat top when stacking layers.
7. Check for Doneness with a Toothpick or Cake Tester
To avoid overbaking or underbaking your cake, check for doneness using a toothpick or cake tester. Insert the tester into the center of the cake; if it comes out clean or with just a few crumbs sticking to it, the cake is done. Be careful not to test the cake too early, as the cake may still be fragile and prone to collapsing.
Overbaking can dry out the cake, making it harder to frost and less enjoyable to eat. Underbaking, on the other hand, will result in a gooey center. So, it’s crucial to find the sweet spot of doneness for a perfectly moist and even cake.
Tip: Start checking your cake for doneness 5-10 minutes before the recommended baking time to prevent overbaking.
8. Allow the Cake to Cool Evenly
Once your cake layers are finished baking, it’s time to cool them properly. Cooling your cake evenly is just as important as the baking process to prevent the layers from becoming misshapen or uneven.
Allow the cakes to cool in the pans for about 10-15 minutes, so they’re easier to remove. Then, transfer them to a wire rack to cool completely. This ensures that they set properly and firm up without becoming soggy.
Tip: Avoid letting the cake cool in the pan for too long, as this can cause it to become soggy on the bottom. Ensure that the cake layers cool completely before frosting to prevent the icing from melting.
9. Level the Cake Layers
Once your cake layers have cooled, they may have domed slightly during baking. To ensure your layers are perfectly flat for stacking, use a serrated knife to level off the tops. A flat, even surface makes the layers easier to stack and ensures that your frosting and decorations go on smoothly.
Tip: Use a cake leveler or a serrated knife to carefully trim off the domed top. Trim a small amount at a time to avoid cutting too much off.
Decorating Your Bluey Cake: Fun and Easy Ideas
Once your cake layers are baked, it’s time to turn them into a show-stopping Bluey-themed masterpiece! Decorating a Bluey cake is an opportunity to let your creativity shine while capturing the essence of this beloved TV show. Whether you’re aiming for a simple design or something more intricate, there are plenty of fun and easy decorating ideas that will make your Bluey cake both visually appealing and delicious. Here are some ideas to help you decorate your cake in a way that will impress both kids and adults alike!
1. Start with a Smooth Base Layer
Before diving into the fun details of your Bluey cake decoration, start with a smooth base layer of frosting or icing. This creates a clean and polished surface for the rest of your decorations. Use buttercream frosting for a smooth finish, or opt for a fondant covering for a more flawless, polished appearance.
If you’re going for a more rustic look, simply spread the buttercream in an uneven, textured pattern that reflects the playful nature of Bluey and her world. Alternatively, a flat fondant finish allows you to add detailed designs on top.
Tip: If using fondant, make sure it’s rolled out evenly to avoid cracks. You can use cornstarch or powdered sugar to keep it from sticking to the rolling pin and work surface.
2. Bluey and Bingo Figurines
A fantastic way to bring Bluey and Bingo into your cake design is by using cake toppers or figurines. Whether you buy them from a store or create them yourself using fondant, figurines of Bluey and her little sister Bingo can really capture the essence of the characters.
These figurines can be placed on top of the cake as a fun focal point or along the edges for a dynamic look. If you want to get creative, you could create an entire scene with the characters, such as a playful Bluey and Bingo enjoying a picnic or playing in their backyard.
Tip: If you prefer to make your own Bluey and Bingo figures, use fondant and food-safe markers to add the details like their eyes, noses, and fur textures.
3. Create a Colorful Background with Icing
One of the simplest and most impactful ways to decorate your Bluey cake is by using colored icing to create a vibrant background. You can use blue icing (to match Bluey’s color) or opt for a gradient effect, starting with darker blue at the bottom and fading to lighter blue at the top.
Another option is to create a background scene that represents Bluey’s world. Think about a backyard setting with green grass, a few clouds in the sky, and maybe even a little tree. Use different colored icing and piping techniques to add texture and depth to the background.
Tip: Use a spatula to smooth the colored icing onto the cake, or for a more artistic look, pipe the icing into small sections to create an abstract or cartoonish feel.
4. Fondant or Edible Cake Toppers
If you prefer to go beyond figurines, you can create various Bluey-themed elements using fondant. This might include Bluey’s iconic collar, a bone-shaped decoration, or even Bluey’s house. These edible fondant toppers can be made in advance and carefully placed on the cake.
You can also create smaller, flat designs with fondant, such as Bluey’s paw prints or cartoon-like objects. These little details will add a whimsical touch to your cake, making it even more personal and fun.
Tip: When using fondant for decorative elements, use food-safe markers or edible paint to add details like eyes, fur patterns, and other facial features.
5. Use Piping for Fine Details
Piping is a great way to add intricate designs to your Bluey cake. You can pipe small details like Bluey’s ears, eyes, and nose, or add fun decorative elements such as flowers, clouds, or hearts.
Use different piping tips to create various textures. For example, use a round piping tip for smooth lines and a star-shaped tip for a starburst or flower design. You could even pipe words or phrases like “Happy Birthday” or “Bluey!” along the side of the cake.
Tip: Make sure to practice your piping on a piece of parchment paper before applying it to the cake, especially if you’re new to this technique. It helps you get the consistency and control just right.
6. Add Edible Glitter or Sprinkles
If you want to add a touch of magic and sparkle to your Bluey cake, edible glitter or sprinkles are an easy and fun solution. These decorations are especially great for a kid’s birthday party, as they’re eye-catching and festive.
Opt for a mix of colors that complement the blue and yellow theme of Bluey. Sparkling edible glitter can be sprinkled across the entire cake, or you can concentrate it on particular areas, such as the cake’s edges or as a border along the top.
Tip: Be sure to use food-grade glitter that’s safe for consumption, as some craft glitters are not intended for eating.
7. Make a Bluey Cake Topper with Printed Edible Images
For a quick and professional touch, you can use edible printed images of Bluey characters, or even a scene from the show, to decorate the top of your cake. These images are available from specialized cake shops or online stores, and they’re printed on edible paper using food-safe ink.
Once you place the edible image on top of your cake, you can add further details around it with fondant, piped icing, or sprinkles to enhance the look. The image will provide a high-quality, clear representation of Bluey and her family.
Tip: When applying an edible image, make sure the frosting on your cake is smooth and slightly tacky so that the image sticks well.
8. Add a Bluey-Themed Cake Border
To finish off your Bluey cake, consider adding a decorative border. A simple border can frame the cake beautifully and give it a polished look. You can use piping to create a border around the base of the cake or along the top.
For a themed touch, you could create a Bluey-inspired border using paw prints, tiny bones, or even some mini fondant flowers. This added detail will give your cake a refined and well-balanced finish.
Tip: Make sure the border is not too bulky, as it can overwhelm the other design elements on the cake. A delicate, finely piped border often works best for a Bluey-themed cake.
9. Use Fresh Fruit or Edible Flowers
For an extra layer of freshness and color, consider adding fresh fruit or edible flowers to your Bluey cake. You can arrange berries, slices of citrus fruit, or even edible flowers like pansies or violets around the base or top of your cake. These additions will not only bring color to the design but will also enhance the flavor of your cake.
Tip: When using fresh fruit, avoid placing it directly on the cake until it’s ready to be served to prevent it from releasing moisture that can affect the frosting or fondant.
Offer Tips on Creating Bluey Cake Designs (Using Fondant, Edible Markers, etc.)
Creating a Bluey-themed cake can be an exciting and rewarding experience, especially when you use the right tools and techniques to bring your vision to life. Whether you’re aiming for a simple design or a more intricate cake that captures the playful and colorful world of Bluey, there are several tips and tricks to help you perfect your Bluey cake designs using fondant, edible markers, and other decorating tools.
1. Working with Fondant for a Smooth Finish
Fondant is an incredibly versatile medium for cake decoration. It offers a smooth and flawless finish, making it perfect for creating detailed, cartoonish designs like Bluey and her family. When using fondant, here are some tips to achieve the best results:
- Roll it Thinly: Roll out the fondant to a thin, even layer to avoid a heavy or bulky finish. If it’s too thick, it can overwhelm your cake and detract from the design.
- Use Cornstarch or Powdered Sugar: If you’re having trouble with the fondant sticking to your work surface, lightly dust it with cornstarch or powdered sugar to prevent it from adhering.
- Create 3D Elements: Fondant is great for creating 3D decorations. For example, you can mold Bluey’s iconic ears, tail, or even her family’s distinctive features. Once you’ve shaped the fondant, you can use edible glue to attach it to your cake.
Tip: If you don’t have a fondant smoother, use a clean rolling pin or a straight-edged tool to press down and smooth the surface to get rid of any imperfections.
2. Adding Color with Edible Markers
Edible markers are a fantastic way to add fine details and intricate designs to your Bluey cake. These markers allow you to create delicate features such as Bluey’s facial expressions, her fur patterns, and even smaller decorative elements like paws, bones, or flowers.
Here are some tips on how to best use edible markers:
- Use for Fine Details: Edible markers are perfect for adding tiny details that fondant or icing might not allow. For instance, you can use them to draw Bluey’s eyes, her collar, or little accents on her body.
- Choose the Right Colors: Edible markers come in a variety of colors. To match Bluey’s colors perfectly, make sure to choose vibrant shades of blue, orange, and black for her coat and details. It’s also helpful to have different shades of brown and pink for other family members like Bandit and Chilli.
- Let the Fondant Dry: If you are using edible markers on fondant, make sure the fondant is dry first. This helps the ink adhere to the surface and prevents smudging. You can also gently let it set in the fridge for a few minutes if needed.
Tip: Edible markers can also be used to create a textured effect. Try adding small strokes or tiny dots to mimic Bluey’s fur texture for a more authentic look.
3. Customizing with Cake Stamps and Cutters
Cake stamps and cutters are great tools for adding specific shapes to your Bluey cake. These tools are perfect for creating clean and consistent designs, such as paw prints, clouds, or Bluey’s house.
- Paw Print Cutters: Use paw print cutters to create paw shapes that you can add to the cake. These can be placed on the sides of the cake, or you can use them to create a path or border around the base.
- Themed Stamps: For a more polished effect, cake stamps can create deeper, more intricate designs. There are plenty of themed stamps available that can be used to emboss fondant or frosting with Bluey-related patterns like bones, dogs, or even the phrase “Happy Birthday.”
- Cutting Shapes: You can also use letter cutters to create words or phrases related to the show. For example, you can spell out “Bluey” on the cake or add fun sayings like “Best Big Sister” or “Paw-some Birthday.”
Tip: To achieve a cleaner finish with cutters and stamps, press firmly and evenly. If necessary, lightly dust the tools with powdered sugar to prevent them from sticking to the fondant.
4. Layering and Stenciling with Icing
In addition to fondant and edible markers, icing is an essential part of cake decoration. With the right technique, you can use icing to add dimension and color to your Bluey cake design.
- Piping Icing: Use a piping bag with different tips to create textures, borders, and finer details on your cake. A star-shaped tip is perfect for creating textured fur or clouds, while a round tip can be used for writing messages or drawing small designs like Bluey’s eyes.
- Stencil Techniques: To add fun patterns or designs without being too intricate, you can use stencils. These can be placed on the cake, and royal icing or colored buttercream can be spread over them to create a clean design. Use this method for things like Bluey’s dog house or little paw prints trailing along the side of the cake.
- Smooth Icing: For a more polished and smooth finish, you can use a spatula to spread a thin layer of buttercream or fondant over the entire cake, giving it a flawless surface to work with.
Tip: When working with icing, make sure the consistency is just right. If it’s too runny, it may spread too much, and if it’s too stiff, it may be difficult to pipe and spread evenly.
5. Personalizing with Edible Decorations
To really make your Bluey cake unique, add personalized edible decorations. This can include anything from edible glitter, sugar flowers, or even a small edible plaque with the birthday person’s name or age.
- Edible Glitter: If you want to add a touch of sparkle to your cake, edible glitter is a fantastic choice. Lightly sprinkle it on the top or around the edges for a magical effect that makes the cake even more eye-catching.
- Sugar Decorations: Sugar decorations, such as tiny blue and yellow flowers, can be used to surround the figurines or placed delicately on the cake’s surface. These add sweetness to both the design and flavor.
- Name Plaques: You can personalize the cake further by adding a fondant or icing plaque with the name of the birthday child, a special message, or even a favorite Bluey quote.
Tip: Be mindful of placement when adding edible decorations. You don’t want to overwhelm the cake design, so choose a few key places to add these fun touches.
6. Using Chocolate and Candies for Fun Texture
Incorporating chocolate and candies can add both texture and sweetness to your Bluey cake. You can use chocolate shards, candy buttons, or even gummy bears to create playful elements that will resonate with kids.
- Chocolate Shards: For a whimsical and artistic effect, break up some chocolate bars into shards and place them at the edges or top of your cake. These can mimic Bluey’s colorful and playful world while adding an edible crunchy texture.
- Candy Decorations: Use brightly colored candies to add pops of color that match Bluey’s theme. Candy eyes, chocolate bones, or even candy melts shaped like paw prints can be added for fun and interactive details.
Tip: If you’re using chocolate or candy, make sure to place them in a way that doesn’t overpower your cake’s main design. Smaller amounts can often have a bigger impact.
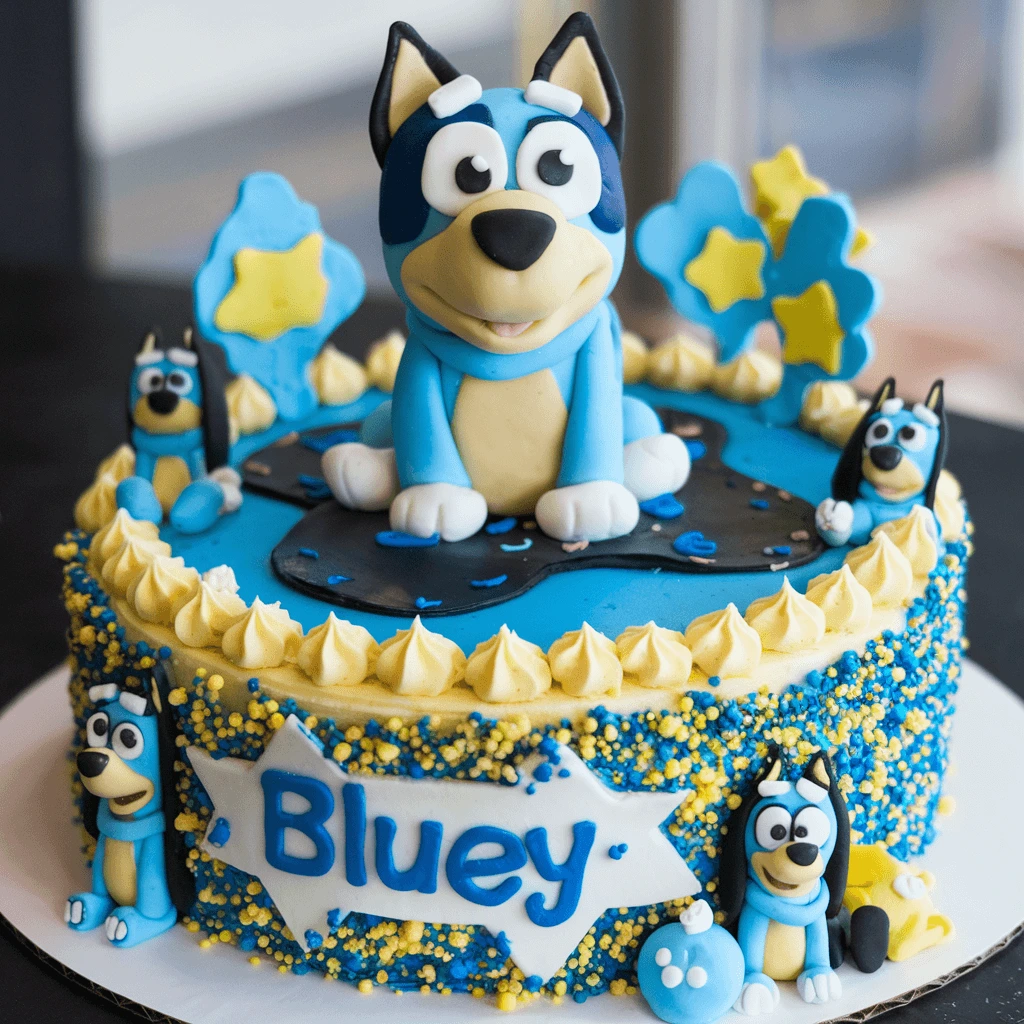
Share Easy Ways to Decorate Bluey Characters (Bluey, Bingo, Bandit, and Chilli) Using Cake Toppers
When it comes to decorating a Bluey-themed cake, adding character toppers is one of the easiest and most effective ways to bring the beloved characters to life. Whether you’re creating a cake for a child’s birthday or for a special fan celebration, these cute, colorful, and recognizable characters—Bluey, Bingo, Bandit, and Chilli—will make your cake both fun and personalized. Here are some simple yet creative ways to decorate these characters on your cake using cake toppers:
1. Pre-made Fondant or Sugar Toppers
One of the most efficient ways to decorate a Bluey cake is by using pre-made fondant or sugar toppers that feature Bluey and her family. These ready-to-use decorations are available from many cake supply shops or online retailers. Here’s why pre-made toppers are such a great option:
- Convenience: Pre-made toppers save you time and effort, especially if you’re not comfortable making detailed decorations by hand. You can simply place them on the cake to achieve an instant Bluey-themed design.
- Accuracy: These toppers are designed with the characters’ distinctive features, ensuring that Bluey, Bingo, Bandit, and Chilli look exactly like they do on the show. The colors and facial expressions are already perfect, making it easy to achieve a professional look.
- Variety: You can find toppers in various shapes and sizes, from small figurines of Bluey and Bingo to larger ones that cover the whole cake. Some suppliers even offer sets that include all of the characters, allowing you to place them together for a complete scene.
Tip: If you’re using pre-made fondant toppers, ensure that they are placed securely on the cake by pressing them gently into the icing or fondant surface. You can also use a little edible glue or royal icing to help them stick firmly.
2. DIY Fondant Toppers
For a more personalized touch, you can create your own fondant toppers of Bluey, Bingo, Bandit, and Chilli. Fondant is a highly versatile material that can be molded and shaped into almost any character. While it requires some patience and practice, the result is a custom-made, edible decoration that makes the cake even more special.
Here’s how you can make these characters from fondant:
- Bluey: To make Bluey, start by rolling out blue fondant for her body and face. Use white fondant for her eyes and mouth, and a small amount of black fondant to form her nose and pupils. For her ears, cut out small pieces of pink fondant and shape them into ear-like structures, attaching them to her head.
- Bingo: Bingo can be made similarly, but with orange fondant for her body. You can add lighter details, such as cream-colored areas on her chest, and use darker brown fondant for her eyes and nose.
- Bandit: Bandit, the father, is made with dark blue or gray fondant for his body. Use lighter brown for his ears and eyes, and black for his paws and nose. Don’t forget to add his signature eye patches using black fondant.
- Chilli: Chilli, the mother, is made with a lighter blue or teal fondant. Her face and features can be shaped similarly to Bluey’s, with some variations for her long ears and gentle expression.
Tip: You can use food coloring to paint on additional details or add personality to your fondant characters. If you’re not confident in making detailed faces, you can use edible markers to draw the eyes, mouth, and other features for added ease.
3. Edible Paper Toppers
Edible paper toppers are a fantastic option for anyone who prefers a simpler way to decorate their Bluey cake. These toppers are made from thin sheets of edible paper, usually rice paper or frosting sheets, that feature high-quality printed designs of Bluey characters.
Here’s how you can use edible paper toppers:
- Easy Application: Simply cut out the desired Bluey character image from the edible paper, and place it on top of the cake. These toppers can be applied directly onto the cake’s surface or on top of a thin layer of fondant or icing.
- Customization: If you prefer, you can also personalize the edible paper topper by printing custom designs, such as adding the birthday child’s name or age along with the Bluey characters.
- Great for Flat Designs: If you want a simpler, flat design, edible paper toppers are perfect for creating smooth and vibrant Bluey cake decorations. They can be used to create a background scene, such as Bluey and Bingo playing, or just focus on the characters’ faces.
Tip: Before placing an edible paper topper on the cake, make sure the cake surface is dry or lightly dusted with cornstarch. This ensures the topper stays in place and doesn’t slide off.
4. Plastic or Toy Cake Toppers
Another easy and effective way to decorate your Bluey cake is by using plastic or toy figurines of Bluey, Bingo, Bandit, and Chilli. These figurines can be purchased from toy stores or online, and they are a great option for a reusable, non-edible decoration.
- Sturdy and Reusable: Plastic figurines can be used again and again for future cakes or as toys for the kids after the party. This is a fun way to combine cake decoration with playtime for the birthday child.
- Durable and Detailed: Toy figurines are often very detailed and can bring your Bluey cake to life in a way that fondant may not be able to achieve. The characters’ faces, clothing, and expressions are usually molded perfectly, making them instantly recognizable.
Tip: When using plastic figurines, be sure to place them carefully on the cake, either in the center or along the edges, without overcrowding the cake’s design. If you want to make them stand out even more, you can add some edible decorations around them, such as small flowers or paw prints.
5. Cupcake Toppers Featuring Bluey Characters
If you’re serving cupcakes in addition to the cake, you can create Bluey-themed cupcake toppers to match the main cake design. These toppers are typically made from fondant, edible paper, or plastic and can easily be placed on top of each cupcake for a fun, themed look.
- Fondant Cupcake Toppers: Similar to the main cake, you can create mini versions of Bluey, Bingo, Bandit, and Chilli using fondant and edible markers. These can be placed directly onto the cupcakes for a fun and personalized touch.
- Edible Paper Cupcake Toppers: Just like the larger edible paper toppers, you can print images of the characters on edible paper and cut them into small circles. These can then be placed on top of each cupcake, creating a unified look across all treats at the party.
- Plastic Cupcake Toppers: For an even simpler option, you can buy small plastic figurines of the characters and stick them into the top of the cupcakes. This is a quick and easy way to add some character without the need for any crafting.
Tip: You can match the colors of your cupcakes to the Bluey theme. Blue cupcakes with blue frosting, for example, will complement your Bluey character toppers beautifully.
Suggest Ideas for Cake Layers with Bluey-Themed Colors Like Blue, Yellow, and Red
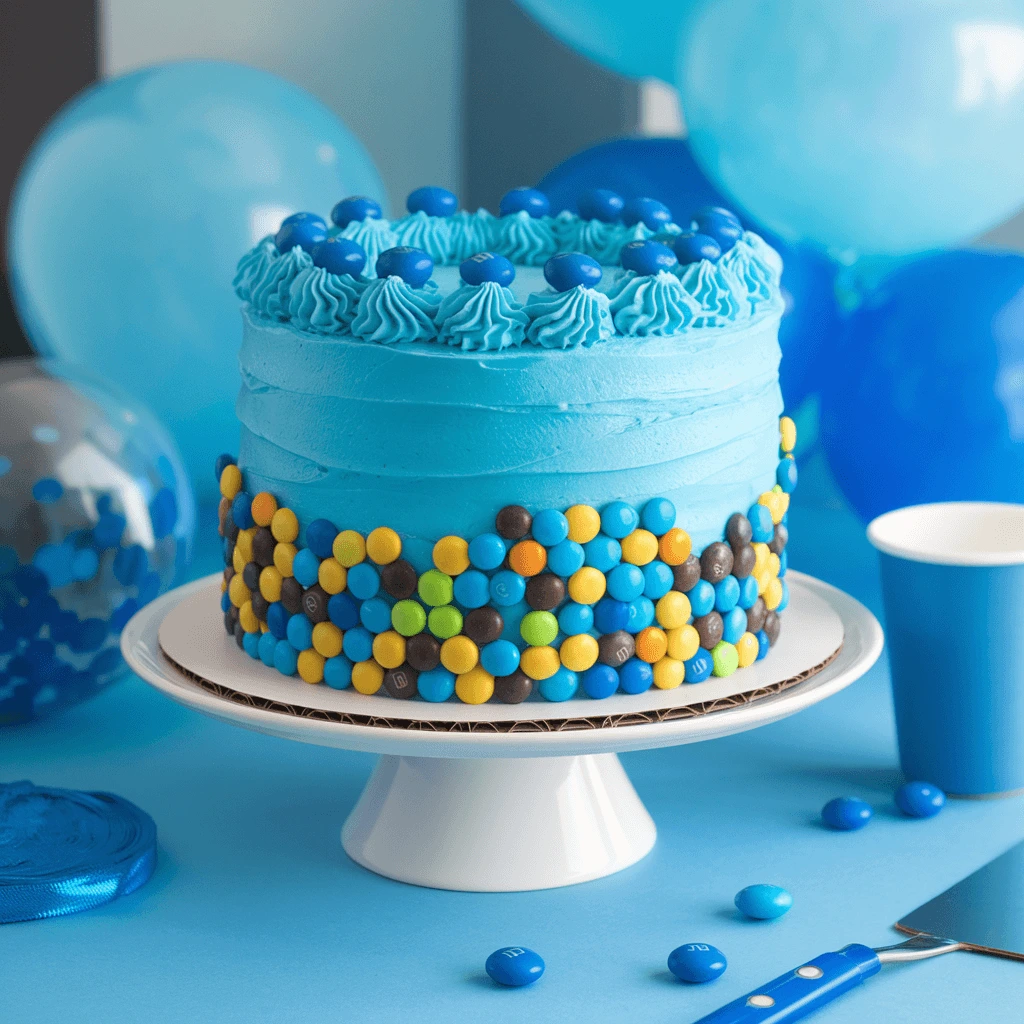
Incorporating Bluey-themed colors like blue, yellow, and red into the layers of your cake is a fantastic way to create a visually stunning and playful design. These vibrant, cheerful colors are closely associated with the Bluey TV show and will instantly bring the fun, lighthearted spirit of the show to your celebration. Here are some creative ideas for using these colors in your cake layers:
1. Blue Layer for Bluey’s Signature Color
The most obvious choice is to create a blue cake layer to represent Bluey, the lovable blue heeler dog who is the star of the show. You can incorporate this vibrant color in various ways:
- Blue Cake Batter: Use blue food coloring to tint your cake batter, creating a bright and cheerful blue layer. To achieve the best effect, it’s often best to use a gel food coloring, which gives a more vibrant and stable color than liquid food coloring.
- Blue Buttercream: If you’re layering the cake with buttercream frosting, you can make one layer of frosting blue to represent Bluey’s fur. To make this stand out, you can use a smooth buttercream or a whipped cream texture that’s easy to work with when frosting the cake.
- Ombre Blue Effect: For an even more striking appearance, you could create an ombre effect with different shades of blue. Begin with a darker blue layer at the bottom, and gradually transition to lighter shades of blue as you work your way to the top layer. This gradient effect is visually captivating and adds depth to your cake.
Tip: For an extra touch of sparkle, you can add edible glitter or shimmer dust on the blue layer to give it a subtle, magical effect that catches the light.
2. Yellow Layer for Bingo’s Playful Personality
Yellow is a fun and vibrant color that perfectly matches Bingo’s cheerful and playful character. Adding a yellow layer to your cake will provide a bright contrast to the blue and red layers, making the cake even more visually appealing.
- Yellow Cake Batter: To create the yellow layer, you can either use a yellow cake mix or tint your cake batter with yellow food coloring. For a richer, more natural yellow, you can also add some turmeric powder to the batter. This will give your cake an organic, warm yellow hue.
- Lemon-Flavored Yellow Cake: To make the yellow layer more flavorful, consider using a lemon-flavored cake batter or frosting. The tangy citrus flavor will pair wonderfully with the sweetness of the other layers, offering a refreshing taste that complements the Bluey theme.
- Bright Yellow Frosting: If you prefer to use frosting, a yellow buttercream or whipped cream frosting will provide a smooth, delicious layer to contrast with the blue. You can also pipe the yellow frosting in fun patterns or swirls to add texture to your cake’s overall look.
Tip: To emphasize the yellow layer, you could add some cute yellow fondant accents, such as small stars, flowers, or paw prints, to tie the theme together.
3. Red Layer for Boldness and Fun
Red is an exciting and bold color that adds energy and liveliness to your Bluey-themed cake. While not as dominant as blue or yellow in the Bluey TV show, red can be incorporated through the decorations and layers to give the cake an extra pop of color and make it more eye-catching.
- Red Cake Batter: You can tint a cake layer with red food coloring to make a vibrant red layer. This color will stand out next to the blue and yellow, creating a fun contrast that draws the eye. It also adds an element of playfulness that’s perfect for a children’s cake.
- Red Velvet Cake Layer: If you prefer a flavorful twist, a red velvet cake layer could work beautifully. The slightly tangy flavor of red velvet pairs well with the other sweet layers, and its deep red color makes a bold statement in your Bluey-themed design.
- Cherry-Flavored Red Cake: For something more unique, consider using a cherry-flavored cake batter or frosting. The sweet and slightly tart flavor will be a fun addition, especially when paired with the blue and yellow layers.
- Red Buttercream or Frosting: You can create a red buttercream layer or use red icing to cover a layer of cake. If you choose to pipe frosting in the red color, consider using decorative swirls or a fun striped pattern for an added touch of whimsy.
Tip: To maintain a balanced and harmonious cake, use the red color sparingly, such as in just one layer or in accents. Too much red can overpower the cake’s overall design.
4. Rainbow Effect with Blue, Yellow, and Red Layers
For an even more spectacular look, consider using a rainbow theme by combining the blue, yellow, and red layers into a multi-colored cake. This technique will create a joyful, eye-catching appearance that perfectly represents the fun and energetic atmosphere of the Bluey show.
- Layered Rainbow Cake: To achieve this effect, prepare three separate batches of cake batter, each one tinted a different color. Then, layer the blue, yellow, and red cake layers on top of each other, ensuring that the colors remain distinct but still blend well together.
- Rainbow Frosting: For a more uniform look, you could also apply rainbow-colored buttercream frosting between each cake layer. Use separate piping bags for each color, and gently spread the frosting in layers, creating a vibrant, multi-colored effect when you slice into the cake.
- Decorative Edible Confetti: To enhance the rainbow look, you can add colorful sprinkles or edible confetti on top of the cake. This will make the cake even more festive and playful, making it an even bigger hit with the kids.
Tip: If you want to make the rainbow layers more pronounced, you can use different textures of frosting between the layers—smooth frosting for one layer and a piped, textured design for another. This will give the cake a unique look as well as a varied mouthfeel.
5. Mixing and Matching the Colors with Other Decorations
In addition to using blue, yellow, and red in the cake layers themselves, consider mixing these colors into your cake decorations. You can use:
- Colored Sprinkles: Top the cake with colorful sprinkles in shades of blue, yellow, and red to enhance the cake’s playful vibe.
- Fondant Decorations: Create small fondant accents like Bluey’s paw prints, stars, or even little Bluey-themed symbols like her bone or collar, and place them around the cake.
- Colored Macarons or Candies: For an added touch of sweetness and color, you can add blue, yellow, and red macarons or candies to the cake’s surface or surrounding area
Common Mistakes to Avoid When Making a Bluey Cake
Making a Bluey cake can be a fun and creative way to celebrate a special occasion. However, like any baking project, it’s easy to run into common pitfalls if you’re not careful. To help you avoid these mistakes and ensure your Bluey-themed cake is a success, here are some of the most frequent errors people make—and how to avoid them.
Overcomplicating the Design
When you’re excited about creating a Bluey cake, it’s tempting to add every detail you can think of—from intricate fondant decorations to complicated piping. While detailed designs can look amazing, it’s important to remember that simplicity can be just as effective. Overcomplicating the design can lead to a cake that’s hard to assemble or decorate properly. Stick to one or two central design elements like Bluey and her family, and make sure they’re well-executed rather than trying to fit too much into the cake.
Not Preparing Properly
One of the biggest mistakes bakers make when creating a themed cake is not being prepared. Bluey cakes, like any other intricate cake, require thoughtful preparation. This includes making sure you have all the necessary ingredients, tools, and decorations ready before you begin. Not having everything at hand can result in wasted time and frustration during the process. Double-check your shopping list for ingredients, decorations (such as cake toppers or fondant), and any molds or tools you may need to shape the cake.
Using the Wrong Type of Cake Mix
While it’s possible to make a Bluey cake with a store-bought mix, the type of cake you use can affect the overall quality. Some mixes may not hold up well to the weight of decorations or the layering needed for a themed cake. For example, a light sponge cake may be too delicate for a heavy fondant or icing covering. Choose a sturdy, moist cake recipe that can support decorations without falling apart. You can opt for a simple butter cake, a vanilla cake, or a chocolate cake depending on the flavor preference. Additionally, if you’re making a multi-layered cake, ensure the layers are even and bake correctly.
Forgetting to Let the Cake Cool Properly
It’s easy to get excited and want to start decorating right away, but if you decorate a cake while it’s still warm, it will melt your frosting or fondant. This is one of the most common mistakes when creating a Bluey cake. After baking, let your cake cool completely before decorating. If you try to frost or apply fondant to a warm cake, the decorations will slip or melt, ruining your hard work. For best results, let the cake cool in the pan for about 10-15 minutes, then transfer it to a wire rack to cool completely.
Not Using Enough Icing or Fondant
Bluey cakes often require a smooth, clean surface for the fondant or icing to properly adhere to. Sometimes bakers are cautious and use too little icing or fondant, which can lead to cracks or uneven coverage. When covering your cake, don’t be afraid to use enough icing to create a smooth, even base. If you’re using fondant, make sure it’s rolled out thinly but evenly, ensuring it covers the entire surface. This will give your cake a professional, polished look.
Ignoring the Importance of Color Scheme
Bluey cakes are all about bright, playful colors. However, it’s easy to get carried away and use too many contrasting colors without considering how they’ll come together on the final design. An overly busy color scheme can overwhelm the eyes. Stick to a cohesive color palette that includes the signature colors of Bluey, like shades of blue, yellow, and orange. You can also accent with smaller pops of other colors, like red or green, for details. Remember, simplicity in color choices often leads to the most striking results.
Not Paying Attention to Proportions
When designing a Bluey cake, proportions are key. For example, if you’re adding fondant characters like Bluey or Bingo, make sure they are the right size relative to the cake. If the figures are too large, they may dominate the cake and take away from the overall look. If they’re too small, they might be hard to see. Take time to measure and plan the proportions of your decorations, ensuring that your characters fit well with the cake’s layers and don’t overpower it.
Rushing the Cake Assembly
If you rush the assembly process, you may end up with a lopsided cake, uneven layers, or mistakes in decoration. Take your time when assembling your Bluey cake. Allow each layer to cool and settle properly before applying the next, and don’t rush when spreading frosting or fondant. Attention to detail during the assembly stage will make a significant difference in the final result. Remember, patience is key to achieving a beautiful Bluey cake.
Not Considering Allergies or Dietary Preferences
If you’re baking the Bluey cake for a party or special occasion, consider the dietary preferences and possible allergies of your guests. Make sure you have options that accommodate common allergies, such as gluten, dairy, or nuts. You could create an allergy-friendly version of the cake or make sure to note the ingredients for people who may need to avoid certain foods. This is especially important when you’re baking for children, as some may have sensitivities to certain ingredients.
By avoiding these common mistakes and taking the time to plan and execute your Bluey cake, you can ensure a fun and delicious treat that everyone will enjoy. With the right preparation, ingredients, and design choices, your Bluey cake will be the highlight of the party, creating lasting memories for everyone involved.
Common Errors in Baking and Decorating Bluey Cakes
Creating a Bluey cake is fun, but there are common errors that can make the process tricky. Whether you’re a beginner or experienced, knowing these potential pitfalls can help you avoid them. Here are the most frequent mistakes in both baking and decorating.
Overmixing the Cake Batter
Overmixing is one of the biggest mistakes when making Bluey cakes. While it’s tempting to combine everything well, overmixing can make the cake dense and tough. Mix your ingredients gently, especially after adding dry ingredients. This will help avoid creating a heavy, dry cake.
Not Leveling the Cake Layers
Another mistake is neglecting to level the cake layers. If the layers are uneven, the final cake will be unstable. This can make it difficult to decorate and look unprofessional. Use a serrated knife to carefully trim the tops of each layer. This ensures your cake is even and stable when you stack the layers.
Using Too Much or Too Little Frosting
Using too much frosting can make the cake too sweet and overpower the flavors. On the other hand, using too little frosting may cause the cake to be dry and hard to decorate. Apply a smooth, even layer of frosting to help the fondant stick while letting the cake’s flavor shine.
Not Giving Fondant Enough Time to Set
Fondant is great for smooth finishes, but not giving it time to set can lead to sagging and cracking. After applying fondant, let it set in a cool, dry area. This prevents the fondant from losing its shape or texture, especially in warm or humid conditions.
Rushing the Decoration Process
Decorating quickly may lead to mistakes with proportions and colors. Applying fondant too quickly can cause it to wrinkle or tear. Give each layer time to set and dry. This ensures a cleaner and more polished final look.
Ignoring the Importance of Cake Support
If you’re stacking multiple layers, not using cake supports is a common mistake. Without proper support, your cake can collapse or become unstable. Use dowels, support boards, or straws to keep the layers stable. Insert the dowels after stacking but before adding the final fondant layer.
Skipping the Cake Chill Time
Refrigerating your cake before decorating is crucial. Without chilling, frosting or fondant won’t adhere properly. Always chill the cake after applying a crumb coat. This makes the cake firmer and easier to handle when decorating.
Forgetting to Add Details and Toppers
Small finishing touches can make a big difference. Forgetting details like Bluey figurines or cake toppers can make your cake look incomplete. Add the details after the main decorating is finished. This ensures your Bluey cake is fun and complete.
Not Considering Temperature and Storage
Lastly, storing the cake improperly is a common mistake. Bluey cakes with fondant need to be stored in a cool, dry area. If the cake is left in a warm environment, the fondant can melt. Always store the cake in a fridge or a cool spot, but avoid humidity or extreme temperatures.
By being mindful of these mistakes, you’ll create a Bluey cake that looks amazing and tastes great. With careful planning and patience, your cake will be a fun and delicious centerpiece for any celebration!
Tips on How to Avoid Common Cake-Making Mistakes
When making a Bluey cake, it’s easy to fall into a few traps, especially if you’re new to cake decorating or want to make everything just right. Below are some practical tips to avoid common mistakes like overmixing the batter or using the wrong food coloring.
1. Prevent Overmixing the Cake Batter
Overmixing the cake batter is one of the most common mistakes people make. This can lead to a dense and dry cake, which isn’t ideal for a soft, moist Bluey cake. Here’s how to avoid this issue:
- Mix only until combined: Once you add the dry ingredients to the wet ingredients, stir gently until they just come together. Don’t continue mixing once the batter is smooth.
- Use a gentle hand: Use a spatula or a wooden spoon to mix. Avoid using a hand mixer or stand mixer on high speed after the dry ingredients are added.
- Test for consistency: If the batter is too thick, add a little milk or water to loosen it up, but always do so gradually to avoid overmixing.
2. Using the Right Amount of Food Coloring
Food coloring is a key element for making a Bluey cake look vibrant, especially for creating Bluey’s character and the overall theme. However, using the wrong amount or type of food coloring can make your cake look odd or taste too artificial. Here’s how to ensure you get it right:
- Use gel or paste food coloring: Gel or paste colors provide more vibrant hues without thinning out your batter or frosting, unlike liquid food coloring, which can affect the consistency.
- Start with a small amount: You can always add more food coloring, but you can’t remove it once it’s added. Start with a tiny amount, then increase as needed.
- Test for color intensity: Before using the color in your cake or frosting, test it by adding it to a small portion of your batter or frosting to see how it looks.
- Use natural food coloring options if preferred: If you want to keep things natural, there are plenty of natural food coloring options, like beet juice for red or spinach powder for green.
3. Properly Leveling Your Cake Layers
If your cake layers are uneven, it can affect both the overall look and the stability of your Bluey cake. Here’s how to avoid this issue:
- Trim the layers after baking: Once the cakes have cooled, use a serrated knife to trim the domed tops. This ensures that each layer sits evenly.
- Use a cake leveler tool: For more precision, you can use a cake leveler, which will help you make the layers completely even.
- Measure before cutting: If you’re concerned about the thickness of your layers, measure the height of each one with a ruler before trimming.
4. Avoiding Excessive Frosting
Using too much frosting can overwhelm the cake’s flavor, making it too sweet and cloying. On the other hand, too little frosting can result in an incomplete look. Here’s how to find the perfect balance:
- Apply a crumb coat: Before you add the final layer of frosting, spread a thin crumb coat to seal in any crumbs. This helps create a smooth surface for your final layer of frosting.
- Use an offset spatula for even application: An offset spatula will help you spread the frosting smoothly, ensuring that the layer is thin and even across the entire cake.
- Don’t overdo the decorations: Once the crumb coat is set, add a thin, smooth layer of frosting to avoid overpowering the cake’s flavor. For Bluey designs, small amounts of colorful icing should suffice.
5. Give Fondant Enough Time to Set
Fondant is a great way to make your cake look professional, but it needs time to set correctly. Here’s how to avoid common fondant mistakes:
- Let the fondant sit at room temperature: After rolling out the fondant, allow it to sit for a few minutes to dry slightly. This prevents it from becoming too sticky when placed on the cake.
- Don’t rush the fondant process: When covering the cake, take your time. Stretch it gently over the cake and smooth it down with your hands, ensuring there are no wrinkles.
- Let the fondant set before decorating: Once the fondant is on the cake, allow it to rest for at least 20 minutes before decorating. This ensures that it won’t sag or lose its shape when you add any additional designs.
6. Properly Support Layered Cakes
When creating a multi-layered Bluey cake, ensuring the layers stay in place is crucial to avoid collapse or instability. Here’s how to provide proper support:
- Use cake dowels or straws: If you’re stacking several layers of cake, place cake dowels or straws in the lower layers to provide structural support. Cut them to the height of your cake, so they don’t poke through the top.
- Cake boards are a must: Place each cake layer on its own cake board. This helps to transfer the cake easily and keeps the layers from shifting.
- Secure the layers carefully: After stacking the cake layers, lightly press down to ensure they are stable. Avoid pressing too hard, which could cause the layers to squish.
7. Chill the Cake for Better Handling
One of the best ways to avoid mistakes while decorating your Bluey cake is to chill it properly before decorating. This will help everything stay in place while you work. Here’s how to do it:
- Chill after applying the crumb coat: Once you’ve applied the crumb coat, refrigerate the cake for at least 30 minutes. This will help the frosting firm up and make it easier to handle.
- Chill the cake before fondant application: After applying the frosting, put the cake in the fridge for a short while. A chilled cake is much easier to cover with fondant without it sliding off or losing shape.
8. Avoiding a Messy Cake Top
Keeping your cake top neat and clean is essential for a polished final look. To avoid a messy cake top:
- Use a clean, dry cloth for wiping down the edges: As you decorate, wipe any excess frosting or fondant from the sides of the cake with a clean cloth.
- Ensure your tools are clean: Always use clean spatulas and cake decorating tools to prevent unwanted smears or marks on the cake’s surface.
- Don’t overcrowd the top with decorations: Keep the top of your Bluey cake simple and clean, with room to showcase the character designs and any other important details.
Troubleshooting Advice for Fixing Mistakes During the Decorating Process
Decorating a Bluey cake can be a fun and creative experience, but sometimes things don’t go exactly as planned. Whether you’re dealing with a fondant mishap, uneven frosting, or design mistakes, here’s a guide to help you troubleshoot common decorating issues and fix them in a way that ensures your cake still looks amazing.
1. Fixing Cracked or Dry Fondant
Fondant can crack or become dry during the decorating process, especially if it’s rolled too thin or exposed to air for too long. Here’s how to fix it:
- Moisten the fondant: If the fondant starts to crack or dry out, lightly rub it with a damp cloth or your fingers to soften it again. Be careful not to use too much water, as it could cause the fondant to melt.
- Patch the cracks: If you notice small cracks in the fondant, roll a tiny ball of extra fondant and flatten it into a small patch. Gently press it over the crack, then smooth it out with your fingers or a fondant smoother.
- Prevent it from cracking: To avoid cracks in the first place, make sure the fondant is properly hydrated and kneaded. Use a rolling pin and dust your work surface with cornstarch or powdered sugar to keep it from sticking.
2. Dealing with Air Bubbles Under Fondant
Air bubbles under the fondant can ruin the smooth, clean look of your Bluey cake. Here’s how to deal with them:
- Pop the air bubble: Use a pin or sharp knife to poke a small hole in the bubble. Gently press the air out by smoothing the fondant over the area with your fingers or a fondant smoother.
- Smooth over the bubble: After popping the bubble, smooth out the area by gently rubbing the fondant with your hands or using a fondant smoother to make it blend seamlessly with the rest of the cake.
- Prevent future bubbles: Roll the fondant evenly and make sure it’s not too thin when applying it to the cake. Also, avoid rolling the fondant in a hot or humid environment, as this can cause it to stretch and form bubbles.
3. Fixing Uneven Frosting Layers
Sometimes frosting can end up lumpy or uneven, which can make your cake look unpolished. Here’s how to fix it:
- Smooth with a spatula: If your frosting is lumpy or uneven, take a large offset spatula and dip it in warm water. Gently smooth the frosting, using even pressure to level out the surface. You can also use a bench scraper for a more professional finish.
- Add more frosting: If there are areas with bare patches or where the cake is showing through, add more frosting to those spots and smooth them out until the layer is even and consistent.
- Refrigerate the cake: If the frosting is too soft or is running off the cake, pop it in the fridge for a few minutes to firm it up. This will make it easier to smooth and handle.
4. Fixing Fondant That Won’t Stick to the Cake
If you find that your fondant won’t stick to your cake, it may be due to insufficient moisture or the frosting not being the right consistency. Here’s what you can do:
- Apply a crumb coat: Before applying fondant, always use a thin layer of buttercream (crumb coat) to create a base that helps the fondant stick. The buttercream should be smooth, and it’s essential to let it set before applying the fondant.
- Moisten the fondant: If the fondant is not sticking, lightly brush the cake with a small amount of water or syrup using a pastry brush. This creates a slight tackiness that will help the fondant adhere better.
- Use marshmallow fondant: If your regular fondant is giving you trouble, try marshmallow fondant. It has a softer texture and can be easier to work with, especially when sticking it to cakes.
5. Fixing Smudged or Messy Cake Decorations
Decorating with edible markers, piping gel, or even colored icing can sometimes result in smudging or mistakes in your Bluey cake design. Here’s how to clean up those errors:
- Wipe off smudges with a clean cloth: If you accidentally smudge the decorations, use a clean, dry cloth to gently wipe off the marks. Be careful not to damage the cake or rub too hard.
- Correct with more detail: If a line or design doesn’t look right, use a fine brush or edible marker to correct it. Adding more details to a design can help cover up minor mistakes and make your Bluey cake look even more polished.
- Use a toothpick for precise lines: When working with small details, such as Bluey’s face or patterns, use a toothpick to carefully outline the shapes. This will give you more control over the design and prevent accidental smudging.
6. Fixing a Tilted or Unevenly Stacked Cake
If you’re stacking multiple layers for your Bluey cake and notice that they aren’t sitting properly, the cake can start to look lopsided or unsteady. Here’s how to fix it:
- Check for level layers: After each layer is added, use a spirit level or ruler to ensure it is straight. If the cake is leaning or uneven, trim the bottom of the layers with a serrated knife to make sure they fit together perfectly.
- Use dowels or straws for support: If your cake is large and stacked with multiple layers, dowels or plastic straws will provide the necessary support to hold the weight of the upper layers and keep everything steady. Make sure the dowels are cut to the exact height of your cake and inserted securely.
- Reposition layers carefully: If your stacked cake starts to lean, carefully lift the top layers off and reapply frosting or fondant as needed before placing them back on top.
7. Fixing Uneven or Misaligned Cake Toppers
Sometimes, when placing decorations or cake toppers, they can end up misaligned or crooked, disrupting the symmetry of your Bluey cake. Here’s how to fix it:
- Reposition the topper: If the topper is edible (like fondant or a sugar decoration), carefully lift it off and reposition it. If it’s a non-edible topper, like a figurine or toy, gently move it into place.
- Use a light coating of frosting for stability: If the toppers are lightweight, apply a small dollop of frosting or a dab of edible glue to hold them in place. This will ensure they don’t shift around during the celebration.
- Consider symmetry: Always check for symmetry when placing multiple toppers. For example, if you’re using Bluey and Bingo as figurines, make sure they are evenly spaced and balanced on the cake.
8. Fixing Overly Soft or Runny Icing
Sometimes your icing may become too soft or runny, making it difficult to achieve a clean finish on your Bluey cake. Here’s how to fix this issue:
- Chill the icing: If your icing is too soft, refrigerate it for about 20-30 minutes to help it firm up. This will make it easier to spread or pipe onto your cake.
- Add more powdered sugar: If the icing is too thin, add a little more powdered sugar to thicken it up. Be cautious when adding sugar—add it gradually to avoid making the icing too thick.
- Whip the icing: Use a stand mixer or hand mixer to whip the icing if it feels runny. This will add volume and help firm it up without making it too stiff.
Final Thoughts and Serving Your Bluey Cake
Creating a Bluey-themed cake is a delightful and creative way to celebrate a child’s birthday or any special occasion for fans of the show. From choosing the right ingredients to decorating with vibrant colors and characters, every step offers an opportunity to showcase your love for Bluey and her family in a fun and delicious way. However, just as important as the preparation and decoration is the final presentation and serving of your Bluey cake. Here’s a guide to help you finish your cake journey on a high note, ensuring both visual appeal and great taste.
1. Presentation is Key
After spending hours crafting the perfect Bluey cake, the way you present it can make all the difference. A well-presented cake will impress guests before they even take a bite. Here are some tips to present your Bluey cake in the best possible way:
- Use a Cake Stand or Pedestal: A cake stand or pedestal can elevate the look of your cake, making it the focal point of the celebration. Opt for a simple, elegant stand to keep the attention on the design. If you’re celebrating outdoors, make sure to place the cake on a sturdy, flat surface to prevent any accidents.
- Add Themed Cake Plates and Cups: Match your cake display with themed plates, cups, and napkins that feature Bluey characters. These little touches can enhance the theme and make your celebration feel cohesive and fun.
- Fresh Flowers or Decorative Elements: If you want to add a touch of extra flair, consider using fresh flowers or other edible decorations like sugar butterflies or stars to accentuate the Bluey cake. These elements should complement, not overpower, the cake’s design.
2. How to Cut and Serve the Cake
Serving the cake can be just as exciting as making it. Here are some practical tips to ensure the cake is served properly, keeping both the design intact and the guests happy:
- Use a Sharp Knife: When cutting the cake, use a sharp serrated knife to slice through the layers neatly. Start by cutting the top tier if you have a multi-layer cake and then work your way down. This will prevent the cake from becoming misshapen or squished.
- Ensure Even Slices: Aim to cut even, generous slices that allow your guests to enjoy the cake without feeling like they’re getting too little. For smaller parties, you may want to slice it into larger pieces, whereas for larger gatherings, you can cut thinner slices.
- Serve with Ice Cream or Drinks: Bluey-themed cakes are often enjoyed by younger guests, so consider pairing the cake with a refreshing drink or ice cream. A scoop of vanilla or chocolate ice cream complements the sweetness of the cake, while a light punch or lemonade can keep the theme festive and fun.
3. Store Leftovers Properly
If you find yourself with leftover cake after the celebration, don’t worry! With the right storage, you can enjoy your Bluey creation for a few more days. Here’s how to store leftover cake:
- Refrigerate for Freshness: If your cake has perishable elements like cream cheese frosting or fresh fruit, it’s best to store it in the refrigerator. Wrap the leftover cake in plastic wrap or place it in an airtight container to keep it fresh for up to 3-4 days.
- Keep Fondant Cakes at Room Temperature: If you’ve decorated your cake with fondant, it’s generally okay to leave it at room temperature for up to two days. The fondant acts as a barrier to moisture, preventing the cake from drying out.
- Freeze for Later: If you have a lot of cake left, you can freeze slices to enjoy later. Wrap individual slices in plastic wrap, then foil, and place them in a freezer-safe bag. When you’re ready to enjoy, allow the cake to thaw at room temperature for a few hours.
4. Let the Kids Help with the Cake
One of the best ways to make the celebration even more memorable is by involving the kids in the cake-cutting process. This adds an interactive and fun element to the occasion, making them feel included in the celebration. Here are some ways to involve them:
- Let Them Decorate: For smaller children, you can set up a mini cake-decorating station where they can add their own toppings to cupcakes or cookies decorated in Bluey themes.
- Cake-Cutting Ceremony: If they’re old enough, let the kids help with the actual cutting of the cake. This moment can be a highlight of the party, especially if they get to slice through Bluey’s face or other recognizable elements of the cake.
5. Create a Cake Moment
Every good celebration needs a “wow” moment, and the unveiling of the Bluey cake is your chance to create that magical experience for everyone. Here are a few ideas to make this moment extra special:
- Dim the Lights: Just before cutting the cake, dim the lights and cue up the birthday song. This builds excitement and draws attention to the cake.
- Take Photos: Before anyone digs in, take plenty of photos to capture the cake’s beauty. These moments are precious, and they’ll be fun to look back on later. You can also encourage your guests to take photos with the cake to share on social media, making your Bluey cake the star of the party.
- Incorporate a Bluey-Themed Game or Activity: After serving the cake, keep the Bluey theme alive by engaging the kids in a fun game or activity related to the show. Whether it’s a Bluey trivia contest or a Bluey coloring session, these activities will keep the energy high and the theme consistent.
6. Celebrate with a Bluey-Themed Send-Off
After everyone has enjoyed their cake, consider offering themed party favors for the children to take home. These can be small, Bluey-related items like stickers, coloring books, or even small figurines of the Bluey characters. It’s a great way to ensure the party’s theme lives on long after the cake is gone.
Recap the Key Steps to Making the Perfect Bluey Cake
Making the perfect Bluey cake involves a combination of planning, creativity, and attention to detail. It’s not just about following a recipe; it’s about capturing the fun and spirit of the show while ensuring the cake looks and tastes amazing. Here’s a recap of the key steps to guide you through the process from start to finish:
1. Planning Your Bluey Cake Design
The first step in making your Bluey cake is planning your design. This involves deciding which aspects of Bluey you want to feature—whether it’s the whole family, specific characters, or iconic elements from the show like Bluey’s paw print or the colors of the characters’ clothing. Take some time to think about how you want the cake to look. Here’s how you can approach this:
- Research the Characters: Look up images of Bluey, Bingo, Bandit, and Chilli to get an idea of their features. Pay attention to their colors, shapes, and key characteristics to ensure you’re capturing their likeness accurately.
- Choose Your Cake Style: Decide whether you want to make a tiered cake, a sheet cake, or a smaller, more simple cake. This decision will affect how much time and effort you put into the decoration.
2. Gathering the Ingredients
Once your design is set, it’s time to gather the ingredients. A classic Bluey cake requires a rich, moist cake base that can stand up to both the weight of the decorations and the flavorful frosting. The basic ingredients needed for a Bluey cake include:
- Basic Cake Ingredients: Flour, sugar, butter, eggs, baking powder, and milk.
- Frosting and Decorations: Butter, powdered sugar, food coloring, and flavoring extracts like vanilla or almond. You can also gather fondant, edible markers, and various tools for intricate designs.
- Specialized Ingredients: If you’re creating detailed shapes or intricate designs, you may want to use specialized cake molds, food coloring gels, or sprinkles that match the Bluey theme.
3. Baking the Cake
After gathering all your ingredients, the next step is to bake the cake. This part is crucial for creating the perfect base for your decorations. Follow these steps:
- Prepare the Cake Pans: Grease your cake pans and line them with parchment paper to ensure the cake doesn’t stick.
- Mix the Ingredients: Cream together the butter and sugar until fluffy, add the eggs one at a time, then slowly add the dry ingredients, alternating with the milk. Be careful not to overmix the batter, as this can affect the texture.
- Bake at the Right Temperature: Bake your cake according to the recipe, usually around 350°F (175°C), checking for doneness by inserting a toothpick into the center of the cake. Once it comes out clean, the cake is ready.
- Cool the Cake: Allow the cakes to cool completely before frosting. This prevents the frosting from melting and ensures a smoother finish.
4. Decorating the Cake
Once your cake is cooled and ready, it’s time to decorate. This is where the Bluey magic happens. Follow these steps to create a fantastic Bluey design:
- Frost the Cake: Start by applying a layer of buttercream frosting to seal in any crumbs. Then, apply a final layer of frosting to create a smooth base for your Bluey design.
- Use Fondant for Shapes: For detailed character designs like Bluey, Bingo, and their parents, fondant is a great option. Roll out colored fondant and cut out shapes that resemble the characters. You can also use molds for precision.
- Add Final Touches: Use edible markers to add facial features, such as eyes and noses, and add additional decorations like paw prints, flowers, or other playful elements to enhance the theme. You can also use colored icing to pipe fun accents and borders around the edges of the cake.
5. Adding the Finishing Touches
The final touches are what make your Bluey cake truly shine. Here are a few additional steps to ensure your cake stands out:
- Cake Toppers: If you prefer an easier option, Bluey-themed cake toppers or figurines are a quick way to add personality without intricate detailing.
- Theme Coordination: Make sure the color scheme matches the Bluey theme—using shades of blue, yellow, red, and orange for a vibrant, fun look. These colors can be incorporated into the frosting, fondant, and decorations.
- Personalization: If this cake is for a birthday or another celebration, consider adding a personalized message like “Happy Birthday [Name]!” in a fun, playful font using icing or edible markers.
6. Serving the Cake
Finally, once your Bluey cake is complete, it’s time to present it and enjoy it! Before cutting, take plenty of photos to capture the design. Then, when it’s time to serve, slice the cake carefully to ensure the layers are neat and the characters stay intact. Consider pairing the cake with themed plates, napkins, and party favors to keep the fun going.
In Summary:
To make the perfect Bluey cake, remember the following key steps:
- Plan your design with a clear vision of which characters or elements from the show you want to feature.
- Gather the right ingredients to ensure a flavorful, moist cake that will hold up under your decorations.
- Bake the cake properly and let it cool completely before decorating.
- Decorate with care, using fondant, edible markers, and icing to bring Bluey and her family to life.
- Finish with special touches like themed toppers or color-coordinated decorations to make your Bluey cake truly stand out.
Ideas for Serving the Cake at Kids’ Parties or Bluey-Themed Events
Serving a Bluey-themed cake at a kids’ party or event can be as fun and exciting as making the cake itself. Here are some creative and engaging ideas to make the cake presentation and serving memorable:
1. Bluey-Themed Cake Table
Set up a special Bluey-themed cake table where the cake is the centerpiece. Decorate the table with Bluey-related items such as:
- Tablecloths and Plates: Use Bluey-themed plates, napkins, and a matching tablecloth to create a colorful backdrop for the cake.
- Bluey Figurines: Place small figurines of Bluey, Bingo, Bandit, and Chilli around the cake for added charm. These can double as party favors after the event.
- Cupcakes or Cookies: Complement the cake with Bluey-themed cupcakes or cookies decorated with characters or paw prints.
2. Character Cake Slices
Instead of cutting the cake in traditional slices, consider cutting the cake into Bluey-shaped slices. Use a Bluey-shaped cookie cutter or a stencil to make each slice resemble the character or theme. This can be a fun surprise for the kids when they’re served their slice.
3. Bluey Cake Toppers for Each Slice
To add a personal touch, place mini Bluey cake toppers (small figurines or edible images) on top of each individual slice of cake. This ensures each child gets their favorite character while enjoying their slice of cake.
4. Cake Pops with Bluey Decorations
Transform some of the cake into fun cake pops decorated in Bluey colors and designs. These small, easy-to-eat treats are perfect for little hands and can feature mini fondant designs of Bluey and her family.
5. Themed Party Favors with Cake
After serving the cake, hand out Bluey-themed party favors to guests. Consider including small toys, stickers, or activity books featuring Bluey. You could even pack small slices of cake in Bluey-themed boxes for kids to take home.
6. Bluey-Inspired Punch or Beverages
Serve drinks in Bluey-themed cups to match the cake, such as a blue punch or lemonade. You could also have “Bluey’s Paw Print Punch,” which can be a fun twist by adding colorful drink ice cubes to the punch to make it visually appealing.
7. Interactive Cake Cutting
Get the kids involved in the cake cutting by turning it into an interactive experience. For example, you could host a “Bluey Cake Cutting Ceremony” where the kids are asked to help cut the cake. You can also invite them to take turns helping to decorate their own cupcakes using Bluey-themed sprinkles or fondant shapes.
8. Themed Cake-Cutting Music
Create a special moment by playing Bluey songs or the theme song while cutting the cake. This can enhance the fun atmosphere of the event and get everyone excited for the cake reveal.
9. Bluey Photo Booth with Cake
Set up a Bluey photo booth next to the cake table with props like Bluey hats, paws, and costume accessories. After taking some fun pictures, guests can enjoy the cake while posing for more photos to make the experience memorable.
10. Bluey-Themed Cake Stand
Use a Bluey-inspired cake stand, such as one shaped like Bluey’s house or featuring images of the characters. This can create a more eye-catching display and add to the overall Bluey ambiance of the event.
Bonus Tip:
Food Allergy-Friendly Options: If any of the children have food allergies, be sure to prepare an allergy-friendly version of the Bluey cake. You can label it clearly with a “Bluey’s Allergy-Free Cake” sign and ensure that everyone can enjoy a slice without concerns.
Ideas for Serving the Cake at Kids’ Parties or Bluey-Themed Events
Serving a Bluey-themed cake at a kids’ party or event can be as fun and exciting as making the cake itself. Here are some creative and engaging ideas to make the cake presentation and serving memorable:
1. Bluey-Themed Cake Table
Set up a special Bluey-themed cake table where the cake is the centerpiece. Decorate the table with Bluey-related items such as:
- Tablecloths and Plates: Use Bluey-themed plates, napkins, and a matching tablecloth to create a colorful backdrop for the cake.
- Bluey Figurines: Place small figurines of Bluey, Bingo, Bandit, and Chilli around the cake for added charm. These can double as party favors after the event.
- Cupcakes or Cookies: Complement the cake with Bluey-themed cupcakes or cookies decorated with characters or paw prints.
2. Character Cake Slices
Instead of cutting the cake in traditional slices, consider cutting the cake into Bluey-shaped slices. Use a Bluey-shaped cookie cutter or a stencil to make each slice resemble the character or theme. This can be a fun surprise for the kids when they’re served their slice.
3. Bluey Cake Toppers for Each Slice
To add a personal touch, place mini Bluey cake toppers (small figurines or edible images) on top of each individual slice of cake. This ensures each child gets their favorite character while enjoying their slice of cake.
4. Cake Pops with Bluey Decorations
Transform some of the cake into fun cake pops decorated in Bluey colors and designs. These small, easy-to-eat treats are perfect for little hands and can feature mini fondant designs of Bluey and her family.
5. Themed Party Favors with Cake
After serving the cake, hand out Bluey-themed party favors to guests. Consider including small toys, stickers, or activity books featuring Bluey. You could even pack small slices of cake in Bluey-themed boxes for kids to take home.
6. Bluey-Inspired Punch or Beverages
Serve drinks in Bluey-themed cups to match the cake, such as a blue punch or lemonade. You could also have “Bluey’s Paw Print Punch,” which can be a fun twist by adding colorful drink ice cubes to the punch to make it visually appealing.
7. Interactive Cake Cutting
Get the kids involved in the cake cutting by turning it into an interactive experience. For example, you could host a “Bluey Cake Cutting Ceremony” where the kids are asked to help cut the cake. You can also invite them to take turns helping to decorate their own cupcakes using Bluey-themed sprinkles or fondant shapes.
8. Themed Cake-Cutting Music
Create a special moment by playing Bluey songs or the theme song while cutting the cake. This can enhance the fun atmosphere of the event and get everyone excited for the cake reveal.
9. Bluey Photo Booth with Cake
Set up a Bluey photo booth next to the cake table with props like Bluey hats, paws, and costume accessories. After taking some fun pictures, guests can enjoy the cake while posing for more photos to make the experience memorable.
10. Bluey-Themed Cake Stand
Use a Bluey-inspired cake stand, such as one shaped like Bluey’s house or featuring images of the characters. This can create a more eye-catching display and add to the overall Bluey ambiance of the event.
Conclusion
Creating and serving a Bluey-themed cake at a kids’ party or Bluey-inspired event is a fun and memorable way to celebrate. From designing the cake to setting up an engaging party atmosphere, there are numerous ways to make the event extra special. By incorporating themed decorations, interactive activities, and creative cake-serving ideas, you can elevate the party and delight young guests. Whether you choose to use Bluey cake toppers, serve cake pops, or set up a Bluey photo booth, the key is to ensure that every detail reflects the joy and excitement of the beloved Bluey characters. With a little imagination, your Bluey-themed cake will be the highlight of the celebration!