
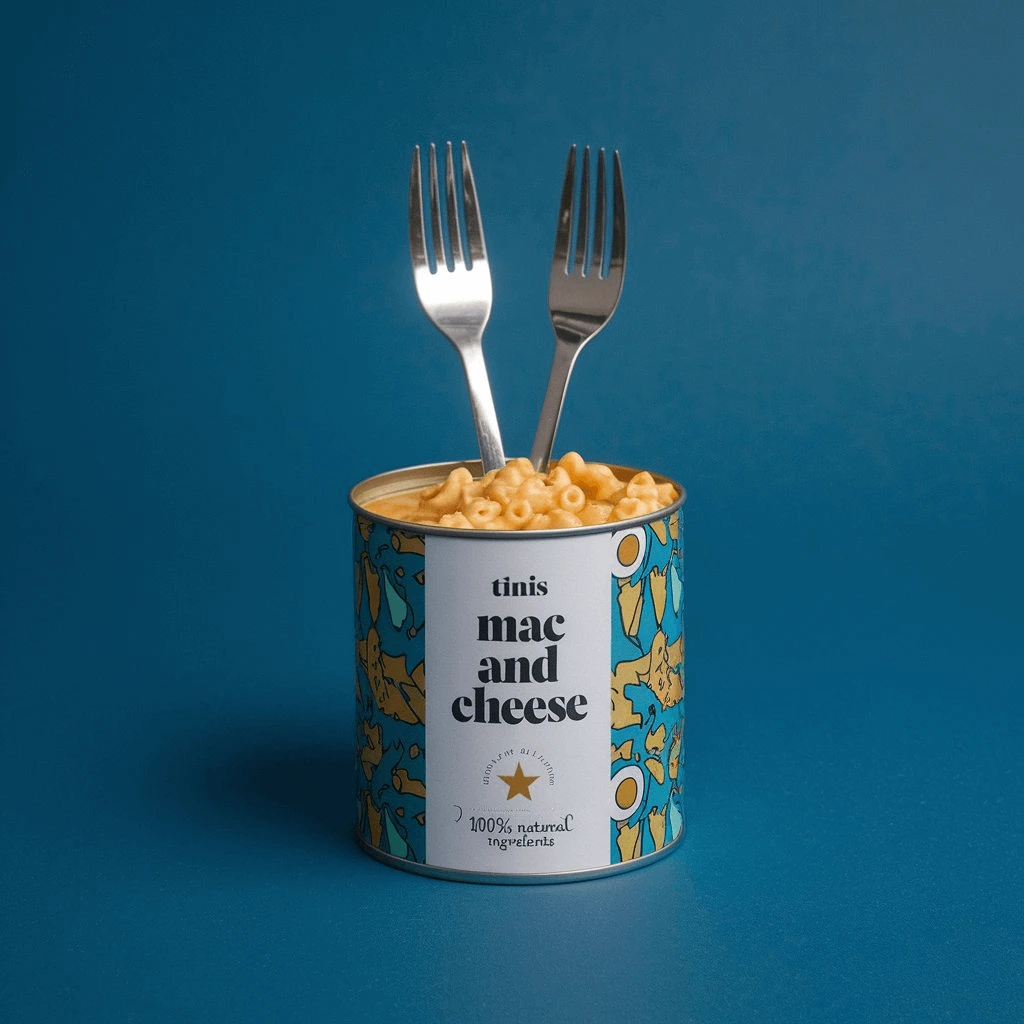
Looking for the perfect comfort food? Tini’s Mac and Cheese Recipe delivers a rich, creamy, and cheesy experience. This dish blends cheddar, mozzarella, and parmesan with tender elbow macaroni for a delicious homemade meal.
You can make it on the stovetop for a quick fix or bake it for a crispy topping. This guide walks you through each step, ensuring a smooth, flavorful mac and cheese every time. Get ready to enjoy an easy, satisfying dish with simple ingredients and expert tips!
Why You’ll Love This Tini’s Mac and Cheese Recipe
Mac and cheese is a timeless comfort food, but Tini’s Mac and Cheese Recipe takes it to a whole new level. Whether you’re preparing it for a cozy family dinner, a potluck, or just indulging in some cheesy goodness, this recipe guarantees rich flavor, a creamy texture, and the perfect balance of ingredients. Here’s why you’ll love it:
1. Rich, Creamy, and Extra Cheesy
First and foremost, this mac and cheese is packed with cheddar, mozzarella, and parmesan, creating a smooth, gooey sauce that coats every bite. Unlike store-bought versions, this homemade recipe ensures fresh, high-quality cheese melts perfectly, giving you the ultimate cheesy experience. Moreover, the secret to its creamy texture lies in the combination of butter, milk, and heavy cream, which blend seamlessly for a luscious sauce.
2. Quick and Easy to Make
Whether you’re short on time or love simple recipes, Tini’s Mac and Cheese is a hassle-free dish that comes together in under 30 minutes. In fact, the stovetop version is perfect for a fast meal, while the baked version adds a delicious crispy layer on top. Even better, you don’t need fancy ingredients or complicated steps—just a few pantry staples and a love for cheese!
3. Perfect for All Occasions
Not only is this dish easy to make, but it’s also incredibly versatile. Serve it as a main dish for a cozy dinner, as a side at BBQs or potlucks, or even as a fun meal for kids. Additionally, you can make a large batch and store leftovers for later. No matter the occasion, Tini’s Mac and Cheese is a crowd-pleaser that always brings people together!
4. Customizable to Your Taste
Another great reason to love this recipe is how easily you can tweak it to suit your preferences. If you want a spicy kick, simply add jalapeños or hot sauce. On the other hand, if you love a smoky flavor, mix in some smoked gouda or crispy bacon. Plus, if you need a gluten-free version, just swap in gluten-free pasta and flour. Clearly, the possibilities are endless, making this a go-to recipe for everyone.
Rich, Creamy, and Extra Cheesy
The best mac and cheese should be smooth, creamy, and packed with layers of cheese—and Tini’s Mac and Cheese Recipe delivers exactly that! Every bite is coated in a luxuriously thick and velvety cheese sauce, making it the ultimate comfort food. But what makes this recipe so irresistibly rich and cheesy? Let’s break it down.
The Perfect Blend of Cheeses
One of the key factors that sets this recipe apart is the combination of cheddar, mozzarella, and parmesan. Each cheese plays an important role:
- Cheddar: The foundation of the dish, offering a sharp, bold flavor and a smooth, meltable texture.
- Mozzarella: Adds a stretchy, gooey consistency that enhances the creaminess.
- Parmesan: Aged and flavorful, it gives a hint of nuttiness and depth to the sauce.
You can also experiment with smoked gouda, Monterey Jack, or gruyère for an even richer taste. The key is to use freshly shredded cheese rather than pre-packaged, as it melts more smoothly and enhances the overall texture.
The Secret to a Velvety Sauce
A good cheese sauce should be silky and smooth, without being too thick or grainy. This recipe achieves the perfect consistency by combining butter, milk, and heavy cream in just the right proportions.
- Butter: Forms the base and enhances the richness.
- Flour: Creates a light roux, which thickens the sauce without making it heavy.
- Milk and Heavy Cream: Provide a creamy, luscious texture while ensuring the sauce doesn’t become too thick.
By whisking these ingredients together slowly and stirring constantly, you get a perfectly emulsified sauce that clings to every piece of pasta.
Melting Magic: How to Avoid Grainy or Clumpy Cheese
To keep the sauce silky and lump-free, it’s important to follow a few simple steps:
- Use low heat: High heat can cause the cheese to break down, leading to a gritty texture.
- Add cheese gradually: Stirring in small amounts at a time ensures an even melt.
- Use room-temperature dairy: Cold milk or cream can cause curdling, so letting it sit for a few minutes before use helps maintain smoothness.
- Opt for cornstarch (optional): If you’re worried about separation, a pinch of cornstarch can help stabilize the sauce.
A Cheesy Coating on Every Bite
A great mac and cheese dish isn’t just about the sauce—it’s also about how well the pasta holds onto it. Elbow macaroni is the traditional choice because its shape traps the sauce inside for maximum cheesiness in every bite. However, shells, cavatappi, or rotini work just as well, adding extra texture and helping the cheese cling better.
Final Touch: A Golden, Cheesy Crust
For those who love a little crunch, baking the mac and cheese adds a golden, crispy topping that contrasts beautifully with the creamy interior. By sprinkling a mixture of breadcrumbs and extra cheese on top before baking, you get an irresistible crust that takes the dish to the next level.
Easy and Quick: A No-Fuss Recipe for Everyone
One of the best things about Tini’s Mac and Cheese Recipe is that it’s incredibly easy to make. Whether you’re a beginner in the kitchen or an experienced cook looking for a quick meal, this recipe comes together in just a few simple steps. In under 30 minutes, you can have a creamy, cheesy, and delicious dish ready to serve.
Minimal Ingredients, Maximum Flavor
Unlike some mac and cheese recipes that require complicated techniques or rare ingredients, this version is straightforward and uses staple ingredients you likely already have at home:
- Pasta – Elbow macaroni is a classic, but you can also use shells, cavatappi, or rotini.
- Cheese – A mix of cheddar, mozzarella, and parmesan creates the perfect cheesy balance.
- Milk and Heavy Cream – Essential for achieving that rich, velvety texture.
- Butter and Flour – Help create a smooth roux for thickening the sauce.
- Seasonings – A touch of salt, pepper, and mustard powder enhances the flavor.
With just a handful of ingredients, you can create a dish that tastes like it took hours to prepare!
Simple, Foolproof Cooking Process
This recipe doesn’t require fancy techniques—just a few easy steps:
- Cook the pasta – Boil the macaroni until it’s al dente, then drain and set aside.
- Make the cheese sauce – Melt butter, whisk in flour, and slowly add milk and cream for a silky base.
- Melt the cheese – Stir in shredded cheese gradually to create a smooth, creamy sauce.
- Combine everything – Mix the pasta with the sauce until fully coated.
- Serve and enjoy! – Your mac and cheese is ready to eat, or you can bake it for a crispy topping.
Because the steps are straightforward and beginner-friendly, anyone can make this dish with confidence.
Flexible Cooking Options
Another reason this recipe is so easy is that you can choose between stovetop or baked versions:
- Stovetop: Perfect for a quick, creamy mac and cheese in just 20 minutes.
- Baked: If you prefer a crispy topping, bake it for an additional 10 minutes with extra cheese and breadcrumbs.
No matter which method you choose, you’ll end up with a rich, cheesy, and comforting dish in no time.
Family-Friendly: A Dish Everyone Will Love
When it comes to family meals, Tini’s Mac and Cheese Recipe is a guaranteed hit. Not only is it easy to make, but it’s also the perfect comfort food that will appeal to both kids and adults alike. Whether you have picky eaters or diverse taste preferences, this mac and cheese is a crowd-pleaser that brings everyone to the table.
Kid-Approved Comfort Food
Mac and cheese is often a go-to meal for kids, and Tini’s Mac and Cheese is no exception. With its creamy sauce and cheesy goodness, even the pickiest eaters will devour it. The dish is mild in flavor, which is perfect for children, and its smooth texture makes it easy for younger kids to enjoy without difficulty. Whether served for dinner, lunch, or even as an after-school snack, this mac and cheese will quickly become a favorite in your household.
Customizable for All Tastes
One of the best aspects of Tini’s Mac and Cheese is how easily it can be customized to suit different preferences. If your family members have different tastes, you can make simple adjustments to the recipe:
- Spicy? Add some jalapeños or hot sauce for a fun twist.
- Meat lovers? Mix in some crispy bacon or sausage for extra flavor.
- Veggie fans? Toss in some broccoli or peas for a nutritious addition.
No matter who’s sitting at the dinner table, this mac and cheese can be personalized to satisfy everyone—and you can still keep it easy to prepare!
A Perfect Side or Main Dish
While this recipe is hearty enough to stand on its own as a main course, it also makes a wonderful side dish. Serve it alongside other family favorites like roast chicken, grilled vegetables, or a fresh salad, and you’ve got a well-rounded meal.
Moreover, this dish is great for leftovers—and with kids, leftovers are always a win! You can even store portions in the fridge for a couple of days, making mealtime even easier during the busy week.
Great for Family Gatherings and Potlucks
Whether you’re hosting a family get-together, potluck, or birthday party, Tini’s Mac and Cheese is the perfect dish to feed a crowd. It’s easy to make in large batches, and it holds up well when kept warm. Plus, it’s a comforting, universally-loved dish that guests of all ages will enjoy.
Ingredients You Need for the Best Mac and Cheese
When it comes to creating the perfect mac and cheese, the key lies in using quality ingredients and knowing how to combine them for the best flavor and texture. Tini’s Mac and Cheese Recipe calls for simple ingredients, but they come together to create a rich, creamy, and cheesy dish that’s truly exceptional. Let’s break down the essential ingredients that you’ll need for this recipe.
1. Pasta: The Base of the Dish
The first essential ingredient for mac and cheese is, of course, pasta. While traditional recipes often use elbow macaroni, you can opt for other shapes like shells, cavatappi, rotini, or even penne for a fun twist. The key is to use a shape with grooves or ridges to help the cheese sauce cling better. Elbow macaroni is a classic because it’s perfectly sized to hold the sauce inside, ensuring that every bite is as cheesy as the last.
Additionally, you can consider using whole wheat pasta or gluten-free pasta to accommodate dietary preferences without sacrificing taste or texture.
2. Cheddar Cheese: The Star of the Show
The most iconic ingredient in mac and cheese is cheddar cheese. A sharp, full-flavored cheddar will give your sauce the perfect balance of creaminess and tang. While mild cheddar can work, opting for sharp or extra sharp cheddar will add a more complex flavor and a richness that elevates the dish.
For the best results, always shred your cheese yourself—pre-shredded cheese often contains anti-caking agents that prevent it from melting smoothly. Freshly shredded cheddar will give you the smooth, gooey texture that makes mac and cheese so irresistible.
3. Mozzarella: The Stretchy Cheese
To create a wonderfully creamy and stretchy texture, mozzarella is the perfect addition. Its mild flavor complements the sharpness of the cheddar, and its meltability creates that beautiful, gooey, cheese pull we all love. When combined with cheddar, it helps create the ideal balance between richness and creaminess, ensuring that your mac and cheese is indulgent but not overly heavy.
You can opt for whole milk mozzarella for a smoother melt, or low-moisture mozzarella for a firmer consistency that still offers that melt-in-your-mouth feeling.
4. Parmesan: A Flavor Boost
Parmesan cheese adds an extra depth of flavor to your mac and cheese. Its nutty, salty taste brings a savory quality that enhances the overall cheese sauce. While it’s not the main cheese in this recipe, it works wonders in rounding out the flavor profile and giving the sauce a hint of umami. Freshly grated Parmesan is best, as it dissolves more easily and adds a smoother finish to the sauce.
5. Butter and Flour: For a Perfect Roux
To create a creamy cheese sauce, you’ll need to make a roux—a mixture of butter and flour. The butter adds richness and flavor, while the flour helps thicken the sauce without making it lumpy. The roux acts as the base for the cheese sauce, allowing the melted cheese to mix smoothly with the milk and cream.
Be sure to cook the roux on medium heat for about 1-2 minutes, stirring constantly to avoid burning, until it forms a smooth, golden paste. This step helps to eliminate any raw flour taste and ensures the sauce thickens to the perfect consistency.
6. Milk and Heavy Cream: For Creaminess
To create a luxurious, smooth sauce, you’ll need a combination of milk and heavy cream. The milk adds the necessary liquid to the sauce, while the heavy cream brings the richness and velvety texture that makes mac and cheese so indulgent. You can use whole milk for the best results, as it’s higher in fat and adds creaminess without being too heavy.
If you prefer a lighter version, you can swap the heavy cream for half-and-half or a lighter cream alternative. However, for the most indulgent mac and cheese, heavy cream is highly recommended.
7. Mustard Powder: A Secret Flavor Enhancer
A small amount of mustard powder is a game-changer in this mac and cheese recipe. It adds a subtle tang and depth to the cheese sauce without overpowering the flavor. The mustard works as an underrated flavor enhancer, balancing the richness of the cheese and cutting through the heaviness with just a hint of sharpness.
If you don’t have mustard powder, you can substitute it with a small amount of yellow mustard or Dijon mustard, though the powder gives a cleaner, more refined flavor.
8. Seasonings: Salt, Pepper, and Garlic Powder
For the perfect mac and cheese, a little seasoning goes a long way. Salt and pepper are essential for bringing out the flavors of the cheese, pasta, and sauce. Be sure to season the water you cook the pasta in with salt to enhance the flavor from the start.
A pinch of garlic powder adds a mild savory kick, complementing the cheese and making the sauce more robust. You can also experiment with onion powder or paprika for added depth or a slight smokiness.
9. Optional Add-ins for Extra Flavor
If you’re looking to add extra flavor or make the dish more filling, consider incorporating some optional ingredients:
- Bacon or sausage: Adds a salty, savory bite.
- Broccoli or peas: Incorporates some veggies for extra nutrition.
- Hot sauce or jalapeños: Gives a spicy kick for those who enjoy heat.
These add-ins can be mixed in during the final step when you combine the pasta and sauce or added to the dish as toppings for additional flavor.
Cheese Selection: The Key to Perfect Mac and Cheese
When it comes to mac and cheese, the cheese selection is arguably the most important aspect of the dish. The right combination of cheeses can elevate your recipe, making it creamy, rich, and full of flavor. In Tini’s Mac and Cheese Recipe, a careful balance of cheeses provides a melty, gooey texture with a savory, sharp taste that’s irresistible. Let’s dive into the best cheeses for creating the ultimate mac and cheese.
1. Cheddar: The Classic Cheese
Cheddar is undoubtedly the star of the show in any mac and cheese recipe. Its sharp, tangy flavor is the perfect base, offering the boldness that mac and cheese fans crave. While mild cheddar can work, sharp cheddar (or even extra sharp cheddar) takes the dish to the next level by providing more complexity and depth of flavor.
- Why Sharp Cheddar?: The sharper the cheddar, the more pronounced the flavor. This adds a delicious contrast to the creaminess of the sauce. Sharp cheddar also has a slightly firmer texture, which helps create the perfect melt without turning into a gooey mess.
- What to Look For: Opt for aged cheddar for a stronger flavor. Aged cheddar adds a sophisticated, nutty profile that balances well with the richness of the sauce.
2. Mozzarella: For Stretch and Creaminess
Mozzarella is the second cheese that brings an essential meltiness to your mac and cheese. Known for its stretchy, gooey texture, mozzarella helps to create that perfect cheese pull that everyone loves. The flavor is mild, so it doesn’t overpower the cheddar but complements it beautifully.
- Why Mozzarella?: Its high moisture content makes it melt incredibly well, giving your mac and cheese a smooth, creamy consistency. The stretchiness makes each bite feel indulgent and comforting.
- What to Look For: For the best melt, choose whole milk mozzarella or low-moisture mozzarella. If you’re looking for extra creaminess, consider fresh mozzarella.
3. Parmesan: Adding Depth and Savory Notes
Though Parmesan is not typically the main cheese in mac and cheese, it plays a critical role in adding umami and depth to the dish. This aged cheese is known for its salty, nutty flavor, and when used in mac and cheese, it brings an extra layer of savory richness.
- Why Parmesan?: Parmesan helps to enhance the overall flavor profile of the mac and cheese. It adds a touch of sharpness without overpowering the dish and contributes to the smoothness of the sauce.
- What to Look For: Always opt for freshly grated Parmesan instead of pre-grated options. Fresh Parmesan will melt more easily and create a creamier texture in the sauce.
4. Gruyère: A Gourmet Touch
For a more gourmet mac and cheese, consider adding Gruyère to the mix. This Swiss cheese has a rich, nutty flavor and a smooth melting quality, making it a great addition to any mac and cheese recipe. It brings a depth of flavor that is both sophisticated and comforting.
- Why Gruyère?: Gruyère adds a distinctive nutty, slightly sweet flavor to the sauce, which pairs well with both cheddar and mozzarella. Its melting properties are ideal for creating a silky, smooth texture in the sauce.
- What to Look For: Use aged Gruyère for a more intense flavor. If you prefer a milder version, opt for a younger Gruyère.
5. Fontina: A Creamy and Buttery Addition
Fontina is another cheese that can elevate your mac and cheese with its creamy, buttery flavor. This semi-soft Italian cheese has a rich, earthy taste and melts beautifully, giving your dish a smooth, luxurious texture.
- Why Fontina?: The creaminess and buttery notes of Fontina balance out the sharper flavors of cheddar and the richness of mozzarella. It adds a touch of sophistication and extra creaminess to the dish.
- What to Look For: Look for Fontina Val d’Aosta, which is made in the Italian Alps and is known for its full-bodied flavor and superb meltability.
6. Blue Cheese: For the Bold and Adventurous
For those who love bold flavors, blue cheese is an unexpected but delicious addition to mac and cheese. Its tangy, sharp flavor brings a unique twist to the classic recipe. Adding blue cheese is perfect for adventurous eaters who appreciate more complex, bold tastes.
- Why Blue Cheese?: Blue cheese adds an intense sharpness and creaminess to the dish. It pairs wonderfully with the milder cheeses and can turn your mac and cheese into a gourmet experience.
- What to Look For: A mild blue cheese, such as Gorgonzola or Roquefort, will give just the right amount of bold flavor without overwhelming the dish.
7. The Perfect Cheese Ratio
While choosing the right cheeses is essential, the ratio of cheeses also plays a vital role in the overall outcome of your mac and cheese. A balance of sharp cheddar, mozzarella, and a touch of Parmesan will give you the ideal mix of flavor, creaminess, and texture. You can also experiment with a blend of cheeses to find your perfect combination.
- A Good Starting Point: Start with two parts cheddar, one part mozzarella, and one part Parmesan. Adjust the proportions based on your taste preferences for more richness or sharpness.
Pasta Choices: Finding the Perfect Shape for Mac and Cheese
The pasta shape you choose plays a crucial role in the texture and experience of your mac and cheese. The right pasta not only holds the cheesy sauce better but also adds to the overall comforting appeal of the dish. In Tini’s Mac and Cheese Recipe, selecting the perfect pasta shape enhances both flavor and texture, making each bite as satisfying as the last. Let’s explore the best pasta shapes for creating the ultimate mac and cheese.
1. Elbow Macaroni: The Classic Choice
When you think of mac and cheese, the first pasta shape that probably comes to mind is elbow macaroni. This short, curved pasta is the traditional choice for mac and cheese, and for good reason. Its small, hollow shape is perfect for holding onto that creamy, cheesy sauce.
- Why Elbow Macaroni?: Elbow macaroni’s circular shape helps trap the sauce inside, ensuring that every bite is packed with flavor. The slight curve also allows for a great texture when combined with the rich, smooth sauce, creating a satisfying balance of cheese and pasta in each forkful.
- What to Look For: Opt for high-quality elbow macaroni made from durum wheat for a firm texture that will hold up during baking or stovetop preparation. Avoid overcooking the pasta, as it can become too soft and lose its ability to hold the sauce.
2. Cavatappi: A Fun Twist on the Classic
If you’re looking to switch things up while still maintaining that perfect sauce-to-pasta ratio, cavatappi is an excellent choice. This spiral-shaped pasta has a fun corkscrew design that helps grab the creamy cheese sauce in a delightful way.
- Why Cavatappi?: The tight spirals of cavatappi offer more surface area for the sauce to cling to, which means you get more cheese in each bite. Its bouncy, textured shape also provides a satisfying chew, making it an ideal pasta for a hearty, indulgent dish.
- What to Look For: Look for high-quality cavatappi made with durum wheat semolina. This pasta shape holds up well in both baked and stovetop versions of mac and cheese.
3. Penne: A More Substantial Choice
For a more substantial pasta experience, penne is a great option. This tube-shaped pasta is often used in heartier dishes, and its smooth texture and ability to hold sauce make it a wonderful choice for mac and cheese.
- Why Penne?: The hollow tubes of penne allow the cheesy sauce to fill each piece, creating a perfect bite with a good balance of pasta and sauce. Penne is slightly larger than elbow macaroni, giving the dish a more substantial feel that’s perfect for those who prefer a bit more pasta in each serving.
- What to Look For: Choose rigatoni or penne rigate for a pasta with ridged edges. The ridges help trap the cheese sauce, resulting in a more flavorful bite.
4. Shells: For Extra Sauce Catching
If you’re looking to get the most out of every ounce of sauce, pasta shells are an excellent option. Their concave shape makes them perfect for holding onto that rich, cheesy goodness.
- Why Shells?: The cup-like shape of pasta shells makes them a great choice for mac and cheese, as they hold the sauce inside, delivering a burst of cheesy goodness with every bite. Shells also have a unique texture, offering a more substantial chew than some other pasta shapes.
- What to Look For: Go for medium-sized shells or even jumbo shells for a fun twist, especially if you plan to stuff the shells with mac and cheese before baking.
5. Fusilli: A Spiral That Works
If you’re looking for a pasta with plenty of texture and twist, fusilli is a fantastic option. These twisted spirals have more surface area for the sauce to adhere to, ensuring that every bite is loaded with flavor.
- Why Fusilli?: The tight spiral shape of fusilli allows for excellent sauce retention, making it a great choice for mac and cheese. Its fun appearance and unique shape also add visual appeal to the dish, making it more enticing and playful.
- What to Look For: Select fusilli pasta made with durum wheat semolina to maintain its firm texture when cooked and to ensure it holds up in the sauce.
6. Farfalle: A Delicate and Elegant Choice
For those who want a more elegant take on mac and cheese, farfalle (or bowtie pasta) is a great option. While not the traditional choice, farfalle adds a touch of sophistication to the dish.
- Why Farfalle?: The small, delicate bowtie shape of farfalle adds a textural contrast to the creamy cheese sauce. While it doesn’t hold as much sauce as other pasta shapes, it offers a pleasant bite and works well in a lighter, stovetop mac and cheese dish.
- What to Look For: Use quality farfalle pasta made from durum wheat to ensure the texture holds up when cooked.
7. Gluten-Free Options
If you or your guests have gluten sensitivities, there are plenty of gluten-free pasta options available that can still deliver the same rich, cheesy mac and cheese experience. Many corn-based or rice-based pastas are designed to replicate traditional wheat pasta’s texture and flavor.
- Why Gluten-Free Pasta?: These options allow everyone to enjoy the creamy goodness of mac and cheese without the worry of gluten. They come in a variety of shapes, so you can still find the right option to complement your cheesy sauce.
- What to Look For: Opt for gluten-free pasta made with a blend of rice flour, corn flour, or quinoa for a better texture and taste.
Creamy Base: The Foundation of Perfect Mac and Cheese
The creamy base is the heart of any mac and cheese recipe. It’s what turns simple pasta into a rich, comforting dish. For Tini’s Mac and Cheese, the creamy base combines high-quality ingredients to create a sauce that’s smooth, velvety, and packed with flavor. Let’s break down the key elements that contribute to the perfect creamy sauce.
1. Butter: The Rich, Flavorful Start
The journey to a creamy mac and cheese sauce begins with butter. Butter not only adds a rich, savory flavor but also provides a smooth texture to the sauce. As the first ingredient in the base, it’s essential for setting the tone of the dish.
- Why Butter?: Butter helps to create a smooth consistency, which is key to a creamy sauce. It also adds a richness that complements the cheese, creating a comforting, indulgent flavor. The fat in the butter also aids in preventing the sauce from separating or becoming too thin.
- What to Look For: Use unsalted butter so you can control the amount of salt in your recipe. For extra flavor, you can also experiment with clarified butter, which has a richer taste.
2. Flour: The Thickening Agent
To achieve that perfect creamy texture, you need a good thickening agent. Flour is the classic choice for mac and cheese. When mixed with butter, it forms a roux (a paste), which helps thicken the sauce without making it lumpy.
- Why Flour?: Flour helps bind the sauce together, creating a smooth and creamy consistency that coats the pasta well. The roux process allows the sauce to be thickened evenly without clumps, so every bite is luxuriously creamy.
- What to Look For: Use all-purpose flour for the best texture. Make sure to cook the roux for a minute or two to get rid of the raw flour taste, but avoid browning it too much to maintain a delicate flavor.
3. Milk: The Liquid Base
The next key component in creating a creamy base is milk. It provides the liquid necessary to turn the flour and butter mixture into a smooth, pourable sauce. Milk helps to maintain the right texture, making the sauce velvety without being too thick.
- Why Milk?: Milk is essential for achieving the right consistency. It adds moisture while keeping the sauce creamy and smooth. The fat content in milk also adds richness, helping to balance the flavor and texture of the mac and cheese.
- What to Look For: For an ultra-creamy sauce, use whole milk or heavy cream if you want a richer base. If you prefer a lighter version, 2% milk still offers a creamy consistency. Avoid using skim milk, as it may result in a thinner sauce.
4. Cheese: The Secret Ingredient
Of course, the key to a creamy mac and cheese is the cheese itself. The cheese melts into the milk and butter mixture, creating a luscious sauce that’s both rich and flavorful. The combination of cheeses you use will define the flavor profile of the dish.
- Why Cheese?: Cheese is the soul of the sauce, contributing its natural fats and flavors to create a rich, smooth texture. The cheese should melt easily into the sauce without becoming gritty or separating. The key is to choose cheeses that melt well and complement each other.
- What to Look For: Sharp cheddar is a must for mac and cheese, offering a bold, tangy flavor. A mixture of cream cheese or Gruyère can add a smooth, velvety texture and a more complex flavor. Mozzarella or Monterey Jack will add a gooey, stretchy quality that everyone loves.
5. Seasonings and Spices: Enhancing Flavor
The final step to creating a creamy base is to season the sauce properly. A pinch of salt, pepper, and other spices will bring out the flavors of the butter, cheese, and milk. Adding a hint of garlic powder, mustard powder, or paprika can elevate the sauce, giving it depth and warmth.
- Why Seasonings?: The seasonings enhance the natural flavors of the cheese and milk while adding complexity to the sauce. A little nutmeg or cayenne pepper can give the sauce a subtle warmth, balancing the richness with a bit of heat.
- What to Look For: Always taste the sauce as you go and adjust the seasonings to your liking. A little mustard powder adds a tangy kick, while paprika gives the sauce a touch of smokiness.
Seasonings & Toppings: Adding Flavor and Texture to Your Mac and Cheese
Seasonings and toppings are where you can get creative and elevate Tini’s Mac and Cheese to new heights. While the creamy base is essential for a rich flavor, it’s the seasonings and toppings that make the dish uniquely yours. Whether you’re craving a bit of spice, savory depth, or a crunchy finish, these additions will transform your mac and cheese into a crowd-pleasing masterpiece.
1. Essential Seasonings: Flavor Foundations
A few simple seasonings can bring out the best in your mac and cheese and enhance the cheese and creamy sauce. Here are some must-have seasonings for the perfect balance of flavors:
- Salt and Pepper: These basic seasonings are the foundation of any great dish. While cheese is naturally salty, the addition of sea salt enhances the overall flavor. Freshly ground black pepper adds a hint of warmth and subtle heat that cuts through the richness of the sauce.
- Garlic Powder: A touch of garlic powder gives the mac and cheese a savory, aromatic kick. It’s an easy way to boost the depth of the sauce without overpowering the cheese.
- Onion Powder: Like garlic powder, onion powder adds a savory undertone that complements the cheese and the creamy base, making each bite more complex.
- Mustard Powder: Adding a bit of mustard powder to your sauce helps to balance out the richness of the cheese and adds a slight tang that elevates the dish. It’s a traditional ingredient in many mac and cheese recipes and gives a subtle zip that makes the flavors pop.
- Paprika: Paprika not only adds color to the sauce but also contributes a mild smokiness that brings a whole new layer of flavor. Smoked paprika is an excellent option for an extra touch of smokiness, especially if you’re looking for a more complex flavor profile.
2. Herbs: Fresh and Aromatic Touches
Fresh herbs can add brightness and freshness to your mac and cheese. They’re the perfect way to balance the richness of the cheese and add a burst of color and flavor to the dish.
- Thyme: A little fresh thyme or dried thyme can lend a subtle earthy flavor to the dish. It works well with the creamy sauce and adds complexity without overpowering the dish.
- Parsley: Fresh parsley is a go-to herb for garnishing mac and cheese. Its bright green color and mild flavor offer a refreshing contrast to the rich, cheesy sauce. Chopped parsley can be sprinkled on top for a fresh finish.
- Chives: Chopped chives provide a mild, onion-like flavor and give the dish a beautiful green pop. They’re an excellent addition to add freshness without introducing too much of a strong flavor.
3. Spice It Up: For a Bold Kick
If you love a bit of heat in your mac and cheese, these seasonings and toppings can turn up the spice level:
- Cayenne Pepper: A pinch of cayenne pepper is all you need to add a subtle heat to your mac and cheese. It pairs beautifully with the richness of the cheese and adds a spicy edge without being overpowering.
- Hot Sauce: If you want to bring some heat and tang, drizzle a bit of your favorite hot sauce over the top of the mac and cheese before serving. For those who love spicy food, this can take your dish to the next level.
- Jalapeños: For a fresh, crunchy heat, sliced jalapeños (fresh or pickled) can be sprinkled over the top of your mac and cheese. They offer both texture and spiciness, making each bite exciting.
4. Crunchy Toppings: Adding Texture and Flavor
While mac and cheese is typically smooth and creamy, the addition of a crunchy topping can add a whole new dimension to the dish. Here are some ideas for topping your mac and cheese with satisfying crunch:
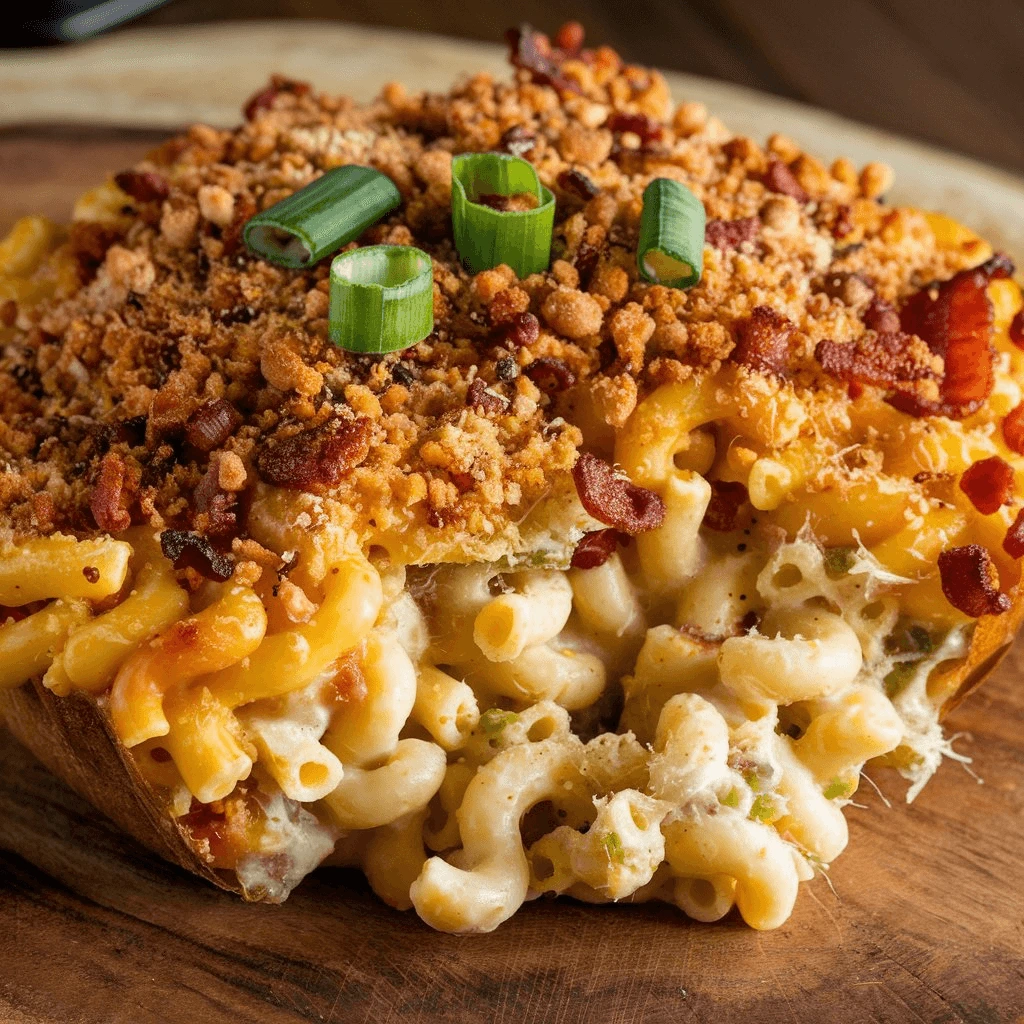
- Breadcrumbs: One of the classic toppings for baked mac and cheese is a layer of crispy breadcrumbs. You can use panko breadcrumbs for an extra crunchy topping or regular breadcrumbs for a finer texture. Toast the breadcrumbs in butter or olive oil to give them an extra flavor boost before sprinkling them on top.
- Crumbled Bacon: Crispy bacon is an indulgent topping that adds a savory crunch to mac and cheese. The smokiness and saltiness of the bacon pair perfectly with the creamy cheese sauce, offering a satisfying contrast in texture and flavor.
- Fried Onions: For a slightly different take, crispy fried onions are a great choice. These give a sweet and savory crunch that adds richness to the dish. They also provide a unique flavor that enhances the overall experience.
- Potato Chips: If you’re in the mood for something truly unique, crushed potato chips make a fun and crunchy topping for mac and cheese. The saltiness and crispiness of the chips provide an unexpected but delightful contrast to the creamy sauce.
5. Special Additions: For Extra Flavor Complexity
Sometimes, it’s the special additions that set a mac and cheese recipe apart. Whether you’re looking for an extra layer of sweetness, umami, or savory depth, these ingredients will take your mac and cheese to the next level:
- Caramelized Onions: Sweet, caramelized onions bring a deep, rich flavor to mac and cheese. The sweetness of the onions pairs beautifully with the tang of the cheese, adding a touch of complexity to the dish.
- Truffle Oil: For a luxurious twist, a drizzle of truffle oil over the mac and cheese can add a savory, earthy depth. Just a little goes a long way in infusing the dish with a gourmet touch.
- Roasted Garlic: Roasted garlic adds a subtle sweetness and complexity that perfectly complements the creamy sauce. It’s a fantastic way to add a little something extra to your mac and cheese without overwhelming the other flavors.
Step-by-Step Instructions to Make Tini’s Mac and Cheese
Making Tini’s Mac and Cheese is a simple yet rewarding process that allows you to create a dish bursting with creamy, cheesy goodness. Whether you’re cooking for a family dinner, a party, or just to satisfy your own cravings, this step-by-step guide will help you achieve the perfect mac and cheese every time. Let’s dive into the process and break it down into manageable steps.
1. Boil the Pasta: The Base of Your Dish
The first step to making mac and cheese is cooking the pasta. This is an essential part of the dish because the pasta will absorb the creamy sauce, making it even more flavorful.
- Instructions:
- Bring a large pot of salted water to a rolling boil. Add about 1 tablespoon of salt for every 4-6 cups of water to help season the pasta as it cooks.
- Add your chosen pasta (like elbow macaroni or cavatappi) to the pot, and cook according to the package instructions, usually around 7-9 minutes. Be sure to cook it al dente, as the pasta will continue to cook once it’s combined with the sauce.
- After cooking, drain the pasta and set it aside, reserving about 1/2 cup of pasta water. This water can help adjust the consistency of the sauce later.
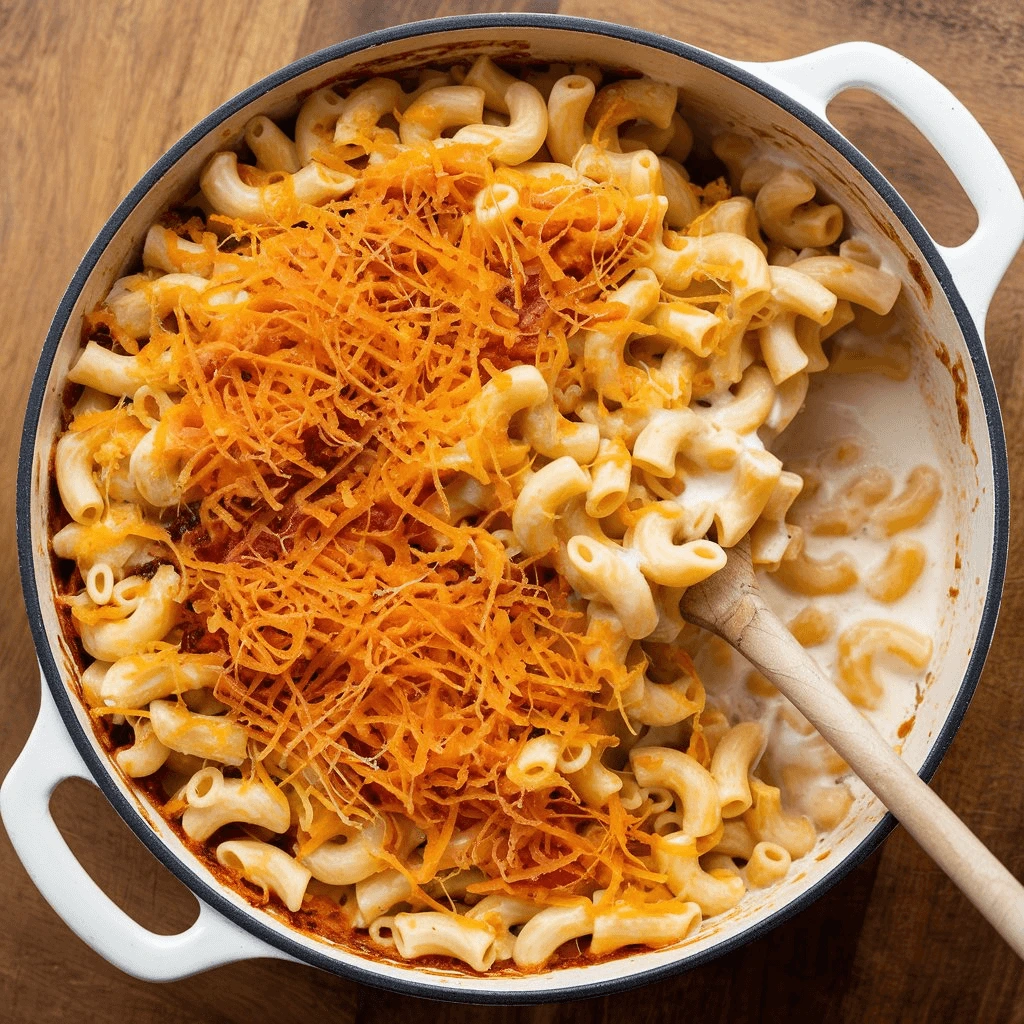
2. Prepare the Creamy Cheese Sauce
The next step is making the rich, velvety sauce that will coat your pasta and make Tini’s mac and cheese irresistible. This sauce is created using a roux, which is a mixture of butter and flour, combined with milk and cheese.
- Instructions:
- In a large saucepan or skillet, melt butter over medium heat. Once the butter is fully melted, add the flour and whisk constantly for about 1-2 minutes to form a smooth paste. This helps cook out the raw flavor of the flour.
- Gradually pour in the milk while continuing to whisk to prevent lumps from forming. Bring the mixture to a simmer, stirring frequently until the sauce thickens, about 3-5 minutes.
- Lower the heat to low, and add in your cheese (sharp cheddar, Gruyère, or mozzarella are great options). Stir continuously until the cheese has completely melted and the sauce is smooth and creamy.
- Taste the sauce and adjust the seasoning, adding salt, pepper, garlic powder, and mustard powder to enhance the flavor.
3. Combine Pasta and Sauce
Now that your cheese sauce is ready, it’s time to combine it with the pasta. This is where the magic happens, and the creamy sauce envelops the pasta, creating the comforting dish everyone loves.
- Instructions:
- Add the drained pasta to the saucepan with the cheese sauce. Stir gently to combine, ensuring every piece of pasta is coated with the luscious cheese sauce.
- If the sauce feels too thick, add a small amount of the reserved pasta water to loosen it up. The starchy pasta water will help the sauce cling to the pasta even better.
4. Optional: Bake for a Golden, Crispy Top
While this step is optional, baking the mac and cheese can add a deliciously crispy top layer that contrasts perfectly with the creamy interior.
- Instructions:
- Preheat your oven to 350°F (175°C).
- Transfer the mac and cheese into a greased baking dish, spreading it out evenly.
- For extra flavor and crunch, top the mac and cheese with buttered breadcrumbs or crushed bacon.
- Bake in the oven for about 20 minutes or until the top is golden brown and bubbly.
5. Serve and Enjoy
Once your mac and cheese is perfectly creamy and golden, it’s time to serve and enjoy! The creamy texture combined with the savory flavors will make this dish a crowd-pleaser at any meal.
- Instructions:
- Serve the mac and cheese immediately while it’s still warm. You can garnish it with fresh parsley or a sprinkle of chives to add a pop of color.
- For extra flavor, you can also drizzle a bit of hot sauce or extra cheese on top before serving.
Step 1: Cook the Pasta – The Essential First Step
Cooking the pasta is the foundational step for making Tini’s Mac and Cheese. It’s crucial that the pasta is perfectly cooked to absorb the creamy cheese sauce and achieve that delightful texture. Getting this step right sets the stage for a smooth and satisfying mac and cheese experience. Let’s break down this process to ensure you get the ideal pasta every time.
1. Choosing the Right Pasta
The type of pasta you use plays a significant role in the texture and overall experience of the dish. While traditional mac and cheese typically calls for elbow macaroni, there are plenty of other pasta shapes that work well too. Here are a few options to consider:
- Elbow Macaroni: The classic choice, elbow macaroni’s curved shape is perfect for holding onto the creamy sauce. It’s small, easy to eat, and ideal for any mac and cheese recipe.
- Cavatappi: These spiral-shaped pasta tubes have a hollow center, which helps trap the cheesy sauce inside, giving every bite a burst of flavor. This pasta is great for a slightly more sophisticated take on mac and cheese.
- Penne: Another excellent choice, penne’s ridges help grip the sauce, making every bite creamy and satisfying.
- Shells: Small or medium shells can be great for capturing sauce in their pocket-like shape, ensuring each bite is perfectly sauced.
No matter which pasta you choose, the most important thing is ensuring it’s sturdy enough to hold the cheese sauce without getting mushy. Opt for a pasta that retains its shape well during cooking.
2. Boiling the Pasta to Perfection
The process of boiling the pasta may seem simple, but it’s an essential step in ensuring that your mac and cheese has the ideal texture. Here’s how to do it correctly:
- Salt the Water: The key to flavorful pasta is salting the water. For every 4-6 cups of water, add about 1 tablespoon of salt. This helps season the pasta as it cooks, ensuring that the flavor of the pasta itself isn’t bland. This step is especially important in mac and cheese because the pasta is the base for the rich sauce.
- Bring Water to a Boil: Start by bringing a large pot of water to a boil over high heat. Once the water is boiling, it’s time to add your pasta. The water should be at a rolling boil when the pasta is added to ensure the pasta cooks evenly.
- Add the Pasta: Stir the pasta immediately after adding it to the pot to prevent it from sticking together. Keep an eye on the cooking time as specified on the pasta package, usually around 7-9 minutes. It’s important to cook the pasta just to al dente, meaning it should still have a slight bite to it when you bite into it. This prevents the pasta from becoming too soft and mushy once mixed with the sauce.
- Taste Test: After the recommended cooking time, taste a piece of pasta to ensure it’s cooked to your liking. If it’s slightly firm but not crunchy, it’s perfect. Overcooking can lead to the pasta losing its shape and not absorbing the sauce as well.
3. Drain the Pasta Properly
Once the pasta is cooked al dente, it’s time to drain it. However, you’ll want to be mindful of a few important details to ensure the best results:
- Reserve Pasta Water: Before draining the pasta, make sure to reserve about 1/2 cup of the cooking water. This starchy water can be added to your cheese sauce later to adjust the consistency if it’s too thick. The starch in the water also helps the sauce adhere to the pasta better.
- Drain the Pasta: After reserving the water, pour the pasta into a colander to drain. Be careful not to over-drain the pasta, as a little bit of the residual water helps the sauce cling to the pasta.
- Do Not Rinse: It’s essential not to rinse the pasta with cold water. Rinsing removes the starch, which helps the sauce stick to the pasta. By keeping this natural starch, you ensure the sauce adheres more evenly and creates a creamier finish.
4. Combine with Sauce Quickly
Once your pasta is drained and the sauce is ready, it’s important to combine them quickly while the pasta is still hot. This ensures the sauce has time to absorb into the pasta, creating that delicious, creamy texture you crave.
- Toss the Pasta with the Sauce: Immediately add the hot, drained pasta into the pot with the creamy cheese sauce. Stir the mixture gently to ensure every piece of pasta is well-coated with the cheese sauce. The pasta’s heat will also help thicken the sauce slightly, creating a perfect creamy consistency.
Step 2: Make the Cheese Sauce – The Heart of Tini’s Mac and Cheese
The cheese sauce is the soul of Tini’s Mac and Cheese, transforming simple pasta into a creamy, flavorful comfort dish. Therefore, getting the sauce just right is crucial. It needs to be smooth, velvety, and rich enough to coat the pasta without being too thick or too runny. Fortunately, we’ll guide you step-by-step through the process to create the perfect cheese sauce that will elevate your mac and cheese to the next level.
1. Start with a Roux: The Foundation of Your Sauce
First, you need to prepare a roux, which is a simple mixture of butter and flour. This roux will help thicken the sauce and provide a smooth texture. Additionally, making the roux properly is essential to getting the right consistency for the sauce.
- Instructions:
- Begin by melting butter (about 3 tablespoons) in a large saucepan over medium heat.
- Once the butter has melted completely, add flour (about 3 tablespoons) and stir constantly with a whisk. This ensures the mixture is smooth and free of lumps.
- Continue cooking the roux for about 1-2 minutes, stirring all the while. This helps to cook out the raw taste of the flour and allows the roux to thicken properly.
2. Add the Milk: The Creaminess Starts Here
Once the roux is ready, it’s time to add the milk. At this point, the milk will begin to turn the mixture into a creamy sauce. For a richer sauce, full-fat milk works best, but if desired, you can also use half-and-half or heavy cream.
- Instructions:
- Gradually pour in milk (about 2 cups) while continuing to whisk. This step helps avoid lumps and ensures a smooth texture.
- Stir the mixture and bring it to a simmer over medium heat. Allow the sauce to cook for around 3-5 minutes. As it simmers, the sauce will thicken and take on a rich, custard-like consistency.
3. Add the Cheese: The Flavor Boost
Now, the best part—adding the cheese! The cheese you choose will determine the flavor and creaminess of your sauce, so be sure to select your cheese varieties carefully.
- Cheese Selection:
- Sharp Cheddar provides a bold, tangy flavor that’s perfect for mac and cheese.
- Gruyère or Fontina cheeses melt beautifully, bringing a subtle nuttiness and richness to the sauce.
- Mozzarella is a great option if you’re looking for a gooey, stretchable texture that adds extra creaminess.
- Instructions:
- Lower the heat to low once the milk has thickened.
- Gradually add the shredded cheese to the sauce, stirring constantly. Be sure to melt the cheese thoroughly, which will help create a smooth, velvety sauce.
4. Season to Perfection
Once the cheese has melted, it’s time to season your sauce. Seasoning is essential to bringing out the full flavor of the cheese, so don’t skip this step!
- Instructions:
- Start by adding salt and pepper to taste. These basic seasonings will enhance the overall flavor.
- For a little extra depth, consider adding a pinch of garlic powder or onion powder. These ingredients complement the cheese wonderfully.
- For a touch of tang, you can also sprinkle in a bit of mustard powder or paprika. These will balance the richness of the cheese while adding a subtle kick.
5. Adjust Consistency
At this stage, it’s important to check the consistency of the sauce. If it’s too thick or too thin, there are easy fixes.
- Instructions:
- If the sauce seems too thick, add a tablespoon or two of the reserved pasta water or extra milk. This will help thin out the sauce to the desired consistency. The pasta water also helps the sauce adhere better to the pasta.
- On the other hand, if the sauce is too thin, continue simmering it over low heat. Stir constantly to prevent the sauce from burning, and let it cook until it thickens to the consistency you prefer.
Step 3: Combine and Cook – Bringing It All Together
Now that you’ve prepared both the cheese sauce and the pasta, it’s time to combine them to create the creamy, comforting dish you’ve been craving. This step is where the magic happens—mixing the two elements together will result in a rich, cheesy pasta that’s absolutely irresistible. Plus, the final step of cooking ensures everything is heated through and perfectly coated in that velvety cheese sauce.
1. Combine the Cooked Pasta with the Cheese Sauce
First, take your cooked pasta and add it directly into the cheese sauce. It’s essential to do this while the sauce is still warm, so the pasta absorbs all the creamy goodness.
- Instructions:
- Gently stir the pasta into the sauce, making sure each piece is well-coated. This will create a uniform, creamy texture, ensuring that every bite is just as delicious as the last.
- If you find that the sauce is too thick at this point, you can add a splash of the reserved pasta water to loosen it up. This also helps the sauce cling better to the pasta, giving it that perfect creamy finish.
2. Heat the Mixture on Low
Once everything is combined, it’s time to let the flavors meld together. Heating the mixture on low ensures that everything is warm and well-integrated without overcooking the sauce or the pasta.
- Instructions:
- Place the combined pasta and cheese sauce back on the stove over low heat.
- Stir occasionally, making sure the sauce doesn’t stick to the bottom of the pan or scorch. This gentle heat will allow the sauce to thicken further, coating the pasta with even more richness.
- Continue heating for about 2-3 minutes, or until the dish is fully warmed through.
3. Optional Step: Add Extra Toppings for a Flavor Boost
While your Tini’s Mac and Cheese is almost ready, you can take it up a notch by adding some extra toppings to enhance flavor and texture.
- Instructions:
- Consider adding a sprinkle of shredded cheese on top and letting it melt into the hot pasta for an extra cheesy layer.
- You can also sprinkle some bread crumbs on top for a crunchy, golden finish. Simply toast the breadcrumbs in a little butter and then add them over the mac and cheese just before serving.
- For a bit of heat, consider adding a few dashes of hot sauce or a sprinkle of red pepper flakes.
4. Serve and Enjoy
Finally, it’s time to dish out your Tini’s Mac and Cheese and serve it hot! This dish is perfect for any occasion, whether it’s a quick family meal or a special gathering with friends.
- Instructions:
- Serve your creamy mac and cheese in bowls or on plates.
- Garnish with a bit of fresh parsley or chives for a pop of color and added freshness.
- Now, take a bite and enjoy the comforting, cheesy goodness you’ve just created!
Step 4: Serve and Enjoy – The Grand Finale
After all the hard work in creating Tini’s Mac and Cheese, it’s time for the most rewarding part—serving and enjoying your delicious creation! This final step is all about presentation, the finishing touches, and sharing the warmth of this comfort food with your loved ones. Whether you’re serving it for a family dinner, a gathering with friends, or a cozy solo meal, the joy of sharing a plate of this creamy, cheesy goodness will never get old.
1. Serve in Warm Bowls or Plates for the Best Experience
Presentation plays a key role in making your mac and cheese look as inviting as it tastes. While mac and cheese is known for being a comfort food, a little attention to presentation can elevate the dining experience. Serving it hot and fresh in beautiful bowls or plates can make a difference.
- Instructions:
- Ladle generous portions of the cheesy pasta into warm bowls or plates. Warm dishes help maintain the temperature of the mac and cheese for a longer period, so your guests can enjoy every bite at its best.
- Consider using shallow bowls or wide plates to allow the creamy cheese sauce to shine. A bit of extra sauce on the plate adds visual appeal and invites a satisfying experience.
2. Add Final Garnishes for Extra Flavor and Color
While your mac and cheese is rich, creamy, and flavorful, a few simple garnishes can enhance its visual appeal and taste. A sprinkle of fresh herbs or a dash of seasoning can elevate the dish and add layers of flavor.
- Instructions:
- Add a sprinkle of fresh parsley or chives on top of each serving. These herbs not only add a pop of color but also a fresh contrast to the richness of the cheese sauce.
- If you’re feeling adventurous, a small drizzle of hot sauce or sriracha can add a burst of heat that pairs beautifully with the creamy base.
- For some extra crunch, sprinkle toasted breadcrumbs or crispy bacon bits over the top. These ingredients bring texture and a savory bite that contrasts with the soft pasta.
3. Pair with Side Dishes or Drinks for a Complete Meal
Tini’s Mac and Cheese is a filling, satisfying dish on its own, but pairing it with complementary sides or drinks can create a well-rounded meal. Adding variety with sides that contrast the creaminess of the dish can make for a more enjoyable and balanced dining experience.
- Instructions:
- Serve your mac and cheese alongside a fresh, crisp green salad. A simple salad with a light vinaigrette or tangy dressing can cut through the richness of the cheese.
- For a bit of extra indulgence, serve your mac and cheese with garlic bread or buttery biscuits. These options add a delightful texture and flavor that pairs beautifully with the creamy pasta.
- As for drinks, a glass of white wine, like Chardonnay, or a sparkling lemonade can complement the dish perfectly, offering a refreshing balance to the richness of the mac and cheese.
4. Enjoy Immediately for the Best Taste
Mac and cheese is best enjoyed fresh, while it’s still hot and gooey. The longer it sits, the more the sauce can thicken, and while it’s still delicious later, the texture may change. To ensure you enjoy the full flavor of Tini’s Mac and Cheese, serve it right after it’s made.
- Instructions:
- As soon as your dish is plated and garnished, it’s time to dig in!
- Take a moment to enjoy the creamy, cheesy texture with every bite. Whether you’re eating alone or sharing with loved ones, savor the comforting and indulgent taste of this classic dish.
5. Share and Celebrate
Lastly, mac and cheese is a meal meant to be shared and enjoyed with others. The warmth, the cheesy goodness, and the comfort of the dish make it perfect for gatherings and celebrations. Share this meal with your friends and family, and create lasting memories over a hearty plate of mac and cheese.
- Instructions:
- Invite your family or friends to the table and enjoy the meal together.
- Tini’s Mac and Cheese is sure to bring smiles, compliments, and satisfaction all around. Whether it’s a weeknight meal or a special treat, it’s the kind of dish that brings people together and leaves everyone asking for seconds.
Pro Tips for the Creamiest Mac and Cheese
Making the perfect mac and cheese is an art, and achieving that dream creamy texture requires some attention to detail. Whether you’re an experienced home cook or just starting out, these pro tips will elevate your mac and cheese game, making it even more indulgent, smooth, and rich. Let’s dive into the secrets behind creating the creamiest mac and cheese you’ll ever make!
1. Use a Mix of Cheeses for Optimal Creaminess
The choice of cheese plays a crucial role in determining the texture and flavor of your mac and cheese. While cheddar is a classic, combining different cheeses will create a more complex and creamy result.
- Instructions:
- Cheddar is a must for its sharp, tangy flavor and meltability. But to achieve a super creamy consistency, add some Gruyère or Fontina for their smooth, silky texture.
- For even more creaminess, include a bit of cream cheese. It melts smoothly and enhances the richness of the sauce, making it extra velvety.
- Lastly, parmesan can be sprinkled on top as a finishing touch, adding flavor and a slight crust when broiled.
2. Don’t Skimp on the Fat
The key to that signature creamy texture lies in the amount of fat you use in the cheese sauce. Without enough fat, your sauce might turn out too thin or greasy. Finding the right balance is essential.
- Instructions:
- When making the roux (the base of your cheese sauce), use a generous amount of butter—around 4 tablespoons for every cup of milk you use.
- The more fat you incorporate, the creamier your sauce will be. Use whole milk or even heavy cream for a luscious, smooth finish. If you’re aiming for an ultra-creamy texture, half-and-half can be a great choice, as it’s a perfect blend of milk and cream.
3. Control the Heat – Avoid Overheating the Sauce
A common mistake when making mac and cheese is overheating the cheese sauce, which can cause the cheese to seize up and become grainy. To keep your sauce silky smooth, it’s essential to control the temperature carefully.
- Instructions:
- When melting the cheese into your sauce, ensure the heat is low to medium. High heat can break down the proteins in the cheese and lead to a clumpy sauce.
- Stir gently but consistently to allow the cheese to melt slowly and evenly. If the sauce begins to separate or seems too thick, you can add a bit more milk to bring it back to the right consistency.
- If you’re finishing it in the oven, avoid overbaking the mac and cheese. A quick broil for a golden top is all you need, as extended heat can cause the sauce to lose its creamy texture.
4. Add Pasta Cooking Water to Adjust Consistency
Using pasta water is a little-known trick to ensure your mac and cheese sauce stays perfectly creamy, without being too thick or watery.
- Instructions:
- Before draining your pasta, reserve about 1 cup of pasta water. This water is starchy and can help thicken the sauce without making it too gloopy.
- When combining the pasta with the cheese sauce, gradually add the pasta water if you find the sauce is too thick. The starch in the water helps the sauce adhere to the pasta while maintaining a silky texture.
5. Bake with a Cheese Topping for a Golden Finish
While mac and cheese is delicious when served right off the stove, baking it with a cheesy topping adds an irresistible crispy texture and enhances the overall experience.
- Instructions:
- Transfer your mac and cheese to a baking dish, then sprinkle a generous layer of shredded cheese (cheddar, mozzarella, or a mix of both) on top.
- For extra flavor and texture, add breadcrumbs or panko on top of the cheese. Toast the breadcrumbs in a little melted butter before sprinkling them on top to create a crunchy, golden crust.
- Bake at 350°F (175°C) for about 15 minutes until the cheese is bubbling and the top is golden brown. If you like extra crispiness, finish it under the broiler for a few minutes.
6. Experiment with Flavored Add-ins
Sometimes the most delicious mac and cheese comes from creative twists. While traditional mac and cheese is always a winner, adding a few flavor-packed ingredients can elevate your dish to another level.
- Instructions:
- Try mixing in some cooked bacon for a smoky, savory depth of flavor.
- For a spicy kick, add cayenne pepper, jalapeños, or a dash of hot sauce to the cheese sauce.
- A handful of caramelized onions or garlic can add an extra layer of richness to the sauce.
- For a fresh, vibrant pop, spinach or tomatoes are great add-ins that balance the creamy richness.
7. Rest the Mac and Cheese Before Serving
Though it may be tempting to dig in right away, letting your mac and cheese rest for a few minutes after cooking allows the sauce to thicken slightly and the flavors to fully meld.
- Instructions:
- Once your mac and cheese is cooked and served, let it rest for 5 to 10 minutes before serving. This gives the sauce a chance to set and will result in a creamier, less runny texture.
- If you’re serving it in a casserole dish, this is the perfect time to let it cool a bit to allow the flavors to come together.
Use Freshly Grated Cheese
When it comes to mac and cheese, the quality of the cheese you use can make a significant difference in the overall taste and texture of the dish. One of the best-kept secrets for achieving the creamiest, most flavorful mac and cheese is using freshly grated cheese instead of pre-shredded cheese. While it may seem like a small detail, it can completely transform the quality of your dish. Let’s dive into why freshly grated cheese is essential for the perfect mac and cheese.
1. Better Melting and Smoother Texture
Pre-shredded cheese may seem like a convenient option, but it’s often coated with anti-caking agents that prevent it from melting smoothly. These additives can cause the cheese to clump together, resulting in a grainy texture rather than a smooth, creamy sauce. Freshly grated cheese, on the other hand, melts evenly and creates a silky, smooth sauce that coats the pasta perfectly.
- Instructions:
- Grate the cheese yourself using a box grater or a food processor. This ensures the cheese is in the perfect consistency to melt smoothly into your sauce without any interruptions.
- Choose cheese that melts well, such as cheddar, Gruyère, or Fontina. These cheeses have a higher fat content and melt beautifully, ensuring your mac and cheese has that perfect, velvety texture.
2. More Flavorful Cheese
Freshly grated cheese has a more intense and vibrant flavor than pre-shredded cheese. When cheese is pre-shredded, it’s often stored in a bag, and the flavors can lose their sharpness over time. By grating your own cheese, you unlock the full depth and richness of its flavor, giving your mac and cheese an extra boost of deliciousness.
- Instructions:
- Opt for aged cheeses, such as aged cheddar, which have a more complex and bold flavor profile. The sharpness of aged cheddar, combined with the richness of younger cheeses, can add layers of flavor to your mac and cheese.
- Mixing different types of cheese, such as Gruyère for creaminess and Parmesan for a savory kick, can take your mac and cheese to the next level, delivering a deeper, more nuanced taste.
3. A Creamier Sauce
Pre-grated cheese often contains starches that help keep the cheese from clumping, but those starches can also make the sauce less smooth and creamy. Freshly grated cheese, on the other hand, melts more naturally into the sauce, providing a smooth and cohesive texture. This makes the sauce much creamier, which is exactly what you want in a perfect mac and cheese.
- Instructions:
- When adding freshly grated cheese to your sauce, do so in small handfuls. Adding cheese gradually allows it to melt evenly into the sauce, creating a smooth and consistent consistency.
- Avoid overheating the sauce as you melt the cheese. Low and slow is key to preventing separation or graininess.
4. No Added Preservatives
Pre-shredded cheese often contains preservatives to extend shelf life, and those preservatives can affect the taste and texture of the cheese. By using freshly grated cheese, you can avoid these additives and enjoy a more natural, pure flavor. The absence of extra chemicals means the cheese will melt more uniformly and blend seamlessly into your sauce.
- Instructions:
- Always choose high-quality, natural cheeses for the best results. Look for cheeses without added anti-caking agents or preservatives.
- Shop at local markets or artisanal stores for fresh cheese that hasn’t been altered by preservatives, ensuring you’re getting the purest, most flavorful option for your mac and cheese.
5. Customization of Cheese Blend
Grating your own cheese also gives you more flexibility to create the perfect cheese blend for your mac and cheese. You can choose different textures, flavors, and meltability levels based on your personal preferences and what you have on hand. Customizing your cheese blend allows you to tailor the flavor profile of your mac and cheese to be as rich, sharp, or mild as you like.
- Instructions:
- Start with a base of cheddar for sharpness and depth.
- Add a bit of Gruyère for creaminess and that Swiss-like texture.
- Mix in Fontina or Mozzarella for a gooey, stretchy finish.
- If you prefer a slightly more tangy or nutty flavor, add some Parmesan or Pecorino Romano to the blend. Experiment with these options to find the ultimate combination that suits your taste.
6. Freshness = Fresh Flavor
Grating cheese fresh ensures you’re using the best possible product at its peak freshness. Cheese can begin to lose its flavor and texture once it’s pre-shredded, but when you grate it just before using it, you’re maximizing the cheese’s natural flavor. Fresh cheese has a lively, full-bodied flavor that enhances your mac and cheese, making it much more indulgent and satisfying.
- Instructions:
- Grate only the amount of cheese you need right before you’re ready to cook. This helps preserve its freshness and prevents the cheese from losing any of its flavor or moisture.
- If you’re making a large batch of mac and cheese, consider grating extra cheese to store in an airtight container for later use, keeping the cheese fresh until you’re ready to cook again.
Don’t Overcook the Pasta
When making mac and cheese, one of the key steps to getting the perfect texture is ensuring the pasta is cooked to the right level of doneness. Overcooking the pasta can result in mushy noodles that won’t hold up well when combined with the creamy cheese sauce. Here’s why it’s crucial to avoid overcooking the pasta, and how to ensure it’s cooked just right for the best mac and cheese experience.
1. Perfect Texture for Pasta
Pasta is the foundation of any mac and cheese dish, so getting it right is essential. If you overcook the pasta, it becomes soft, sticky, and will lose its ability to hold its shape in the final dish. This leads to a less-than-ideal texture, where the noodles become part of the sauce instead of holding their own in a comforting bite. Properly cooked pasta should be tender with just the right amount of firmness, so it maintains its integrity and gives the perfect texture when mixed with the creamy cheese sauce.
- Instructions:
- Cook the pasta just until al dente – firm to the bite, but not hard. Usually, this means cooking it for about 1 to 2 minutes less than the time indicated on the package.
- After draining the pasta, do not leave it sitting in hot water, as it will continue cooking from the residual heat. Drain it immediately to prevent further softening.
2. Prevents Sogginess in the Final Dish
Overcooked pasta will soak up too much sauce, making the entire dish soggy and less appetizing. The excess moisture from the overcooked noodles can dilute the richness of the cheese sauce, causing it to lose its creamy, velvety texture. The goal is for the pasta to be well-coated in the sauce without becoming a mushy mass.
- Instructions:
- Once the pasta is drained, try to immediately combine it with the sauce while it’s still warm. This helps prevent the noodles from absorbing excess water and ensures the cheese sauce adheres to the pasta without becoming watery.
- If you’re making a large batch or prepping ahead of time, consider undercooking the pasta slightly (by 1 minute) and then finishing the cooking process in the oven or stovetop once the sauce is added. This allows the pasta to absorb just the right amount of sauce without becoming soggy.
3. Pasta Absorption of Sauce
Pasta continues to absorb liquid even after it’s drained, so overcooking it can leave you with pasta that’s too soft to handle the creamy cheese sauce. The texture of the pasta should allow it to hold up to the richness of the sauce without disintegrating. When you cook the pasta just right, it maintains a good balance, letting the sauce cling to each piece of pasta in a creamy, comforting way.
- Instructions:
- As you prepare the cheese sauce, consider keeping a small amount of pasta water on hand. If the sauce becomes too thick, adding a spoonful of starchy pasta water helps loosen it without making the sauce too runny.
- Gently stir the pasta into the sauce as soon as it’s ready, and avoid leaving it in the pan for too long after mixing to ensure the sauce doesn’t absorb into the pasta and result in a dry, overcooked texture.
4. Balanced Cooking Method
A common mistake when making mac and cheese is cooking the pasta and sauce separately and then combining them. If the pasta is cooked too far in advance, or if the sauce is left to sit too long, you risk overcooking both elements and compromising the final dish. The timing and coordination of cooking the pasta and sauce together is crucial to ensure the dish remains fresh, flavorful, and with the right texture.
- Instructions:
- Prepare the sauce while the pasta is cooking so that the timing matches up. By the time your pasta is ready to be drained, the cheese sauce should also be finished, and the two can be combined right away.
- If you’re finishing the dish in the oven, be sure to cook the pasta a little less than you normally would, as it will continue to cook in the oven when combined with the sauce.
5. Timing the Pasta Cooking Process
When it comes to making mac and cheese, timing is everything. Since pasta continues to cook slightly after it’s drained, knowing exactly when to take it off the heat is essential. Overcooking the pasta at the beginning sets the stage for a less-than-perfect end result.
- Instructions:
- Set a timer when boiling the pasta to ensure that you don’t leave it on the heat for too long. Check the pasta a minute before the package’s suggested cooking time is up to see if it’s tender yet firm.
- Once you drain the pasta, immediately combine it with the cheese sauce to prevent the noodles from continuing to cook and becoming mushy.
6. Avoid Rinsing the Pasta
After draining the pasta, some people make the mistake of rinsing it under cold water to stop the cooking process. While this is common for some pasta dishes, it’s not recommended for mac and cheese. Rinsing pasta can remove the natural starches that help the sauce adhere to the noodles and can result in a less cohesive dish. The goal is to keep the pasta’s natural starches intact, which helps the sauce cling better and creates a creamy, smooth texture.
- Instructions:
- Once the pasta is drained, don’t rinse it. Instead, let it rest briefly to allow the remaining heat to finish the cooking process. Combine it with the sauce immediately to preserve the best texture.
Customize the Flavor
One of the best things about mac and cheese is how versatile it is. With its rich, creamy base, you can easily customize the flavor to suit your tastes or experiment with different ingredients. Whether you’re looking to add a bit of spice, a burst of freshness, or a savory twist, the possibilities are endless. Here’s how you can take Tini’s Mac and Cheese recipe to the next level by tailoring it to your flavor preferences.
1. Add Spice for a Kick
If you like your mac and cheese with a little extra heat, there are several ways to bring in some spice without overwhelming the dish. You can use spicy seasonings, peppers, or even hot sauce to give your mac and cheese a zesty kick. The cheese sauce itself can be enhanced with chili powder, cayenne pepper, or paprika for a smoky, spicy flavor.
- Instructions:
- Cayenne pepper or chili powder: Sprinkle a small amount into the cheese sauce for a mild heat. You can always add more, but it’s easier to start with a little and build up the spice level.
- Hot sauce: For a tangy, fiery kick, add a few dashes of your favorite hot sauce into the sauce mixture. Choose one with a flavor that complements cheese, like sriracha or buffalo sauce.
- Jalapeños or other hot peppers: Finely chop fresh or pickled jalapeños and stir them into the sauce or sprinkle on top before serving.
2. Experiment with Different Cheeses
While the classic mac and cheese flavor comes from cheddar, you don’t have to stop there! Mixing different cheeses into your cheese sauce can completely transform the flavor profile. Try using a combination of sharp cheddar, creamy mozzarella, tangy goat cheese, or nutty Gruyère to create a unique flavor. You can also experiment with blue cheese for a bolder taste or parmesan for a salty, umami twist.
- Instructions:
- Sharp cheddar: Offers a tangy, bold flavor that’s perfect for the base of your mac and cheese.
- Gruyère: A Swiss cheese that melts beautifully and adds a slightly nutty and creamy flavor.
- Fontina: Known for its smooth melting properties, Fontina can add a rich and buttery flavor to the sauce.
- Cream cheese: For extra creaminess, stir in a small amount of cream cheese for a velvety texture and a tangy note.
3. Fresh Herbs and Greens
Herbs can add a refreshing contrast to the richness of mac and cheese, and they can be incorporated both in the sauce or as toppings. Fresh herbs like basil, thyme, or parsley brighten up the dish, balancing out the heaviness of the cheese. Adding spinach or kale gives the dish a burst of color and a dose of healthy greens while complementing the creamy texture.
- Instructions:
- Stir finely chopped herbs like parsley or basil into the sauce for a fresh, aromatic kick.
- For a veggie boost, sauté spinach or kale and fold it into the pasta and cheese sauce mixture. You could also layer them in as a topping for a pop of green and nutrition.
- Chives or dill can also add a nice, mild flavor to your mac and cheese, offering some subtle tang and freshness.
4. Add Savory Ingredients for Depth
To add more layers of flavor and make your mac and cheese even more comforting, try incorporating savory ingredients like bacon, sausage, or caramelized onions. These ingredients add depth and complexity to the dish and can make your mac and cheese even more indulgent. The smoky, salty notes from bacon or the savory richness of sausage work wonderfully in complementing the creamy cheese sauce. You can also try roasted garlic for a mellow, fragrant flavor that enhances the richness of the cheese.
- Instructions:
- Bacon: Crisp up bacon in a pan and crumble it over the mac and cheese before serving. The crispy texture adds a nice crunch against the creamy pasta.
- Sausage: Cook up some crumbled sausage and mix it into the sauce for a hearty, savory addition. Italian sausage, for example, can add a bold and slightly spicy flavor.
- Caramelized onions: Slowly cook onions until they become golden and sweet, and then stir them into the pasta for a rich, savory taste.
- Mushrooms: Sauté mushrooms until they’re golden brown and add them for an earthy, savory flavor that complements the cheese.
5. Sweet and Tangy Variations
For those who enjoy a touch of sweetness in their dishes, you can try adding ingredients that balance the richness with a touch of sugar or acidity. Sweet potatoes can add a creamy, slightly sweet flavor that contrasts well with the sharpness of the cheese. Similarly, apple slices or roasted pears bring a natural sweetness that pairs beautifully with the savory, cheesy base. A dash of lemon juice or vinegar can cut through the richness and balance the flavors.
- Instructions:
- Stir in a few spoonfuls of mashed sweet potato to make the sauce richer and add a subtle sweetness.
- Apples: Thinly slice apples and lightly sauté them with cinnamon, then add to the dish for a sweet twist.
- Lemon zest or a squeeze of lemon juice can provide a bright, tangy contrast to the richness of the sauce.
6. Try Different Cooking Methods
Finally, you can customize the flavor by changing the cooking method. Instead of simply boiling pasta and mixing it with the sauce, you can bake your mac and cheese for a crispy, golden top. Adding a breadcrumb topping with a touch of butter and seasoning creates a crunchy contrast with the creamy pasta. Baking allows the cheese to caramelize on top, giving the mac and cheese an even richer flavor.
- Instructions:
- After mixing the cooked pasta and cheese sauce, pour it into a baking dish and sprinkle a layer of breadcrumbs or panko on top.
- Bake in a preheated oven at 350°F (175°C) for 20–30 minutes until the top is golden and crispy.
FAQs About Tini’s Mac and Cheese Recipe
Mac and cheese is one of those comfort foods that never goes out of style, and Tini’s Mac and Cheese recipe is no exception. However, there may be a few questions or concerns that arise while preparing this dish. Whether you’re a seasoned cook or a beginner, these FAQs will provide you with helpful tips and answers to ensure your mac and cheese turns out just the way you like it.
1. Can I use a different type of cheese for Tini’s Mac and Cheese recipe?
Yes, absolutely! While the recipe calls for a blend of sharp cheddar and creamy mozzarella, feel free to experiment with other cheeses based on your preferences. A mixture of Gruyère, Fontina, parmesan, or cream cheese can add a unique flavor profile and creamy texture. If you prefer a stronger cheese taste, blue cheese or smoked gouda can add depth and richness. The key is to use cheeses that melt well and have complementary flavors to create that perfect creamy sauce.
2. Can I make Tini’s Mac and Cheese ahead of time?
Yes, Tini’s Mac and Cheese can be made ahead of time, which makes it a great dish for meal prep or special occasions. To prepare in advance, cook the mac and cheese up until the point of combining the pasta with the cheese sauce. Then, store the dish in an airtight container in the refrigerator for up to 2–3 days. When you’re ready to serve, you can reheat it on the stovetop over low heat, adding a little milk to loosen the sauce, or pop it in the oven for a baked version with a crispy top. If you’re baking it, cover with foil and bake at 350°F (175°C) for 20–30 minutes, then remove the foil for an additional 10–15 minutes to brown the top.
3. How do I prevent the cheese sauce from getting lumpy?
To ensure a smooth and creamy cheese sauce, make sure to cook your roux (butter and flour mixture) over medium heat, stirring constantly. If the heat is too high, the flour might cook unevenly, leading to lumps. Additionally, when you add the milk, pour it in gradually while continuing to stir. It’s important to use freshly grated cheese, as pre-shredded cheese contains anti-caking agents that can affect the texture of your sauce. Once the cheese is melted, be sure to stir well until the sauce is completely smooth and creamy.
4. Can I make this recipe gluten-free?
Yes, you can easily make Tini’s Mac and Cheese gluten-free by using gluten-free pasta and substituting the flour in the cheese sauce with a gluten-free option like cornstarch or rice flour. For the roux, dissolve the gluten-free flour in the butter over medium heat, then proceed with the rest of the recipe as usual. Just make sure that the cheese and any other ingredients you use are certified gluten-free if you need to accommodate dietary restrictions.
5. How do I make Tini’s Mac and Cheese spicier?
If you like a bit of heat, there are several ways to add spice to Tini’s Mac and Cheese. You can mix cayenne pepper, chili powder, or paprika into the cheese sauce for a mild kick. For more intense heat, try adding fresh jalapeños or serrano peppers to the sauce or as a garnish. Alternatively, you can stir in a few dashes of your favorite hot sauce, such as sriracha or buffalo sauce, to enhance the flavor with a spicy twist. Just be sure to taste as you go, adjusting the heat level to your preference.
6. How can I make Tini’s Mac and Cheese creamier?
To make the mac and cheese even creamier, consider adding a few extra ingredients to the cheese sauce. Cream cheese or half-and-half can boost the richness of the sauce, making it velvety smooth. If you like a particularly luxurious texture, you can also stir in a little heavy cream or milk to thin the sauce as needed. Another tip is to add a generous amount of freshly grated cheese, which will melt beautifully and add more creaminess to the overall dish.
7. Can I add vegetables to Tini’s Mac and Cheese?
Absolutely! Adding vegetables to your mac and cheese is a great way to boost the nutrition and flavor. Some popular vegetable additions include spinach, broccoli, cauliflower, and peas. If you’re using leafy greens like spinach, you can sauté them briefly and mix them into the cheese sauce for added color and texture. For a heartier version, consider adding roasted butternut squash or sweet potatoes for a natural sweetness that pairs well with the cheesy sauce.
8. Can I make this recipe without milk?
While milk is essential for making the cheese sauce smooth and creamy, there are alternatives if you need to avoid dairy. You can substitute almond milk, soy milk, or coconut milk for a non-dairy version. Be sure to choose a milk alternative that’s unsweetened and unflavored to avoid any off-tastes. If you’re looking for a richer substitute, you can use coconut cream or cashew cream, both of which will provide creaminess without dairy.
9. How do I make a baked version of Tini’s Mac and Cheese?
If you prefer a baked mac and cheese with a golden, crispy top, follow the recipe as usual and then transfer the macaroni and cheese to a greased baking dish. Sprinkle the top with breadcrumbs (preferably panko) or crushed crackers, and dot with a little extra butter. Bake in the oven at 350°F (175°C) for 25–30 minutes, or until the top is golden and crispy. For an even more decadent version, you can sprinkle some additional cheese on top before baking to create a cheesy crust.
10. Can I make Tini’s Mac and Cheese with a vegan cheese alternative?
Yes, if you’re looking for a vegan-friendly version of Tini’s Mac and Cheese, you can use plant-based cheeses like vegan cheddar or cashew cheese in place of dairy cheese. To make a creamy base, you can use unsweetened almond milk or oat milk. Additionally, nutritional yeast can be added to the sauce for a cheesy, umami flavor. Keep in mind that the texture and taste may be slightly different from the original recipe, but with the right ingredients, you can still achieve a delicious vegan mac and cheese.
Can I Make This Mac and Cheese Ahead of Time?
Yes, you can absolutely make Tini’s Mac and Cheese ahead of time! This recipe is perfect for meal prepping or making for special occasions, as it holds up well in the fridge and can be baked later for a golden, bubbly finish.
How to Prepare in Advance
- Make the Mac and Cheese Base: Follow the recipe up to the point of mixing the cooked pasta with the cheese sauce. At this stage, you can either store it in the fridge or proceed with baking it right away. If storing, transfer the mac and cheese mixture to an airtight container.
- Refrigerate or Freeze:
- Refrigerating: Transfer the mac and cheese into a greased baking dish, cover it with foil, and refrigerate for up to 2–3 days. You can even add the breadcrumb topping before refrigerating.
- Freezing: For longer storage, freeze the mac and cheese in a freezer-safe container for up to 2 months. Be sure to seal it tightly to prevent freezer burn.
Reheating Instructions
When you’re ready to enjoy the mac and cheese, there are a couple of ways to reheat it:
- Baking: Allow the mac and cheese to come to room temperature for about 20–30 minutes. Preheat the oven to 350°F (175°C), cover with foil, and bake for 20–25 minutes. Remove the foil during the last 10–15 minutes to allow the topping to crisp.
- Microwaving: If reheating individual servings, add a splash of milk to keep the sauce creamy. Microwave in 30-second intervals, stirring each time until it’s hot and well-mixed.
Why Make Mac and Cheese Ahead?
- Convenience for Busy Days:
Having Tini’s Mac and Cheese prepped and ready means less time spent cooking on busy nights. It’s a great time-saver for families or dinner parties. - Flavor Enhancements:
As with many dishes, mac and cheese can taste even better after sitting for a day or two. The flavors meld together, making it even creamier and more flavorful when reheated. - Meal Prep and Leftovers:
This mac and cheese is perfect for meal prepping. Portion it out for quick lunches or dinners throughout the week.
What’s the Best Cheese for Mac and Cheese?
When it comes to mac and cheese, the choice of cheese plays a crucial role in determining the flavor and texture of the dish. The perfect mac and cheese requires a combination of cheeses that offer both meltability and rich, creamy flavor. Here are some of the best cheese options for mac and cheese and why they work so well.
1. Sharp Cheddar Cheese
Sharp cheddar is a classic choice for mac and cheese due to its bold flavor and excellent melting qualities. The tangy and slightly salty taste of sharp cheddar adds depth to the dish and balances the creaminess of the sauce. When using sharp cheddar, ensure it’s grated fresh for the best texture and smoothness.
- Flavor Profile: Tangy, bold, and slightly sharp.
- Why It Works: Provides the signature cheesy flavor we all love in mac and cheese.
2. Mild Cheddar Cheese
For those who prefer a milder taste, mild cheddar cheese is another excellent choice. It’s creamier and less sharp than its sharp counterpart, but it still provides a smooth, rich texture when melted. Combining mild cheddar with other cheeses can give your mac and cheese a perfect balance of flavor.
- Flavor Profile: Mild, creamy, and smooth.
- Why It Works: Great for creating a creamy base while balancing the sharper flavors from other cheeses.
3. Gruyère Cheese
Gruyère is a semi-hard Swiss cheese known for its nutty and slightly sweet flavor. It melts beautifully and adds complexity to mac and cheese. When combined with cheddar, Gruyère contributes an extra layer of flavor, making the dish feel more sophisticated and rich.
- Flavor Profile: Nutty, slightly sweet, and earthy.
- Why It Works: Adds depth and richness to the cheese sauce, creating a velvety smooth texture.
4. Mozzarella Cheese
Mozzarella is known for its smooth, stretchy melt and mild, milky flavor. While it doesn’t have the strong flavor that cheddar or Gruyère offers, mozzarella is perfect for creating a super creamy, gooey mac and cheese. It’s best used in combination with other, more flavorful cheeses to help stretch the sauce.
- Flavor Profile: Mild, milky, and stretchy.
- Why It Works: Creates a gooey, melt-in-your-mouth texture that’s perfect for mac and cheese.
5. Fontina Cheese
Fontina is an Italian cheese that is rich, creamy, and slightly tangy. It’s known for its excellent meltability and adds a smooth, velvety texture to the cheese sauce. Fontina’s robust flavor pairs well with the sharpness of cheddar and can elevate the dish with a subtle earthy undertone.
- Flavor Profile: Rich, creamy, and slightly tangy.
- Why It Works: Melts well and adds a rich, earthy flavor, which enhances the overall taste of the mac and cheese.
6. Parmesan Cheese
Parmesan is a hard, aged cheese that adds a salty, nutty kick to mac and cheese. While it’s not a cheese you would typically use as the main ingredient, a sprinkle of freshly grated Parmesan on top of your mac and cheese adds a nice finishing touch and a bit of texture.
- Flavor Profile: Salty, nutty, and savory.
- Why It Works: Used as a topping, Parmesan adds a crunchy, flavorful layer that contrasts beautifully with the creamy cheese sauce.
7. American Cheese
For a super creamy and smooth cheese sauce, American cheese is a great option. It’s often used in combination with other cheeses because it melts smoothly and helps create that ultra-creamy consistency. While it doesn’t offer the same depth of flavor as other cheeses, American cheese ensures your mac and cheese is velvety and gooey.
- Flavor Profile: Mild, creamy, and smooth.
- Why It Works: Melts effortlessly and adds creaminess to the sauce, making it extra smooth.
Tips for Combining Cheese for Mac and Cheese:
To achieve the perfect balance of flavor and texture, try combining two or more types of cheese. A popular combination is sharp cheddar and Gruyère for a well-rounded flavor with plenty of creaminess. Mozzarella can be used alongside cheddar for an extra gooey effect, and a touch of Parmesan adds that delightful finishing flavor.
Cheese Pairing Suggestions:
- Sharp Cheddar + Gruyère + Parmesan: A classic, flavorful combination with depth and creaminess.
- Mild Cheddar + Mozzarella + Fontina: Mild yet creamy with a soft texture.
- Cheddar + Gruyère + Parmesan: For a sophisticated, rich mac and cheese with layers of flavor.
Can I Make This Mac and Cheese Gluten-Free?
Yes, you can easily make Tini’s Mac and Cheese gluten-free without sacrificing flavor or texture! Whether you’re gluten-sensitive or following a gluten-free diet, there are simple substitutions you can make to ensure this classic comfort dish works for everyone.
1. Use Gluten-Free Pasta
The most important change when making mac and cheese gluten-free is to use gluten-free pasta. Luckily, there are many great gluten-free pasta options available, made from ingredients like rice flour, corn, quinoa, or chickpeas. Look for pasta shapes that resemble traditional elbow macaroni, or use any gluten-free pasta shape that you like. Some popular gluten-free pasta brands include:
- Barilla Gluten-Free Pasta: Known for its excellent texture and flavor, this brand offers a variety of pasta shapes, including elbow macaroni.
- Jovial Gluten-Free Pasta: Made from organic brown rice flour, it holds up well when cooked and has a similar texture to regular pasta.
- Banza Chickpea Pasta: Made from chickpeas, this pasta has a slightly nuttier flavor and more protein than traditional pasta, making it a nutritious option.
When cooking gluten-free pasta, it’s essential to follow the package instructions carefully, as gluten-free pasta can be more delicate and may cook faster or need more attention to prevent overcooking.
2. Choose a Gluten-Free Roux
The creamy cheese sauce in mac and cheese is usually thickened with a roux, which is typically made from butter and all-purpose flour. For a gluten-free version, simply swap the all-purpose flour for a gluten-free flour blend. Many gluten-free flour blends are designed to mimic the texture and consistency of wheat flour, making them perfect for sauces.
Some excellent gluten-free flour options include:
- Rice Flour: A commonly used flour that’s great for thickening sauces.
- Gluten-Free All-Purpose Flour Blends: Brands like King Arthur and Bob’s Red Mill make gluten-free flour blends that work well for a variety of recipes, including mac and cheese.
- Tapioca Starch or Cornstarch: These starches are perfect for thickening sauces without adding any grainy texture.
To make the roux, melt the butter in a pan, then whisk in the gluten-free flour blend until smooth. Gradually add the milk and continue whisking to create a velvety, creamy sauce. The rest of the process remains the same as the original recipe!
3. Ensure Your Cheese is Gluten-Free
Most cheeses, including cheddar, Gruyère, and mozzarella, are naturally gluten-free. However, it’s always important to double-check the label, especially with processed or pre-shredded cheeses. Some brands may add gluten-containing ingredients as stabilizers or anti-caking agents, so look for labels that explicitly state the product is gluten-free.
To avoid any risk of cross-contamination, it’s best to use block cheese and grate it yourself. This way, you can ensure that no unwanted ingredients are included.
4. Add Gluten-Free Toppings
To make your mac and cheese even more delicious, you might want to add a crunchy topping, like breadcrumbs. Fortunately, gluten-free breadcrumbs are widely available, or you can make your own at home using gluten-free bread. Simply toast the gluten-free bread, then pulse it in a food processor until it reaches a breadcrumb consistency.
If you don’t want to use breadcrumbs, you can try other toppings such as:
- Crushed gluten-free crackers: These add a nice crunch and are easy to find in stores.
- Panko-style gluten-free breadcrumbs: For a lighter, airier texture on top.
5. Consider Dairy-Free Options
If you’re also looking to make the mac and cheese dairy-free, you can substitute the milk and cheese with plant-based alternatives. For a creamy base, use unsweetened almond milk, oat milk, or coconut milk, and opt for dairy-free cheese varieties like vegan cheddar or mozzarella. There are also many excellent vegan cheeses that melt well, making them great options for mac and cheese.
Tips for Making Gluten-Free Mac and Cheese:
- Watch the consistency of the sauce: Gluten-free flour can behave slightly differently from wheat flour, so it’s important to keep an eye on the sauce as it thickens. If it’s too thick, you can add more milk; if it’s too thin, continue cooking the roux to help it thicken.
- Taste testing: Gluten-free pastas can have slightly different flavors and textures than regular pasta. Be sure to taste the pasta before combining it with the cheese sauce to ensure it has the right bite and flavor.
- Avoid cross-contamination: If you’re making gluten-free mac and cheese for someone with celiac disease or a gluten sensitivity, ensure that all your ingredients, cooking utensils, and kitchen surfaces are free from gluten contamination.
Conclusion
Tini’s Mac and Cheese is more than just a comfort food; it’s a dish that brings warmth, joy, and satisfaction to any meal. Whether you’re enjoying it as a cozy weeknight dinner or serving it at a family gathering, this recipe provides a creamy, cheesy, and indulgent experience that everyone will love. From the rich cheese sauce to the perfectly cooked pasta, every step of the process is designed to ensure the ultimate mac and cheese dish.
Why This Recipe Stands Out
What makes Tini’s Mac and Cheese special is the combination of high-quality ingredients, thoughtful techniques, and the flexibility to customize it to your taste. You can play with different cheese combinations, pasta shapes, and even add extra ingredients like bacon or vegetables to make the dish your own. The versatility of this recipe ensures that it can be tailored to suit various dietary preferences, whether you’re looking for a gluten-free or vegetarian version.
The Secret to the Creamiest Mac and Cheese
The secret to getting the creamiest mac and cheese lies in the quality of cheese used and the care you take with the cheese sauce. By using freshly grated cheese, making a smooth roux, and ensuring the pasta is cooked perfectly, you’re guaranteed a dish that is velvety, rich, and absolutely irresistible. Plus, with the pro tips shared throughout the post, you’ll know exactly how to elevate your mac and cheese to the next level.
A Dish for Any Occasion
Tini’s Mac and Cheese isn’t just for casual meals—it’s the perfect side dish for holidays, special occasions, or even as a standalone meal when you’re craving something hearty and comforting. With its adaptable nature, you can easily make this recipe ahead of time or serve it fresh, making it a go-to for busy families or anyone looking to impress their guests with a delicious homemade dish.